Sabéis que soy un enamorado de Hugo para hacer webs sencillas que no requieran contenido dinámico.
Y una de las características que más me gusta es que hay un montón de servicios que nos ofrecen alojar gratis las web hechas en Hugo.
Hoy os vengo a hablar de uno de estos servicios: Netlify
Que no te engañe que Netlify nos deje alojar nuestra web de Hugo gratis.
Netlify es un servicio profesional y de calidad.
Te lo Cuento en Vídeo
Suscríbete a mi canal:
Entonces ¿por qué nos dejan alojar nuestra web gratis?
Muy sencillo: Están Evangelizando 🙂
¿Cuántas personas conoces que no hagan su web en WordPress? Muy pocas verdad?
Servicios como Netlify, Cloudflare, DigitalOcean, están ofreciendo alojar tu web estática gratis para conseguir cuota de mercado y cuando la consigan estoy seguro que no será gratis.
El caso es que ahora podemos crear nuestra web y alojarla en los mejores servidores y todo ello gratis 😉
Qué necesitas para alojar tu web en Netlify
En este tutorial no voy a explicar como se instala Hugo ni nada que ya hayamos explicado en el Curso de Hugo para hacer Webs Estáticas.
En este tutorial vamos a ver como se crear una web en dos minutos y como la podemos alojar en Netlify.
Por lo que voy a suponer que:
- Tienes Hugo instalado en tu ordenador
- Tienes una cuanta de Github
- Tienes un editor de código como Visual Studio Code
Creando mi Web en Hugo
Entro en la terminal de mi ordenador, voy al directorio donde voy a crear mi web y escribo:
hugo new site nombre-mi-web
Y me aparece el siguiente mensaje:

Ahora voy a añadir una plantilla a mi web, para ello entro en la carpeta THEMES y traigo desde Github la plantilla con el siguiente comando:
git clone https://github.com/halogenica/beautifulhugo.git
Aquí la captura de este proceso:

Ahora copio el contenido de la carpeta /themes/beautifulhugo/exampleSite al raiz de mi web.
Me dirá si quiero sobreescribir, le digo que sí.
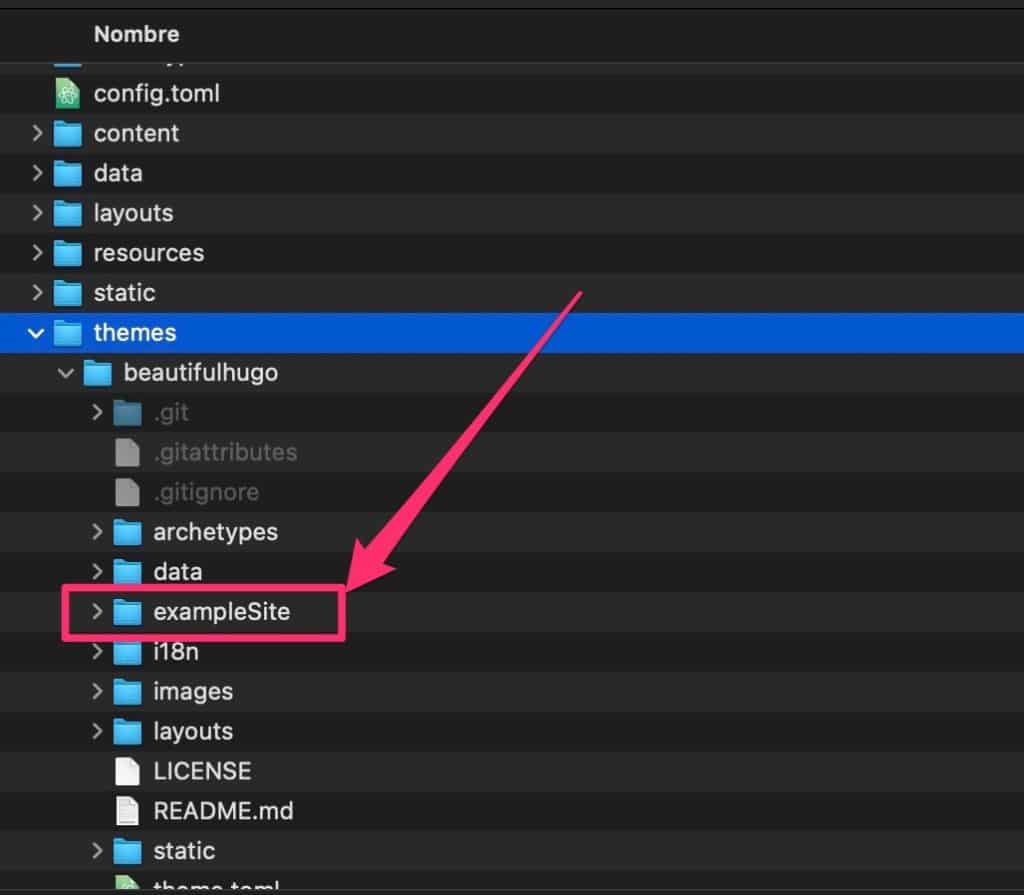
Ojo
El contenido de la carpeta exampleSite, no la carpeta en sí.
Es decir, esto:
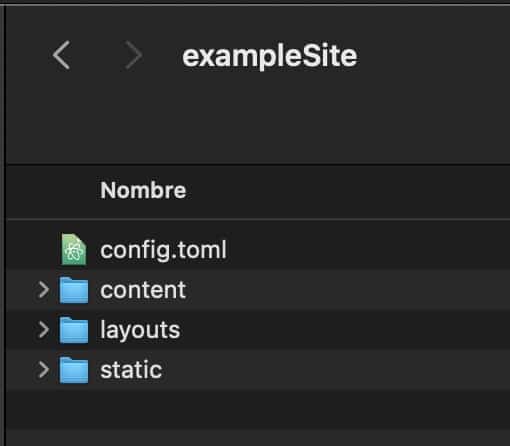
Una vez copiado al directorio raiz de nuestra web podemos ejecutar el servidor local de Hugo para ver que la web funciona.
El comando lo tenemos que ejecutar en el directorio raiz de nuestra web:
hugo serverY nos tiene que aparecer algo así para ver que está todo bien:
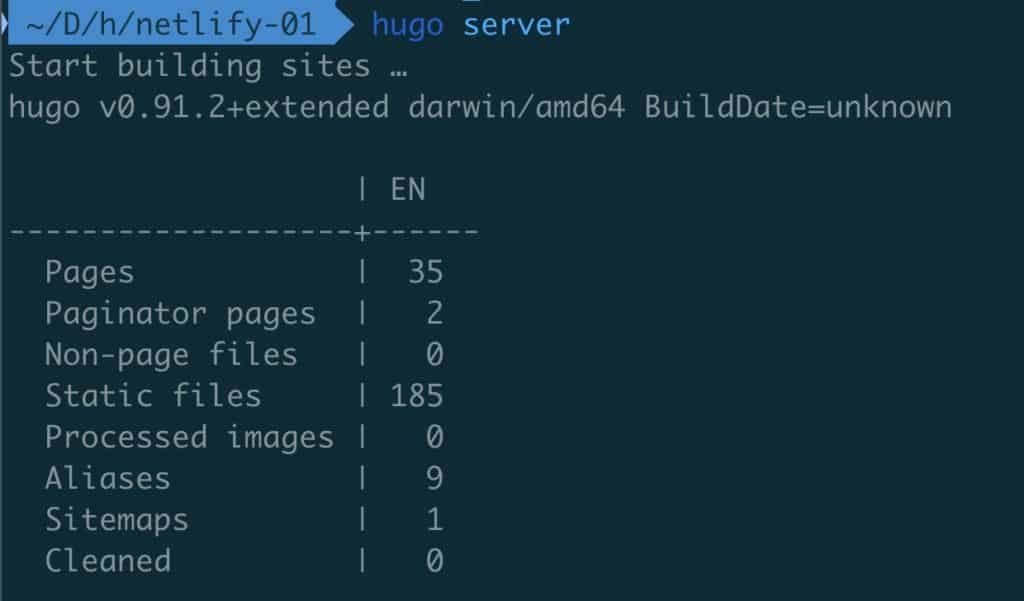
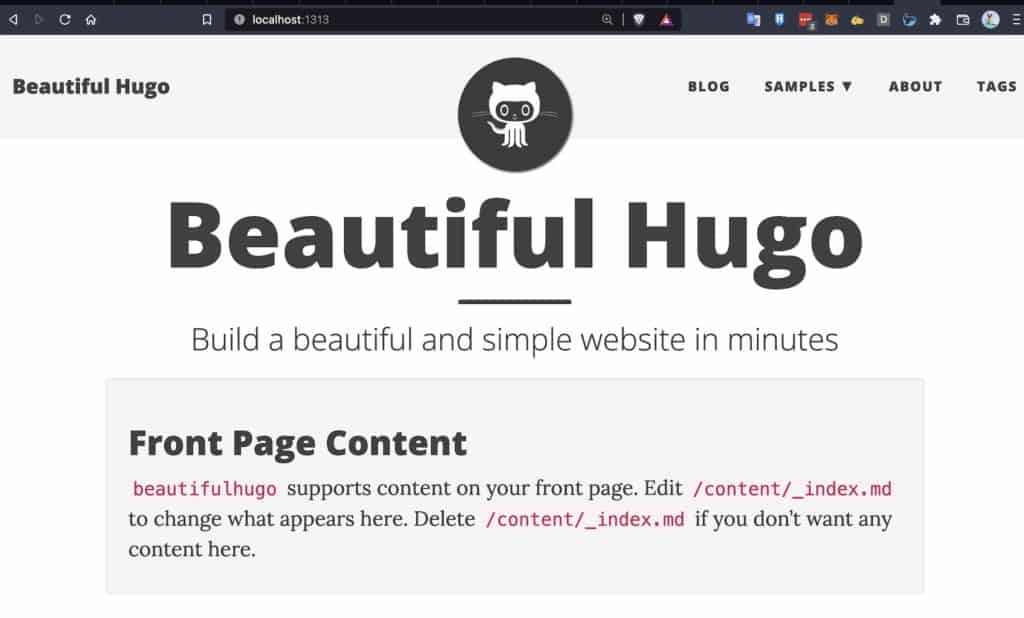
Si todo ha ido bien vamos a la dirección que nos aparece en el terminal. Suele ser http://localhost:1313/
Y deberíamos ver algo así:
Subir la Web a Github
Antes de alojar nuestra web en Netlify, tenemos que subir nuestra web hecha en local a un repositorio en Github.
Para ello usamos Git:
git init
git add .
git commit -m "mi primera versión"
Creamos un Respositorio vacío en Github y el propio Github nos dice los comandos que tenemos que usar para subir nuestro repositorio:
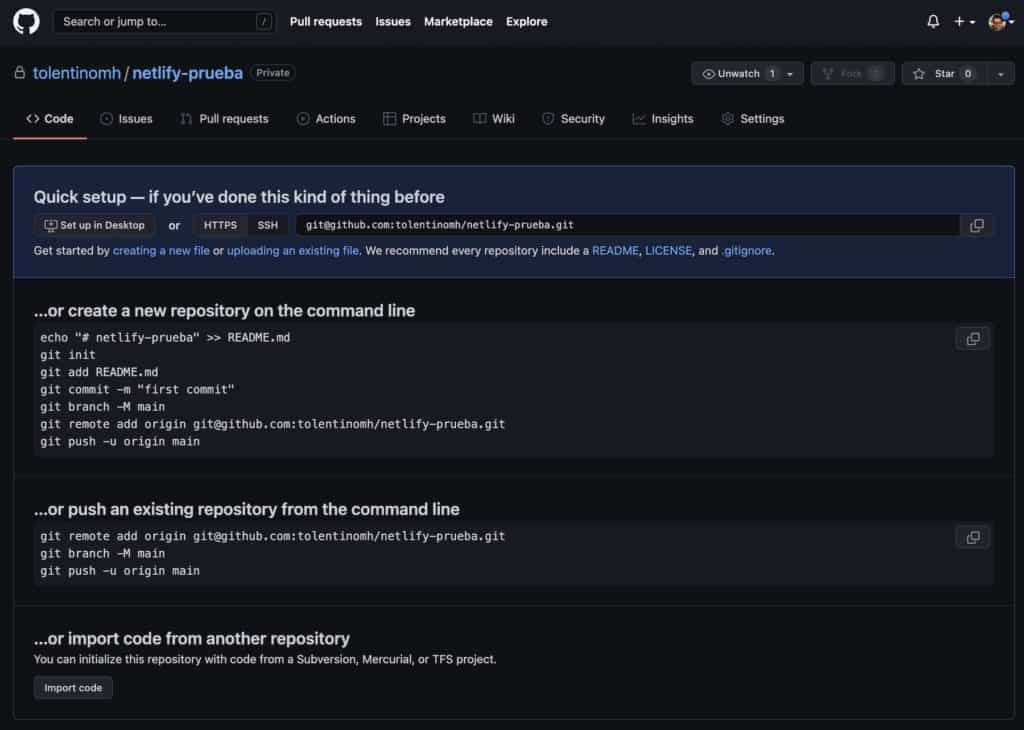
En mi caso concreto los comandos a usar son los siguientes:
git remote add origin git@github.com:tolentinomh/netlify-prueba.git
                                git branch -M main
                                git push -u origin main
Y ahora que lo tenemos todo listo es el momento de alojar nuestra web en Netlify.
Subir nuestra Web a Netlify
Si no tienes cuenta en Netlify es momento de crearla
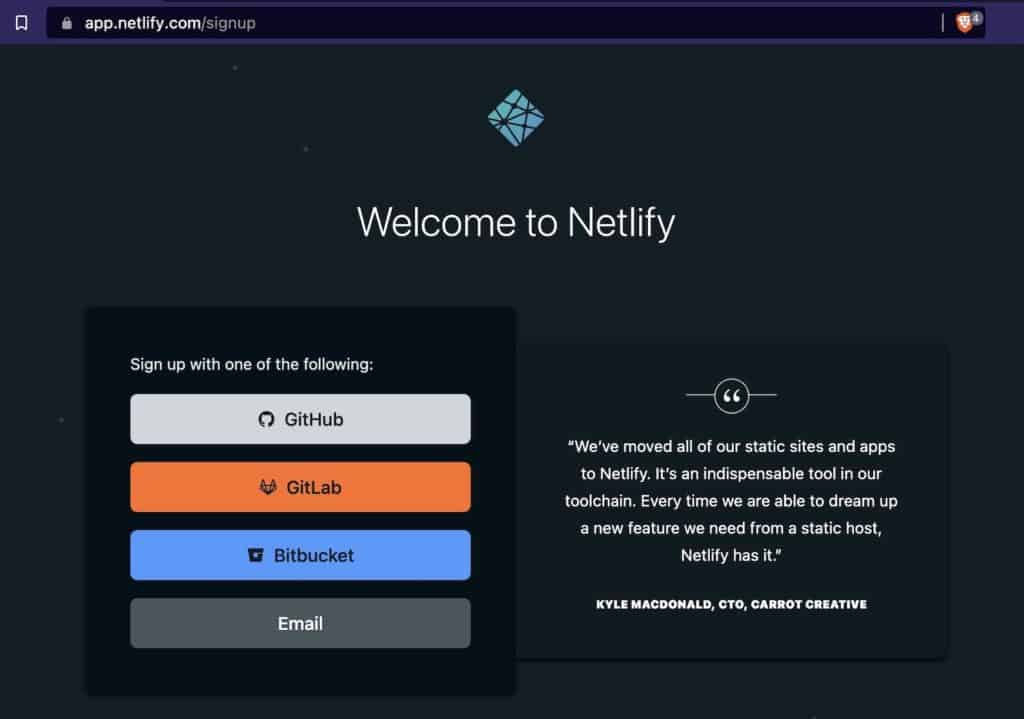
Mi recomendación es que te crees la cuenta con GitHub y así tener más sencillo importar tus repositorios de Github en Netlify.
Una vez que tenemos nuestra cuenta creada y conectada con githug vamos a crear un nuevo sitio:
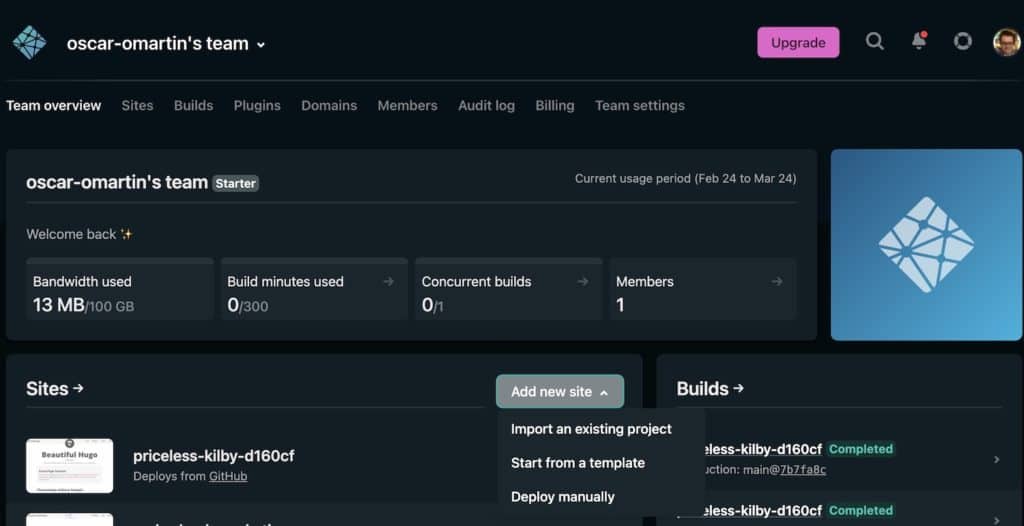
Hacemos click en Import an existing project
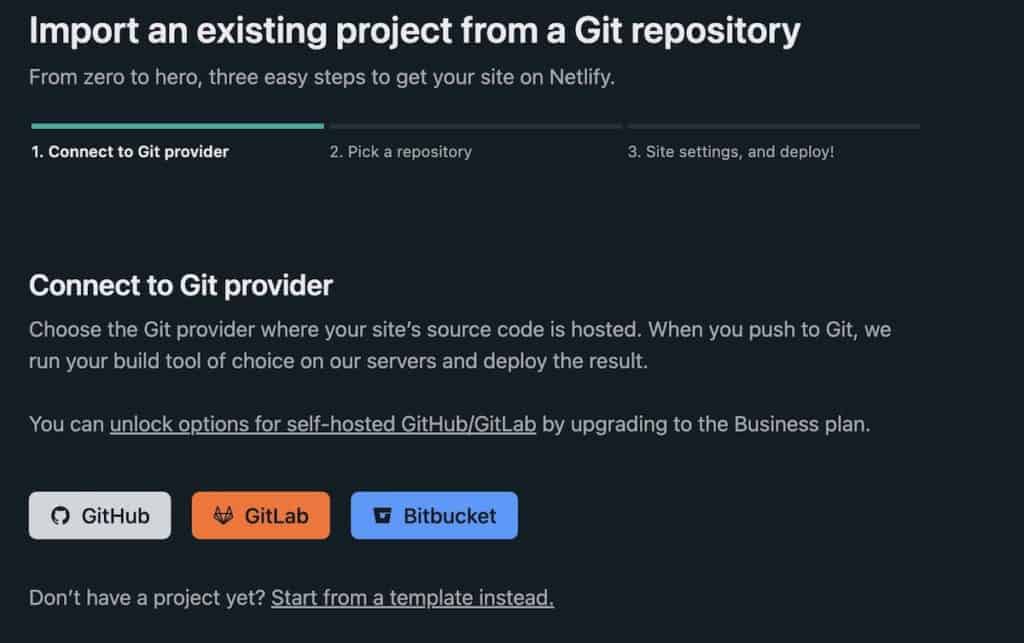
En la siguiente pantalla elegimos el respositorio de nuestra web y dejamos todo por defecto:
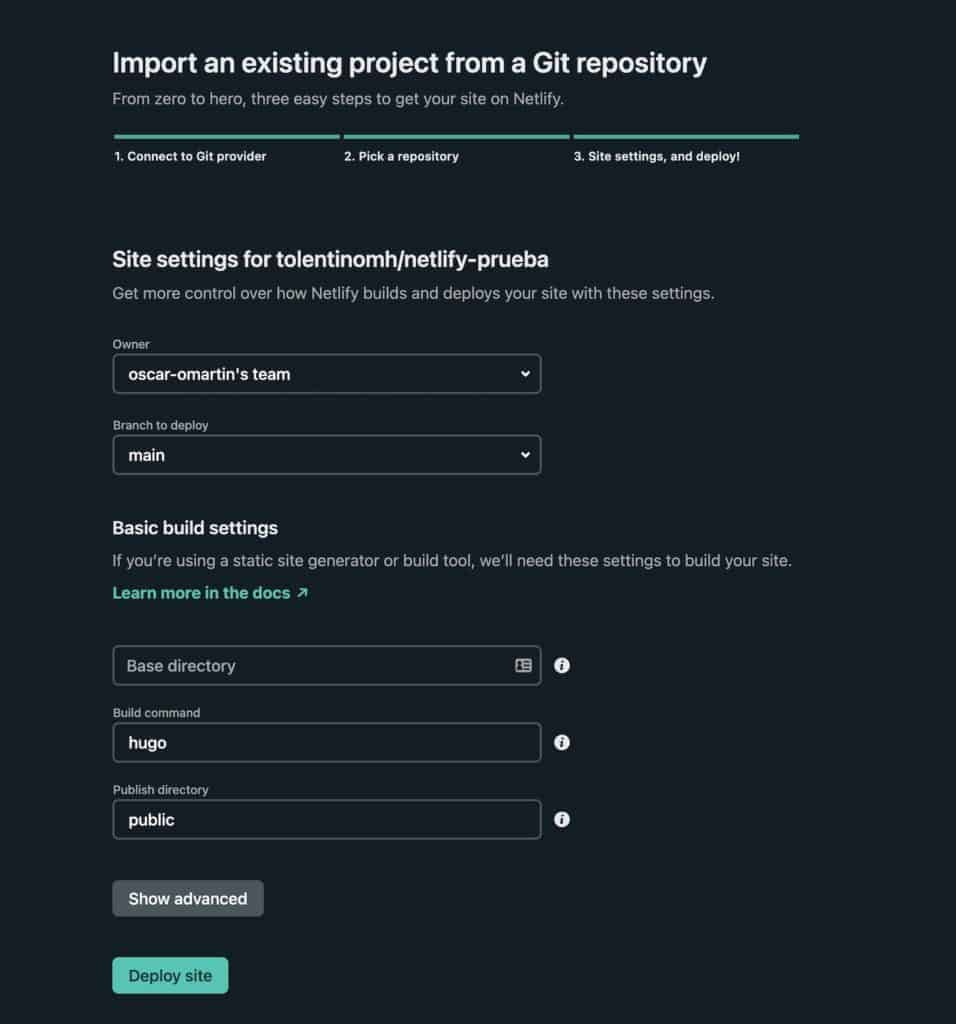
Ahora hacemos click en Deploy Site y …
FALLARÁ 😭
Pero tranquilos, lo solucionaremos fácil.
Te saldrá un fallo como el siguiente:
Error
Failed during stage ‘preparing repo’: Error checking out submodules: fatal: No url found for submodule path ‘themes/beautifulhugo’ in .gitmodules

Lo bueno es que el error es muy descriptivo y nos está diciendo lo que falla.
Tenemos que ir al directorio raiz de nuestra web y crear un archivo que se llame .gitmodules.
En mi caso lo hago desde Visual Studio Code

El contenido es el siguiente:
[submodule "themes/beautifulhugo"]
    path = themes/beautifulhugo
    url = https://github.com/halogenica/beautifulhugo
Subir los cambios a Github
Recuerda que estamos trabajando en local. Siempre que hagamos cambios los tenemos que subir a Github
Una vez subidos los cambios con Git recuerda, git add., git commit -m «tu mensaje», git push, volvemos a Netlify y veremos que a los pocos segundos o minutos intenta de nuevo generar nuestra web y si todo ha ido bien ahora no dará fallo y te dirá Published:

Y si intentas acceder a la url temporal que te genera Netlify ya puedes ver tu web pero con un pequeño problema: No aparecen bien los formatos y las imágenes
Esto es porque en el fichero de configuración configur.toml de tu web tienes que cambiar la URL por la URL que nos da Netlify y más adelante por el dominio real:

Y una vez hechos los cambios y subidos al repositorio tenemos nuestra flamente web subida:
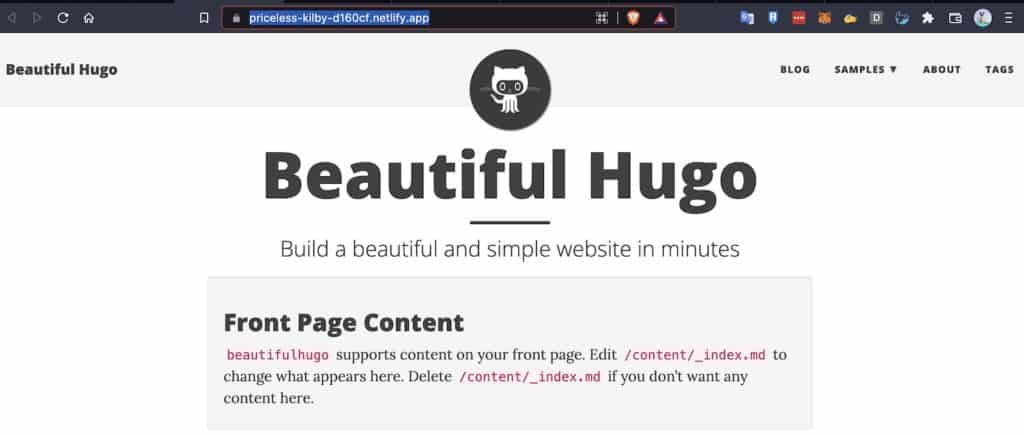
Configurar Dominio Definitivo en Netlify
Ahora que ya funciona nuestra web en Netlify tenemos que asociarle nuestro dominio.
Para hacerlo tan solo tenemos que configurar los DNS
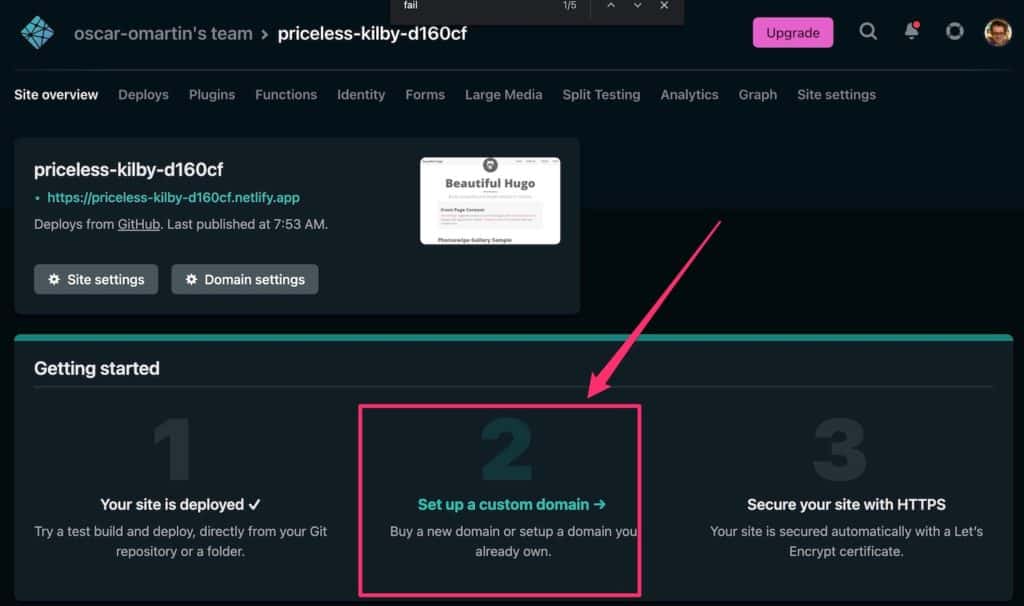
Cuando hacemos clic en el paso dos Set up a custom domain nos va a preguntar que dominio queremos asociar a nuestro proyecto.
Si no existe el dominio nos preguntará si lo queremos comprar y si existe nos dice que tenemos con configurarlo
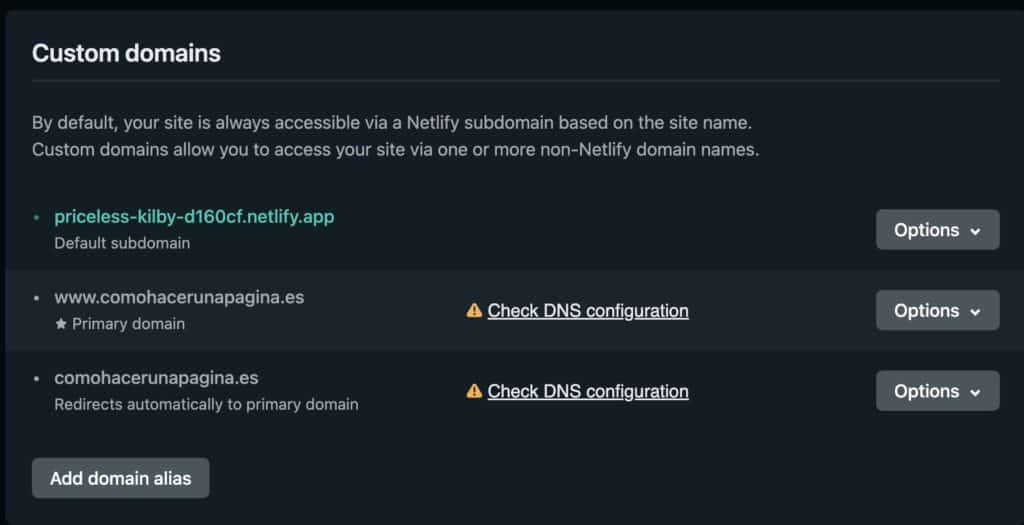
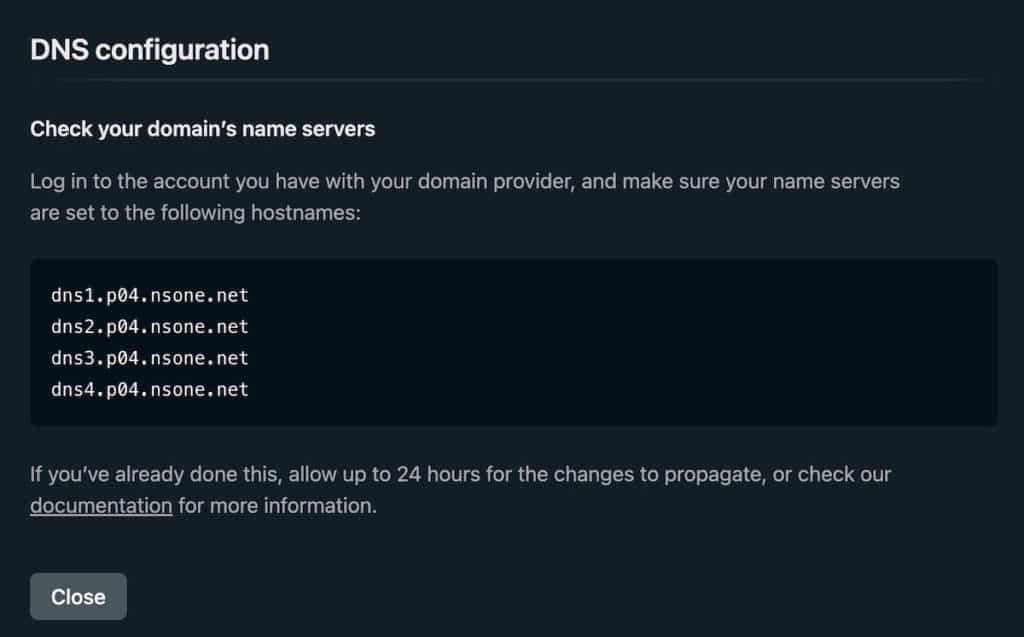
Si hacemos clic en Check DNS configuration nos dirá los DNS que tenemos que configurar:
Y listo, si hayas llegado hasta aquí ya tienes tu web hecha con Hugo y alojada en Netlify 😉
Espero que te haya sido útil.