En un tutorial anterior vimos como pasar de http a https pero os comenté que para ello nuestro hosting nos tenía que dar la posibilidad de añadir un certificado SSL. En este tutorial vamos a ir un paso más allá, vamos a añadir un certificado SSL gratis aunque nuestro hosting cobre por ello, como es el casó de Hostgator 😉
En este tutorial veremos como hacerlo en Hostgator pero valdría para cualquier otro servidor que no te ofrezca SSL por si mismo.
Hostgator es un hosting muy barato que nos permite instalar muchas webs de forma barata pero en contraposición cobra por instalar el certificado SSL, pero hemos encontrado la solución gratuita.
Lo vamos a realizar con un servicio llamado CloudFlare.
Cloudflare es un servicio que además de ofrecernos el certificado de seguridad gratuito va a acelerar nuestra web y la va a hacer más segura.
Lo mejor de todo es que no tenemos que cambiar de hosting, sólo cambiar los DNS y todo ello en su plan gratuito.
Tutorial en vídeo
Suscríbete a mi canal:
Lo primero que tenemos que hacer es darnos de alta en Cloudflare, para darnos de alta tan sólo nos pide email y contraseña:

Una vez dados de alta entramos en el cloudflare y tenemos que dar de alta el domino al que queremos añadir SSL gratis. Puedes dar de alta tantos dominios como necesites.

Añades el dominio y va a empezar a escanearlo para ver todos los DNS de tu página. Ya que para hacer funcionar cloudflare tendremos que cambiar los dns actuales por los que nos dará Cloudflare:
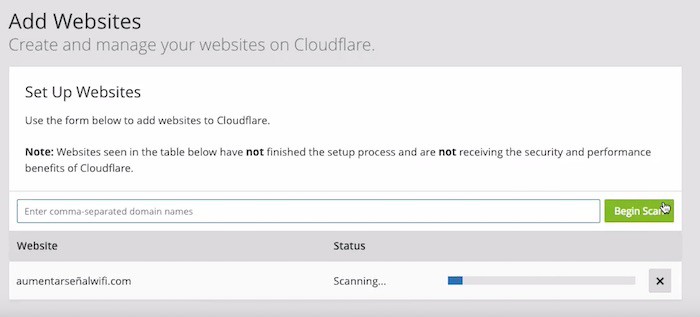
Una vez que ha terminado de escanear nos dice que si queremos seguir con la configuración y nos muestra en pantalla todos los dns que ha encontrado, hacemos click en continuar y nos da a elegir entre los planes que ofrece CloudFlare. Elegimos el plan gratuito:
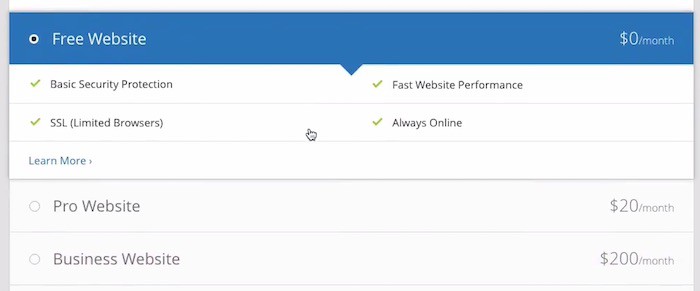
Hacemos click en continuar y ahora nos dice que tenemos que cambiar en nuestro dominio los DNS antiguos por los nuevos. Y no os preocupéis, como Cloudflare a escaneado todos los DNS la web en todo momento seguirá funcionando.
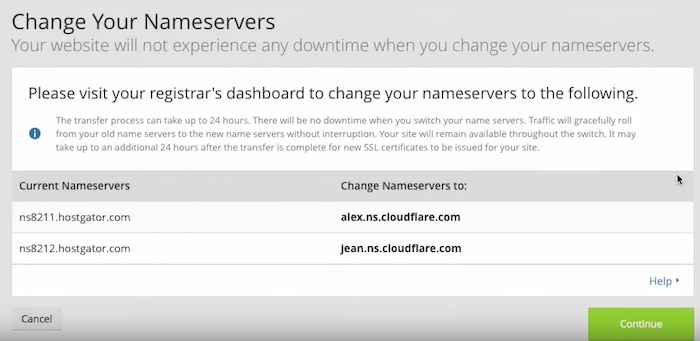
¿Cómo modificamos los DNS de nuestro dominio?
Depende de donde lo tengas comprado. Recordemos que el alojamiento lo tenemos en hostgator pero normalmente el registro del dominio lo tendrémos en otra empresa.
En el video de este tutorial veréis como hacerlo en 1and1 y en GoDaddy.
En cada registrador se hará de manera distinta pero siempre es el mismo procedimiento. Por ejemplo en 1and1 dentro de la configuración del dominio hacemos click en «Adaptar la configuración DNS»
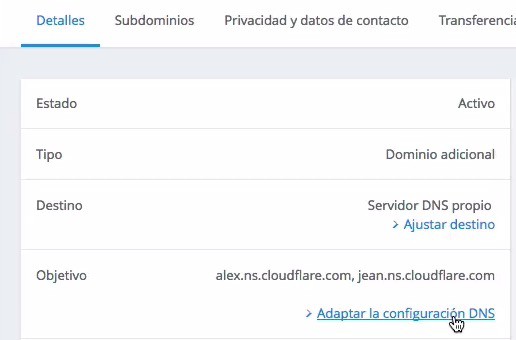
Y cambiamos dos DNS que apuntan a hostgator por los que nos ha dado cloudflare:
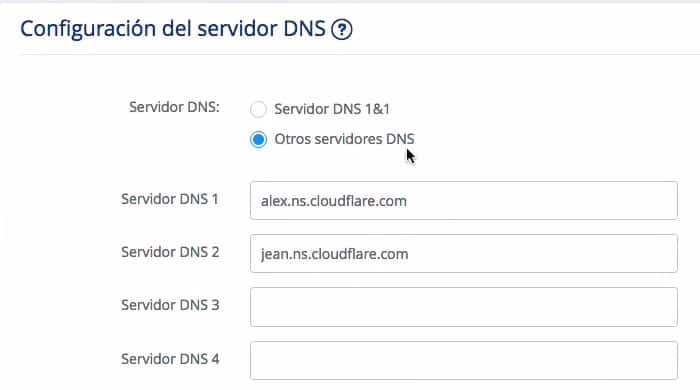
Cuando el cambio de DNS esté listo el propio Cloudflare nos va a avisar que está todo listo.
Por defecto Cloudflare activa el DNS, no tenemos que hacer nada para configurarlo. Puedes verlo en el botón «Crypto».
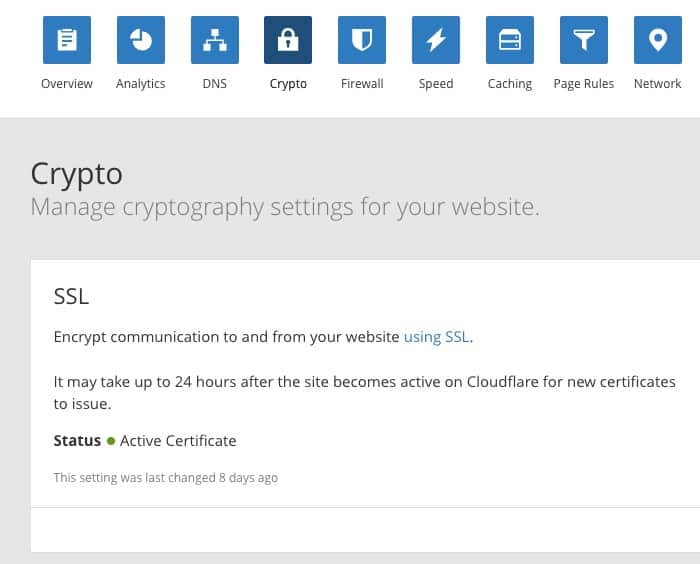
Nos daremos cuenta que tenemos ya el certificado porque si entramos en nuestra web pero en vez en http ponemos en la url https no nos saldrá esta pantalla de error:
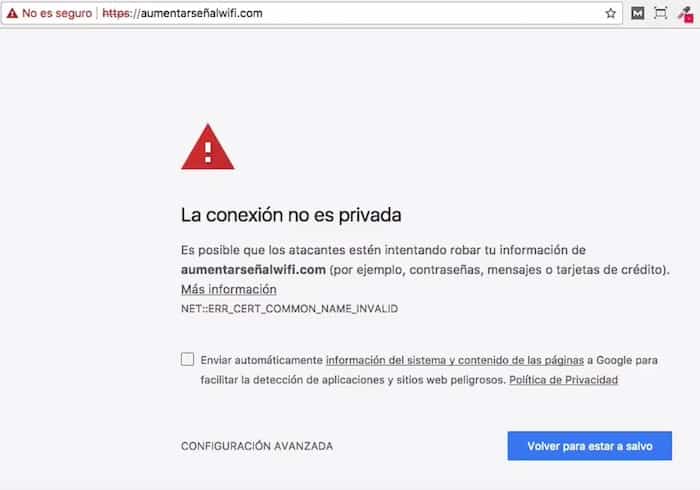
Mientras salga ese error es que Cloudflare no ha terminado de configurarse.
Una vez que ya no nos salga ese error, entraremos en nuestro WordPress e instalaremos el plugin Really Simple SSL
Una vez activado, si todo ha ido bien y ha detectado el certificado de seguridad nos preguntará si queremos activar el SSL, le decimos que si y si todo ha ido bien ya tenemos nuestra web con el certificado instalado 😉
Espero que os haya gustado y que paséis vuestras web a SSL ya que Google cada vez ve con peores ojos que no tengamos las webs sin el certificado SSL.
Hola Óscar, muy buen tutorial, Voy a ponerlo en prácica ya mismo. Tengo unas dudas, ¿se puede modificar el .htacces en vez de instalar el plugin en WordPress?
Y otra más, ¿el servicio de CloudFlare que hace realmente? ¿una copia de los archivos de hostgator para poder colocar el certificado? cuando se carga la página, accedemos al servidor de hostgator o a clodflare. Puede que no sea importante, pero siempre intento girar un poco más la tuerca.
El plugin no es necesario si te funciona bien. En algunas webs si y en otras no. Si ves que te da fallos instalaló y te ayuda pero sólo si tienes problemas.
Cloudflare sirve para acelerar la web porque hace de caché y de cdn gratuito.
Saludos 😉
Interfiere en la recepción de mis correos que tengo en hostgator?
No debería de influir nada 😉
Saludos!!!