En este tutorial veremos como podemos añadir más zonas de widgets en la plantilla Altitude Pro en la home.
Por defecto vienen 7 zonas pero vamos a ver poder añadir tantas como queramos.
El proceso no es difícil pero hay que hacerlo editando algunos ficheros de la plantilla por lo que hacer copia de seguridad antes de empezar ya que cualquier error al modificar la plantilla podemos dejar la web rota.
Antes de ponernos a editar la plantilla fijémonos que, de forma alterna, un widget va con imagen de foto y el siguiente widget no. Y así sucesivamente.
Lo podemos ver de forma sencilla yendo a personalizar de la plantilla –> Front Page Backgroun images:

Cómo vemos sólo los widgets impares tienen imagen de fondo, más adelante veremos como añadir fondo a los nuevos widgets que creemos.
Vamos al lío 🙂
Tutorial en vídeo
Suscríbete a mi canal:
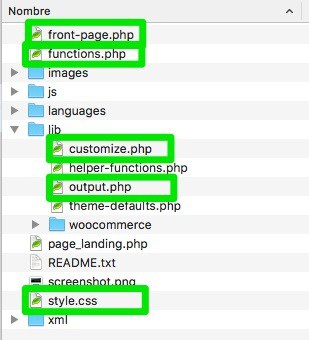
Dentro de nuestra plantilla tenemos que modificar los siguientes ficheros:
- front-page.php
- functions.php
- customize.php
- output.php
- style.css
Es decir, los siguientes:
front-page.php
Si nos fijamos en la función de la fila 19 nos encontramos enumerados las zonas de widgets existentes, pues aquí simplemente añadimos las que queramos, en mi caso dos más, es decir la 8 y la 9.

En este mismo fichero más abajo tenemos que añadir más código, concretamente en la función altitude_front_page_widgets que está en la fila 77.
En mi caso como añado dos nuevos widgets añadiré copiaré los dos últimos widgets que aparecen en esta función y los pegaré a continuación. Cambiando el número del widtget:
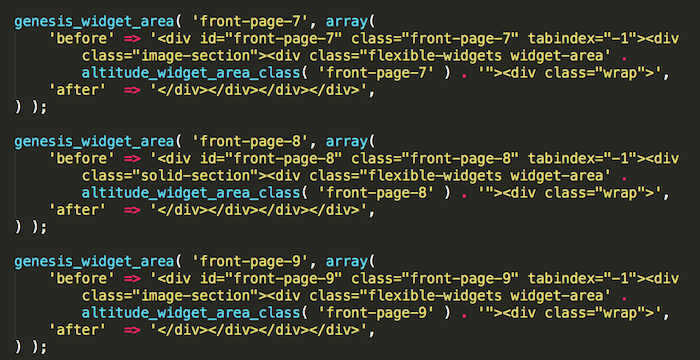
Fijémonos que el código de los widgets impares es distinto de los widgets pares y eso es porque los impares tienen una imagen de fondo y los pares no.
funtions.php
Al igual que en el fichero anterior, buscamos en que lugares se hace referencia a los widgets.
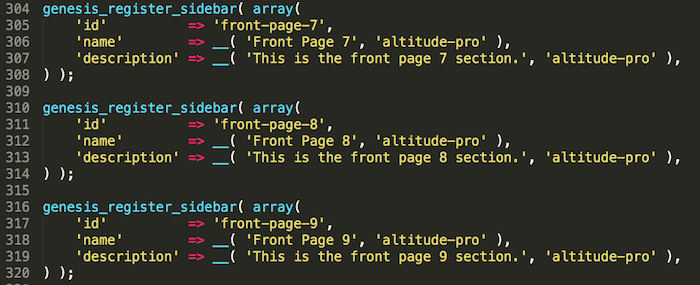
En este caso nos encontramos a partir de la línea 273 el registro de las zonas de los widgets.
Aquí añadimos otras dos zonas copiando el código de las existentes y cambiando el número de zona.
customize.php
En este fichero es donde decimos que widgets tienen de background imágenes y se lo decimos en la función altitude_customizer_register de la fila 21
Por lo que tendremos que añadir el widget 9 para que también tenga imagen de fondo:

output.php
Al igual que en el anterior tenemos que añadir el número del widget del que queremos que tenga fondo.
Vamos a la función altitude_css de la línea 20 y lo añadimos:

style.css
La funcionalidad ya está bien, ahora tendríamos que asegurarnos que el diseño está correcto.
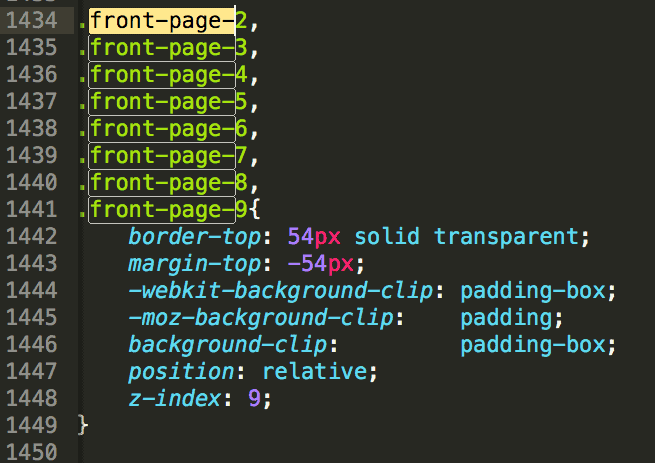
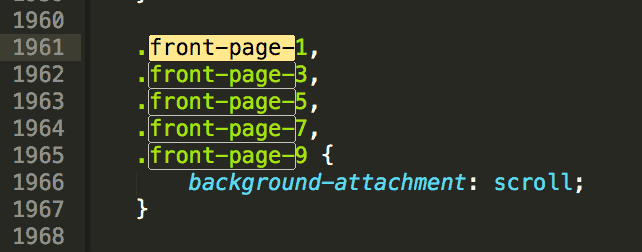
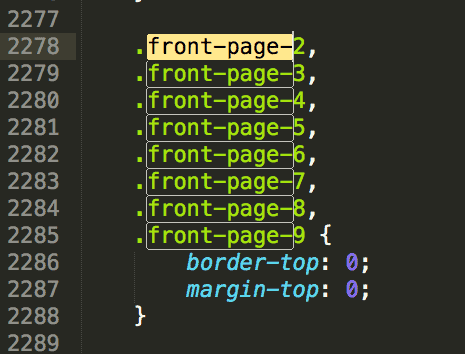
En este archivo buscaremos en que lugares se hace referencia a los otros widgets y añadiríamos los nuestros en el mismo lugar para que tenga el mismo diseño.
Concretamente vamos a modificar las siguientes partes:
Línea 1434
Línea 1451

Línea 1961
Línea 2278
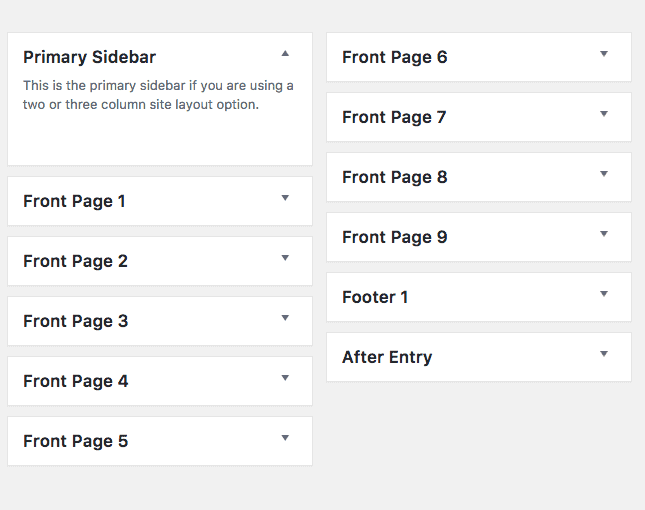
Si ha ido todo bien ahora cuando vayáis a los widgets veréis que tenéis 9 en vez de 7:
Además si vamos a personalizar de la plantilla –> Front Page Backgroun images, veremos que podemos añadir un fondo al widget 9

Y por supuesto en la página principal aparecen:

Espero que el tutorial os haya gustado 😉