Hola chicos, ¿Cómo estáis?
Hoy os traigo un tutorial muy interesante, donde veremos como poder mostrar dentro de nuestra página Web, las ventas realizadas en nuestra tienda de WooCommerce.
Puede que te preguntarás, ¿para qué me sirve esto?
Mostrar ventanas emergentes con las ventas realizadas en los días anteriores ayudará a incentivar a que otras personas se animen a comprar, ya que sentirán más confianza sabiendo que otros ya han comprado.
Vamos a usar la herramienta Beeketing.
Para acceder a ella debemos ingresar al siguiente link: https://beeketing.com/
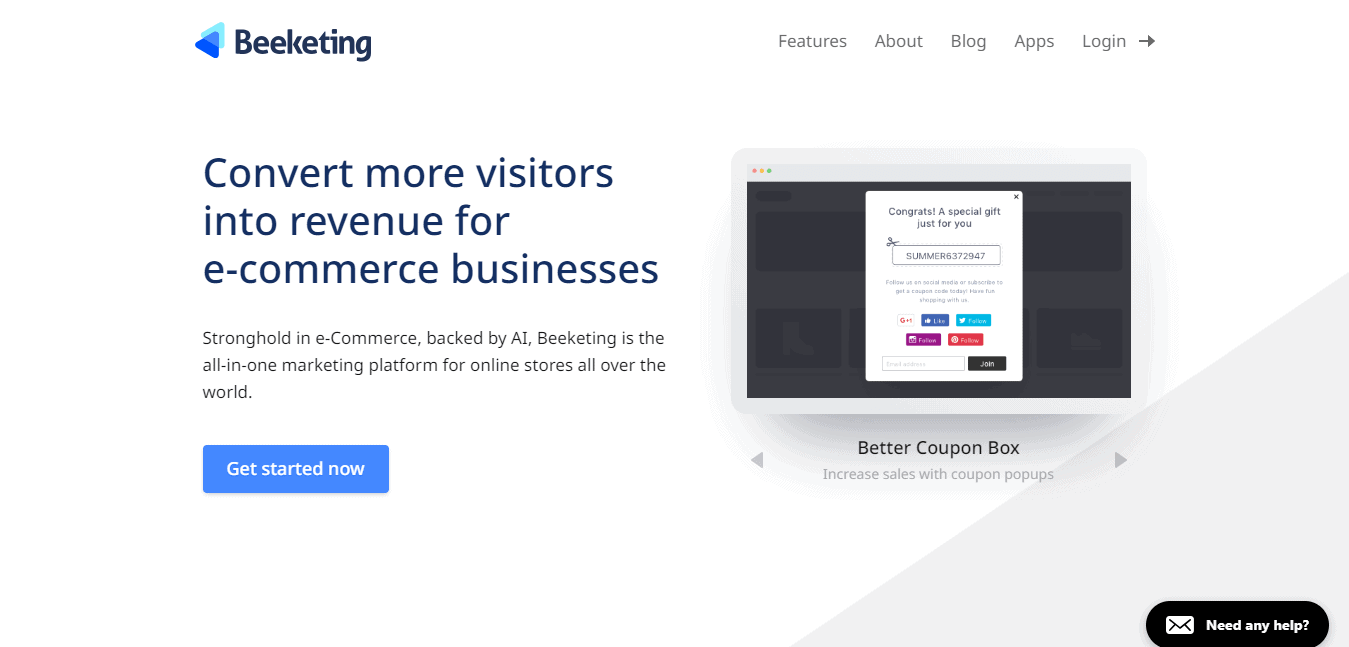
Beeketing es una plataforma de Marketing con diferentes herramientas para aumentar las ventas de nuestra tienda. Algunas aplicaciones son gratuitas, como la que vemos en este tutorial pero otras son de pago. Ofrecen 13 aplicaciones, de las cuales 4 son de pago.
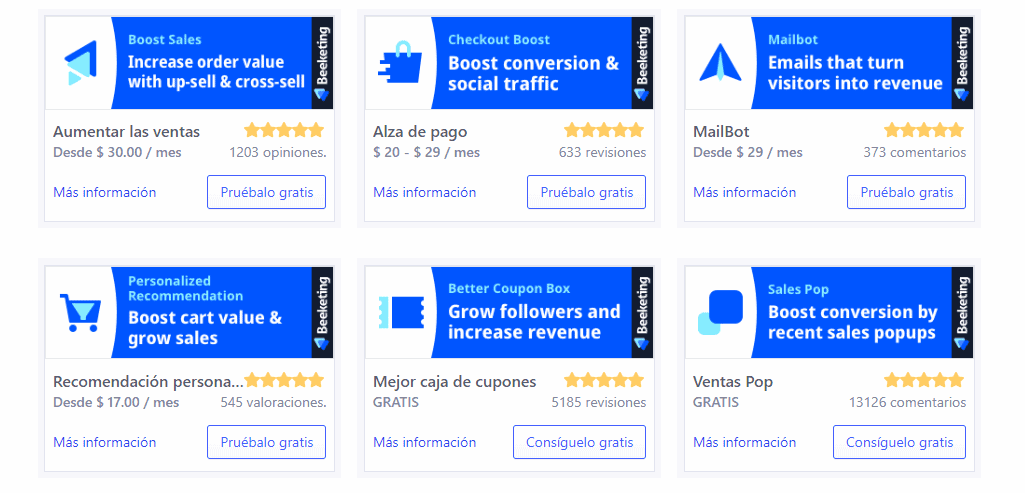
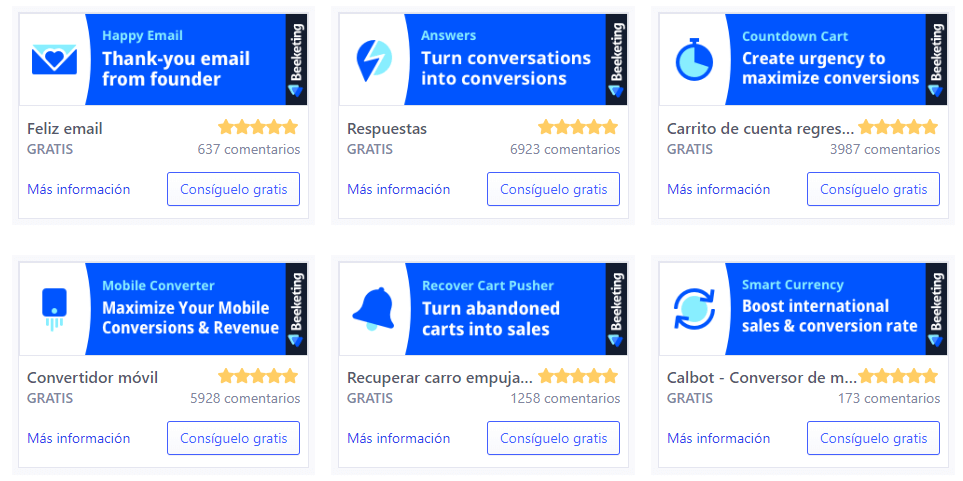
En este tutorial vamos a ver la aplicación gratuita Sales Pop. Espero que os guste 😉
Esta aplicación se encarga como ya he comentado al principio, de mostrar ventanas emergentes personalizadas, donde les dice a los visitantes de tu sitio Web quienes han hecho compras, que producto han comprado, de donde es el visitante y hace cuanto se realizó.
Esta es una muestra de cómo quedaría en una web, una vez configurada la aplicación:
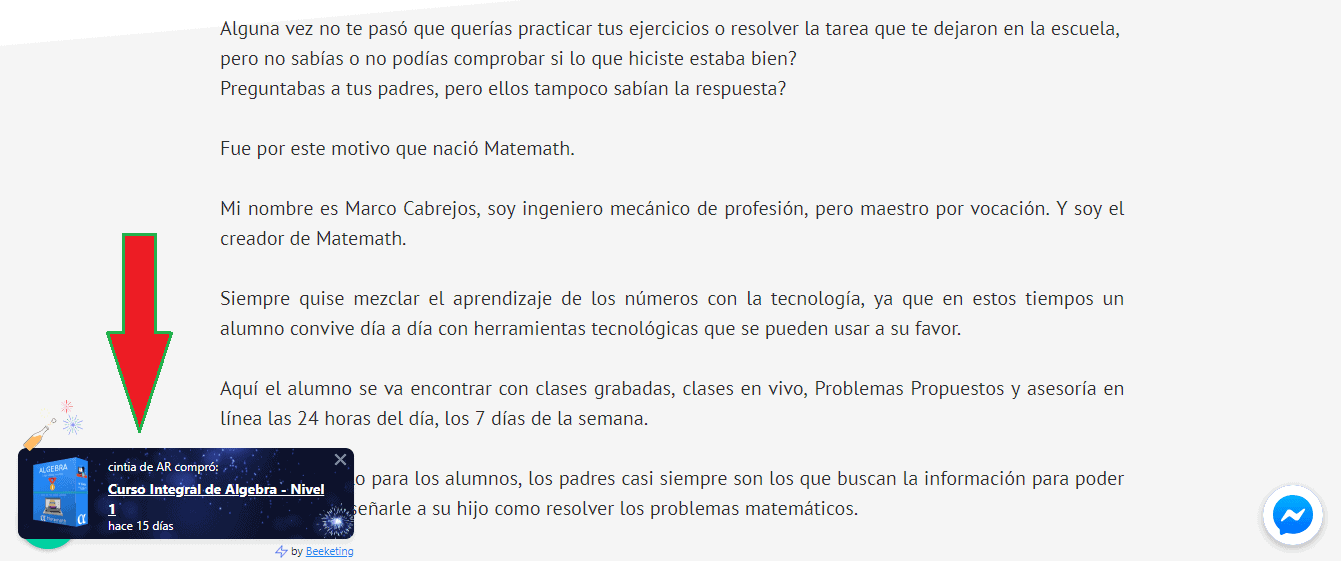
Para conseguir este resultado deberíamos hacer lo siguiente:
Lo primero que debemos hacer es crearnos una cuenta y darnos de alta en Beeketing. Para ello, nos vamos a: https://fly.beeketing.com/sign-up
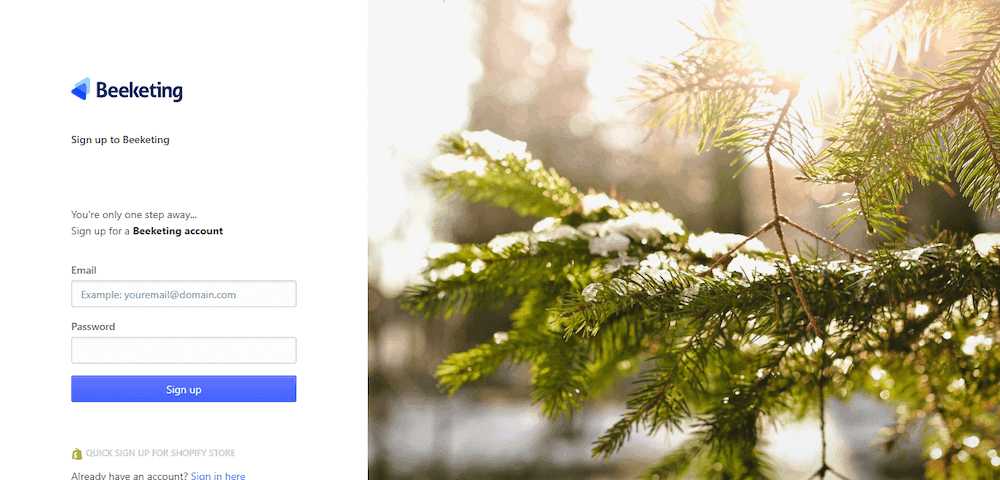
Colocamos nuestro Email, creamos una contraseña y le damos clic a Sign up.
Ahora nos preguntará con qué herramienta trabajamos nuestra tienda Online, en mi ejemplo selecciono WooCommerce y en segundo lugar me pide que coloque mi dominio.
Hago clic en Add Shop:
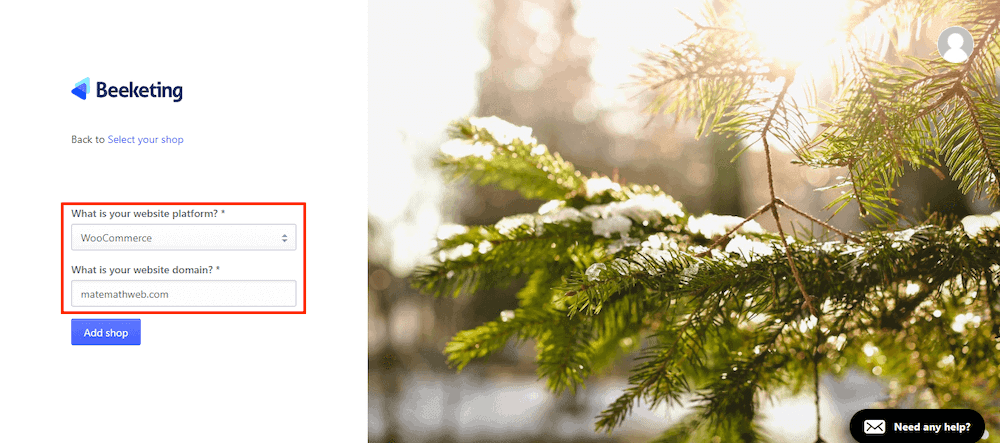
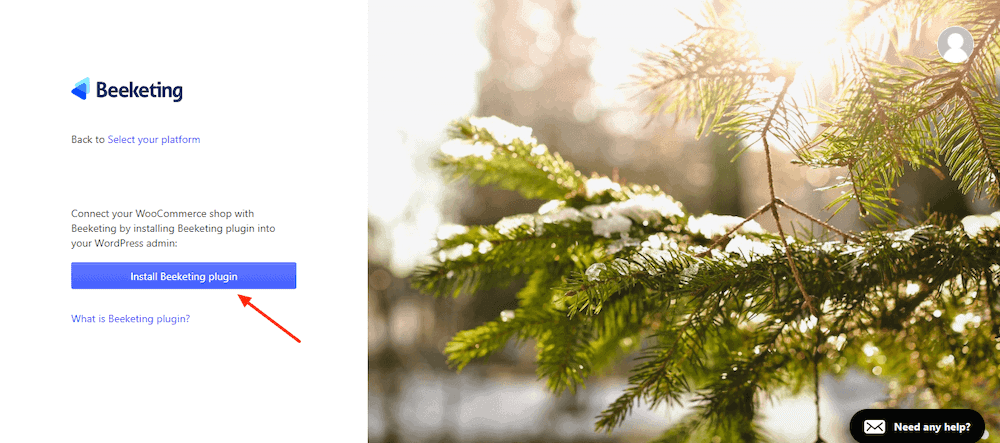
Ahora te pedirá que Instales el Plugin de Beeketing:
Te va dirigir automáticamente a tu página de WordPress para que descargues el Plugin de Beeketing para Woocommerce:
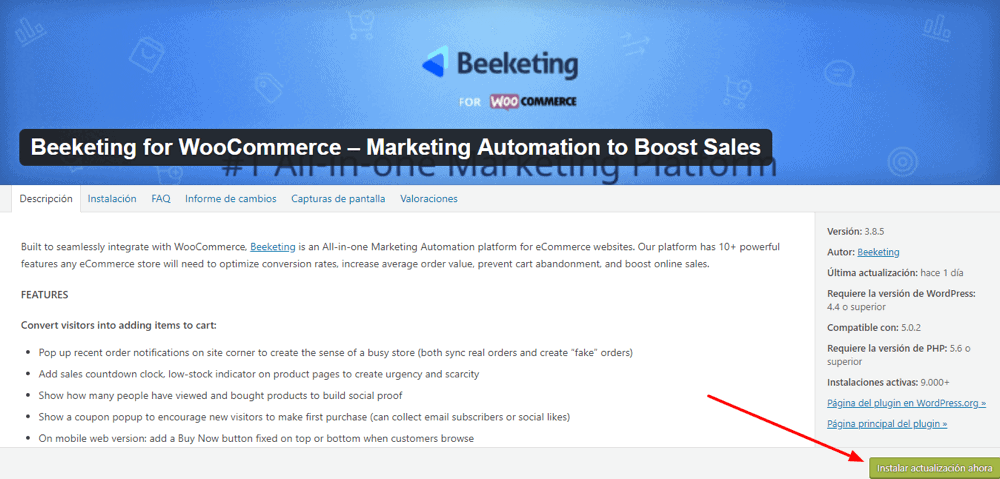
Como yo lo tengo instalado, en mi caso me pide que haga la actualización. En tu caso lo debes intalar y activar.
Ya dentro de tu WordPress tendrás una pantalla como esta:
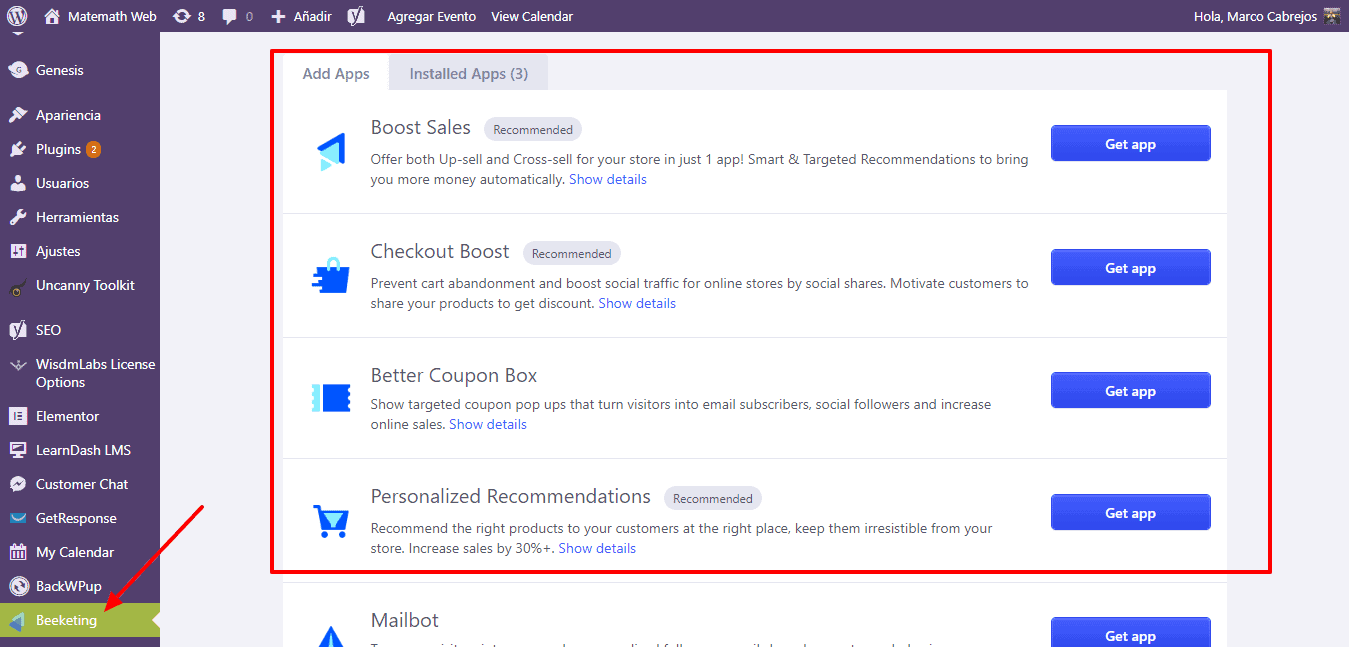
En la lista de Menú podrás ver el ícono de Beeketing y dentro la lista de las aplicaciones con las que puedes trabajar.
Vamos a seleccionar Sales Pop y damos clic en Get app:
Nos va llevar al sitio Web para que hagamos las configuraciones correspondientes:
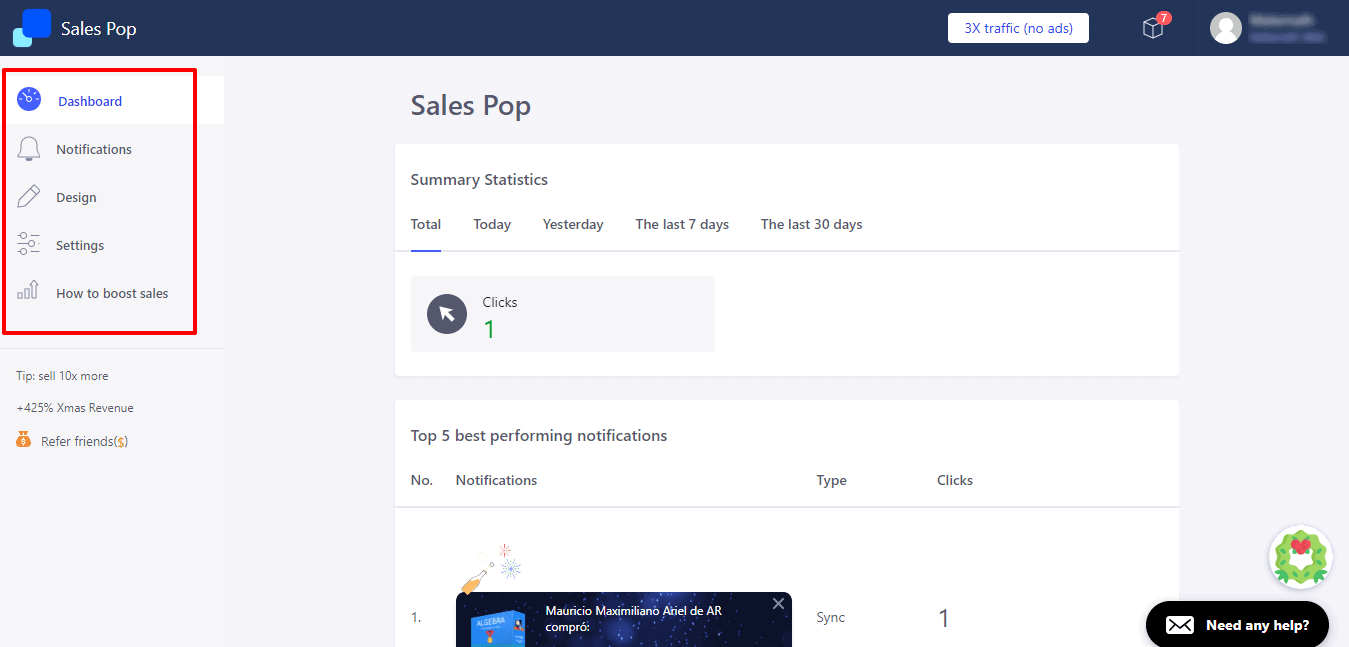
En el lado izquierdo tenemos el menú principal.
Las opciones son las siguientes:
- Dashboard = Tablero Principal
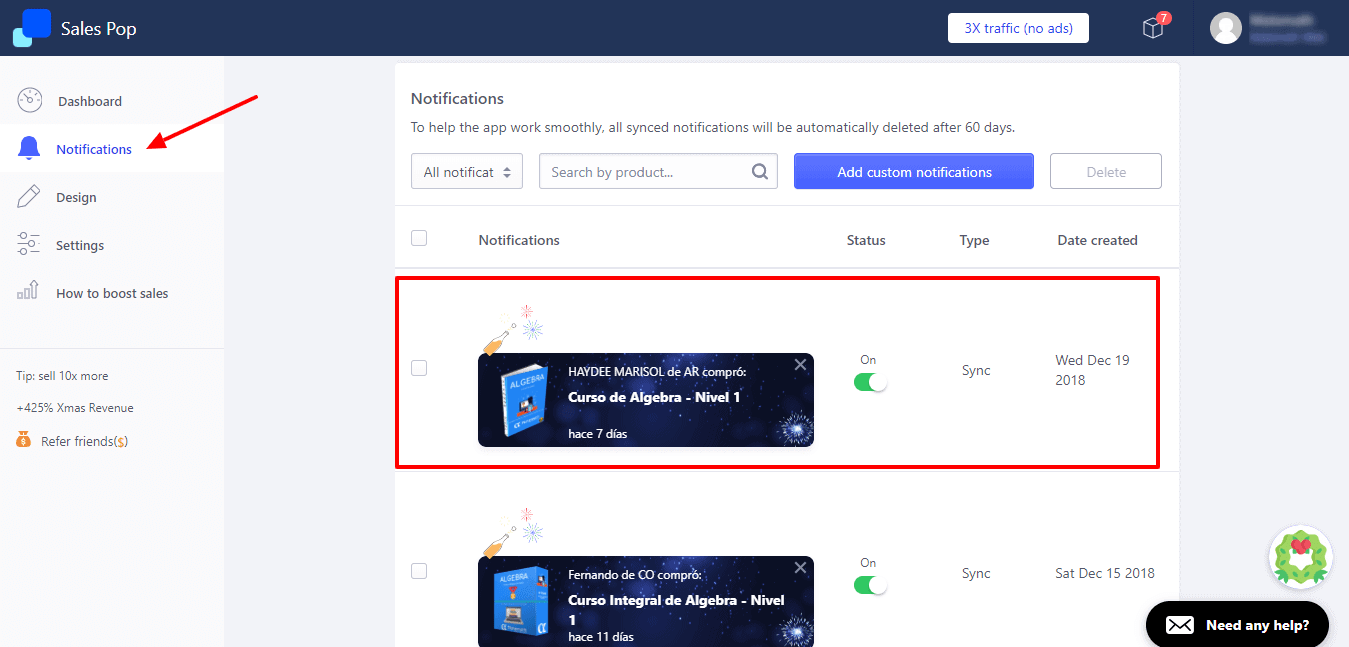
- Notificaciones = Vamos a poder visualizar las notificaciones de las compras que los clientes han realizado. Puedes editarlas, desactivando las que no quieras que aparezcan.
- Diseño = Esta tercera opción nos permite elegir el diseño de la caja emergente que aparecerá en nuestro sitio Web
a. Primero debes elegir el diseño entre las opciones que te muestran y en la parte derecha puedes ir viendo como quedaría.
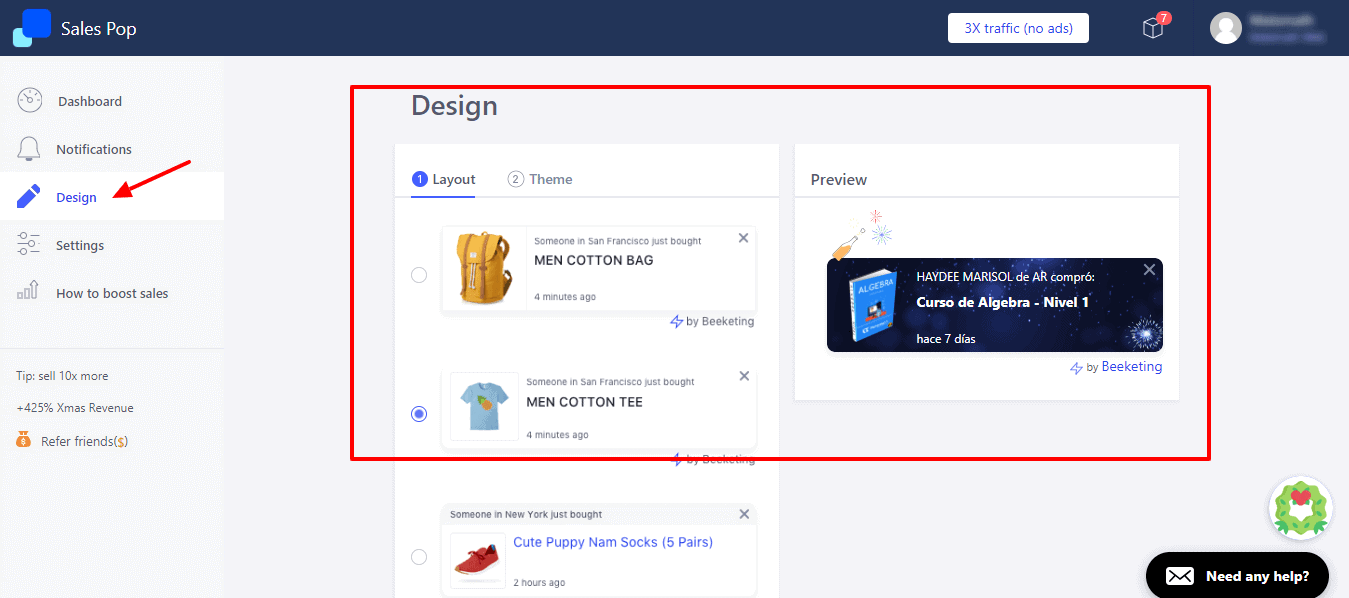
b. Lo segundo es elegir el tema, puedes escoger un tema básico, de acuerdo a las festividades o personalizarlo a tu gusto.
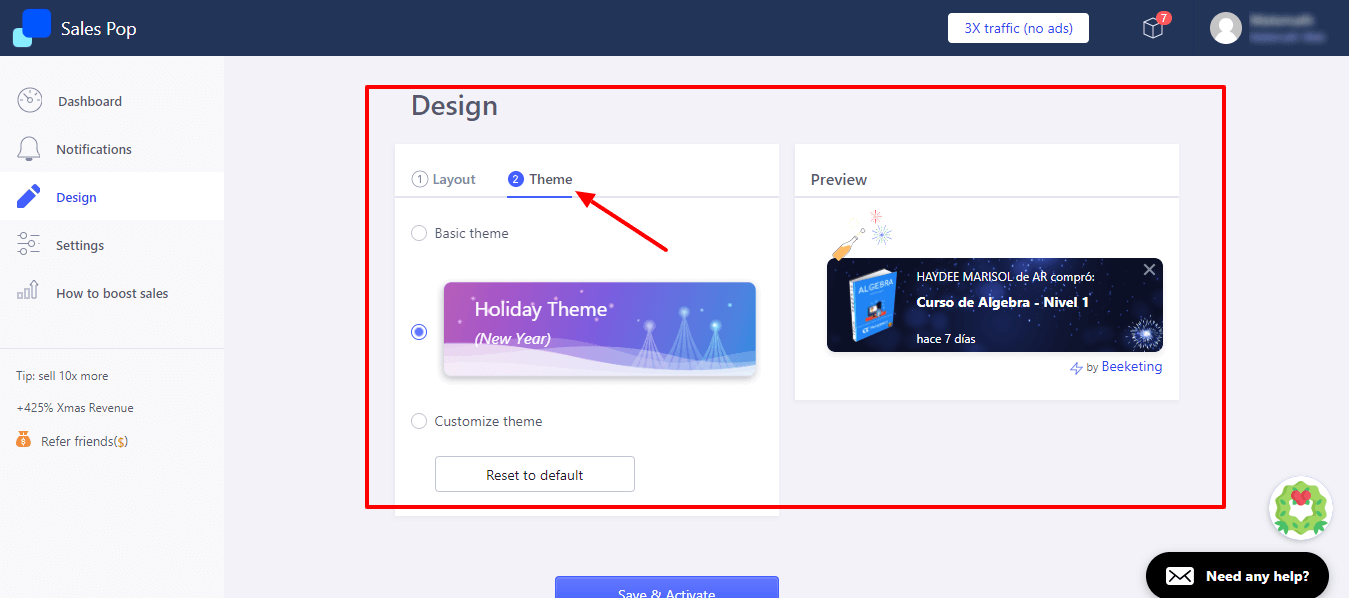
- Configuración = Aquí vamos a poder configurar a detalle como quiero mostrar mis ventas
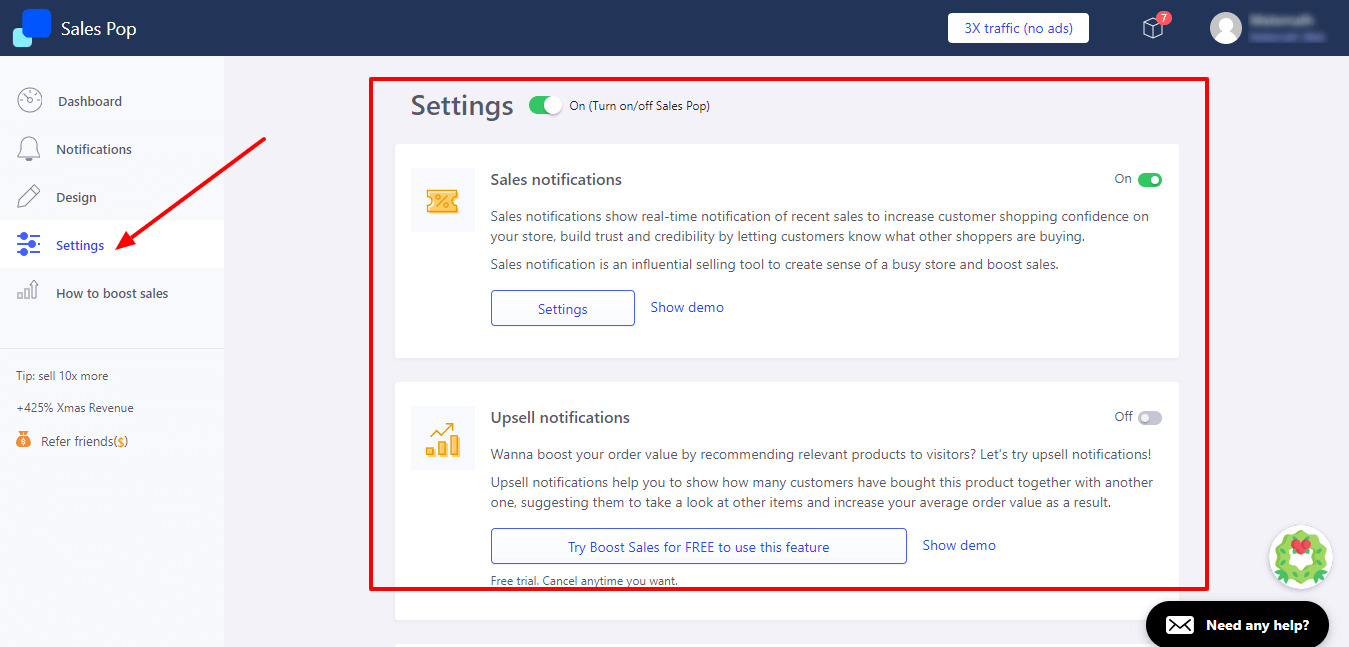
La primera opción es Sales Notifications, si hacemos clic en Settings, veremos una pantalla como esta:
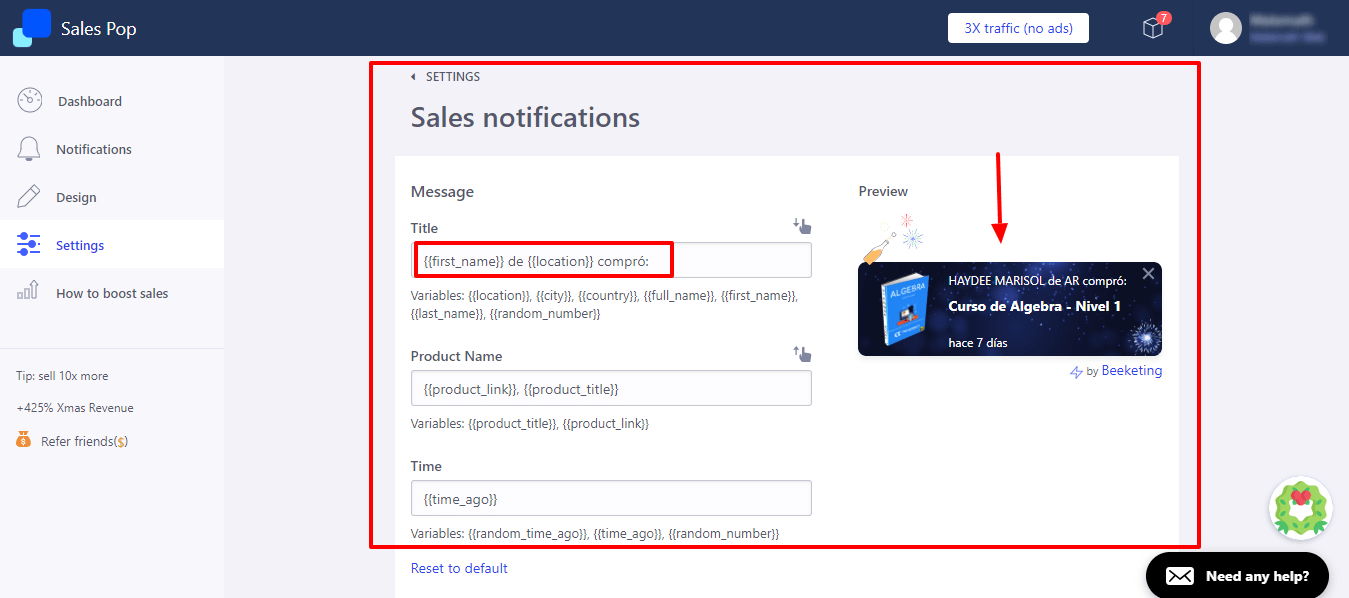
Aquí vamos a configurar cómo queremos que se muestre el mensaje. Lo primero es el título, tenemos opciones por defecto que mostrarán: El primer nombre de la persona, la ciudad, el país, nombre completo, etc… Nosotros podemos ir jugando con todas las opciones.
Para mi ejemplo, mostraré el primer nombre de la persona y de donde es:

La segunda opción es el nombre del producto. Recomiendo dejarlo por defecto, pero sepan que también puedes modificarlo.

Y en tercer lugar el tiempo, hace cuántos días fue comprado el producto, de igual forma recomiendo dejarlo por defecto, tal cual está.

Si hemos modificado algo, no olvides salvar la configuración.
Regresamos y por último hacemos clic en la configuración general de la App (Deslízate a la última opción)
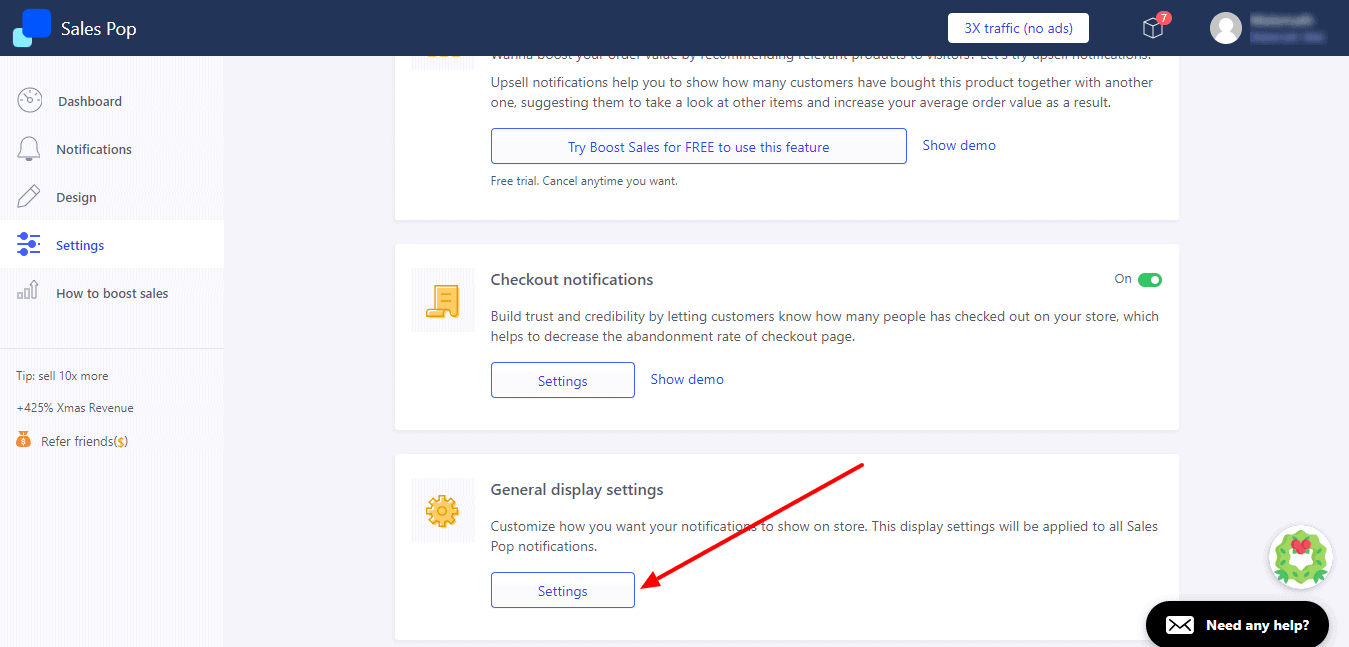
Lo primero será seleccionar donde quiero que aparezca la ventana emergente, puedo elegir en la parte inferior o superior y al lado izquierdo o derecho
Segundo indicaré cuánto será el tiempo que existirá (Segundos) entre dos notificaciones.
Lo tercero es el Display Time, tengo que decir por cuánto tiempo quiero mostrar mi ventana cada vez que aparezca.
En cuarto lugar tengo Maximum per page, donde debo decir cuántas notificaciones quiero mostrar como máximo por página.
Si lo que quiero es que las ventas se muestren de manera aleatoria, selecciono: display notifications in random order
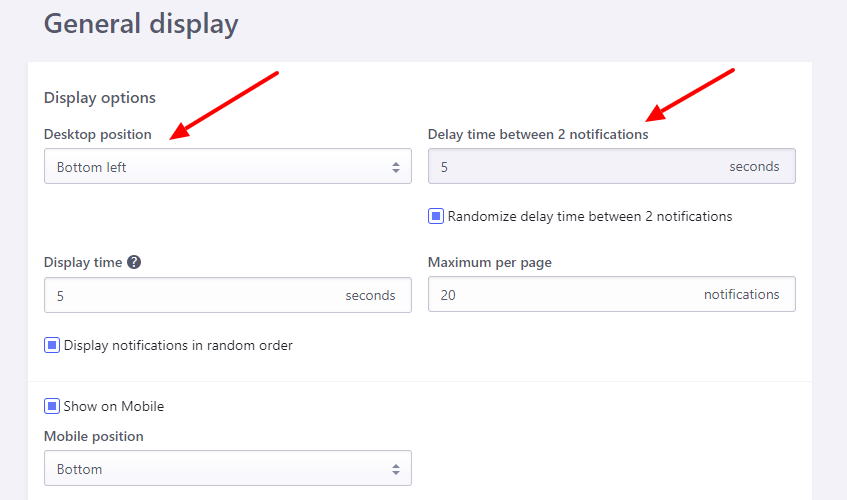
Puedo también configurar lo que se mostrará en un dispositivo móvil, si se visualizará en la parte inferior o superior.
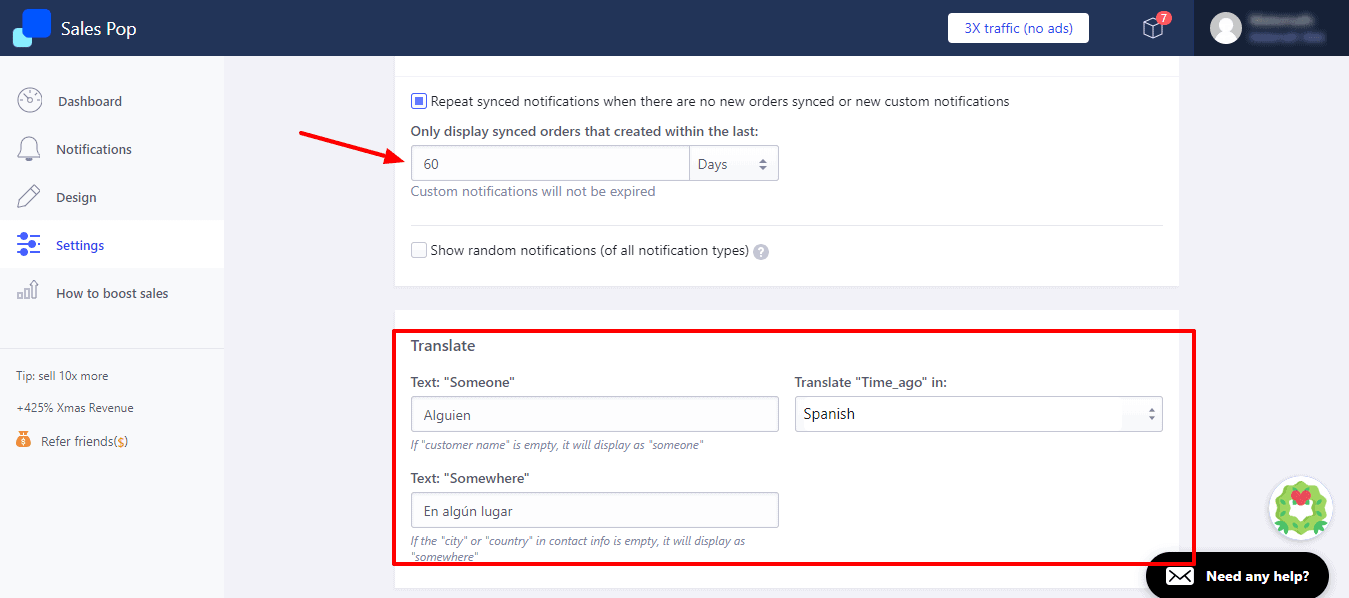
La siguiente opción es: «Only display synced orders that created within the last»
Tengo que indicar la cantidad de días que quiero mostrar mis ventas, es decir. Si coloco 60 (como viene por defecto) les estoy diciendo que muestre las ventas de los últimos 60 días.
En la sección Translate debo cambiarle al idioma Español lo que quiero mostrar.
Una vez terminada la configuración hago clic en Save Settings
Listo, eso sería todo y ahora solo queda ir a nuestro sitio Web para ver como quedaría nuestra aplicación
Espero que este vídeo les haya gustado y les sea de mucha utilidad 🙂