En este tutorial vamos a añadir un botón de WhatsApp en cada listado de nuestra web realizada con la plantilla Listify.
El botón de WhatsApp será plenamente funcional y al hacer click se abrirá WhatsApp y nuestros usuarios podrán enviar un WhatsApp al número que hayamos puesto
Para poder seguir el tutorial te hará falta el plugin de pago WP Job Manager Field Editor, el plugin cuesta 39$ pero lo tienes disponible en la zona premium gratis.
Aquí tienes el tutorial en vídeo:
Suscríbete a mi canal:
El resultado que vamos a obtener es un botón en el lateral con la posibilidad de enviar WhatsApp. Algo como lo siguiente:
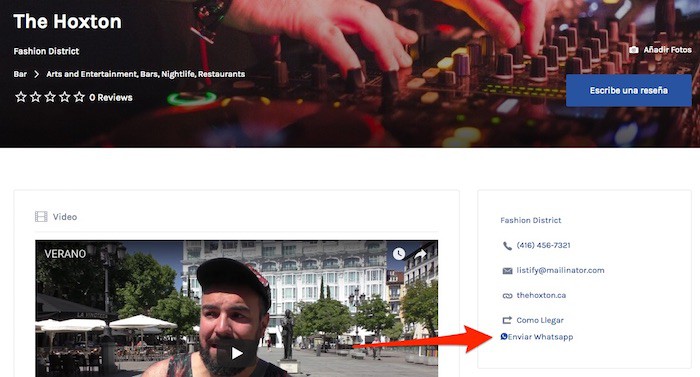
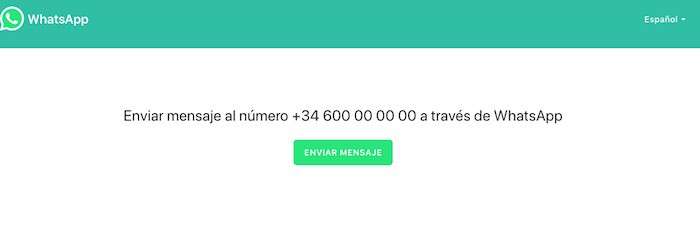
Y al hacer click en el botón se nos abrirá WhatsApp para poder enviar el mensaje:
Lo primero que necesitamos es instalar el plugin WP Job Manager Field Editor. Una vez instalado dentro del menú listings nos saldrán nuevas opciones para poder crear campos en cada listado:
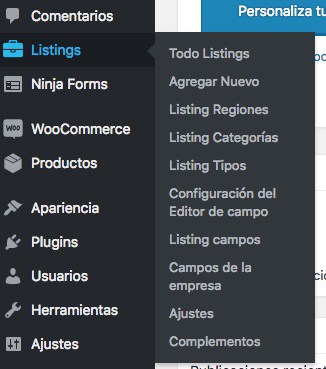
Entramos en campos de la empresa y hacemos click en «Add Empresa Campo»

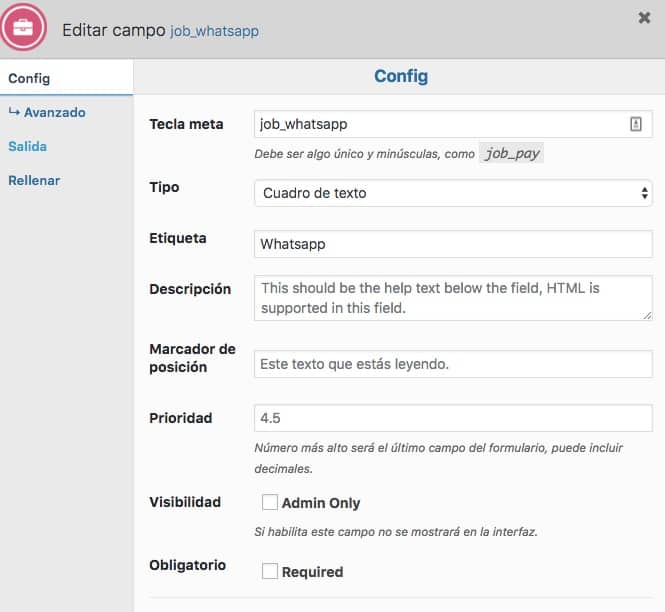
Y rellenamos los siguientes campos:
Config:
- Tecla meta: job_whatsapp
- Tipo: Cuadro de texto
- Etiqueta: WhatsApp
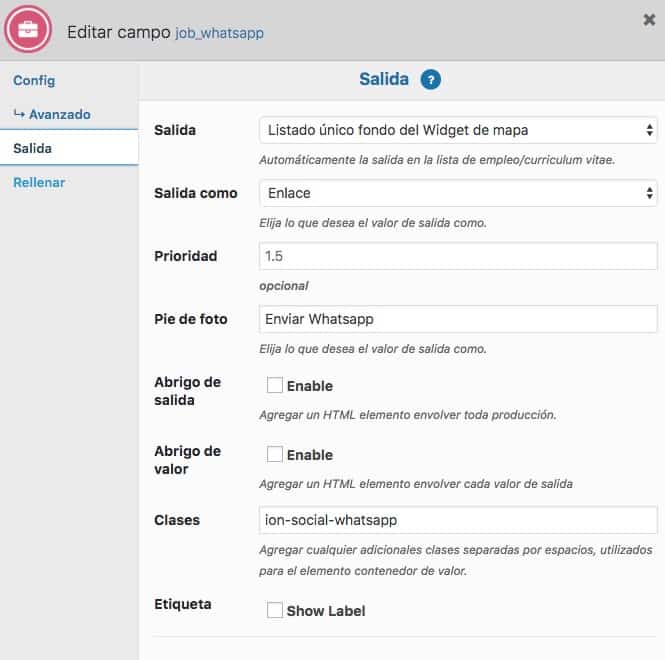
Salida:
- Salida: Listado único fondo del Widget de mapa
- Salida como: Enlace: Cuadro de texto
- Pie de foto: Enviar WhatsApp
- Clases: ion-social-whatsapp
Aquí tienes una captura de la pantalla Config:
Aquí tienes una captura de la pantalla Salida:
Si has llegado hasta aquí, ahora cuando editas un listado tendrás un nuevo campo, el campo del WhatsApp:

Genial, pero, ¿cómo se rellena? Muy fácil, ya veréis 😉
El propio WhatsApp nos dice como en la siguiente página:
https://faq.whatsapp.com/en/android/26000030/?category=5245251
Tenemos que añadir un enlace como el siguiente:
https://api.whatsapp.com/send?phone=15551234567
Tenemos que tener cuidado con el código del país, no tenemos que añadir el signo más
Es decir, para un móvil de España pondríamos algo así:
https://api.whatsapp.com/send?phone=34600000000
Sin el signo +
Y ahora si, ya tenemos un botón en cada listado para poder enviar WhatsApp.
Espero que os haya gustado 😉