En muchas ocasiones quieres modificar con CSS un elemento de tu web pero cuando lo vas a hacer te das cuenta que el elemento no tiene ninguna clase ni identificador.
No te preocupes que no está todo perdido.
Gracias a las PseudoClases podemos hacer mucho más de lo que imaginas y en este tutorial vamos a ver como hacerlo.
Todo lo que vamos a ver en este tutorial nos sirve para cualquier página que hagas con HTML y CSS.
Y concretamente, por supuesto que vale para WordPress, de hecho en nuestros ejemplos lo haremos en WordPress.
📺️ Tutorial en Vídeo:
Suscríbete a mi canal:
:first-of-type Modificar Sólo el Primer elemento
Esta pseudo-clase nos permite modificar solo el primer elemento de su tipo entre un grupo de elementos hermanos.
Ahora vamos a ver ejemplos concretos pero aquí tienes un ayuda muy buena sobre esta pseudoclase.
Lo primero que vamos a modificar es el primer elemento de un menú:

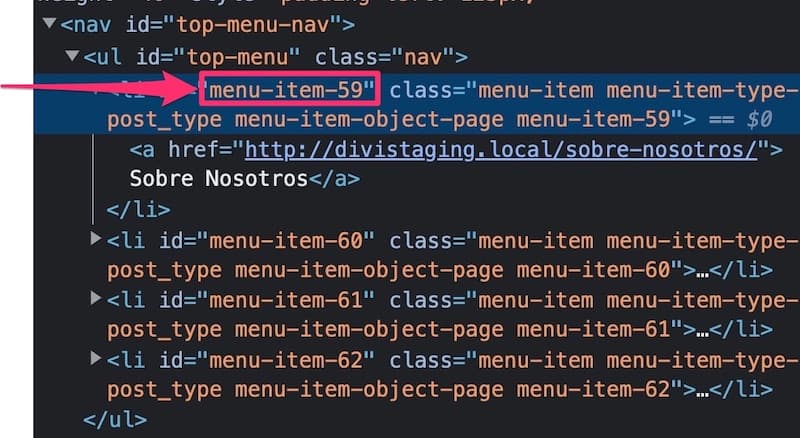
Normalmente lo que hago cuando quiero modificar algo es entrar en el inspector de elementos de mi navegador (botón derecho –> Inspeccionar) y comprobar si el elemento a modificar tiene una clase o un identificador:

El elemento que quiero modificar tiene un identificador concreto por lo que realmente no necesitaría hacer uso de las pseudoclases.
Pero imaginad que lo habéis visto y que yo no sé que sí tiene identificador 🙈
Voy a modificar ese elemento como si no existiera ese identificador.
Para hacer uso de las pseudo-clases tengo que añadir la pseudoclase precedida de dos puntos:
#top-menu li:first-of-type {
    margin-right: 140px;
}

Y el resultado es:

Como podemos ver en la captura de pantalla anterior solo hay se ha aplicado el margen derecho al primer elemento.
:last-of-type Modificar Sólo el Último Elemento
De la misma forma que en el ejemplo anterior podemos modificar solo el último elemento.
En esta ocasión usaremos :last-of-type de la siguiente forma:
#top-menu li:last-of-type {
    margin-right: 140px;
}

Y el resultado sería:

:nth-of-type Modificar el Elemento o Elementos que Queramos
Esta pseudo-clase es muy potente porque podemos hacer referencia a cualquier elemento concreto que queramos o crear patrones para que se seleccionen varios elementos.
Imaginemos que necesito modificar el segundo elemento de mi menú, para ello usaríamos nth-of-type de la siguiente forma:
#top-menu li:nth-of-type(2) {
    margin-right: 140px;
}


Crear patrones con :nth-of-type en Elementos Pares
Si en vez hacer referencia a un elemento en concreto queremos hacer referencia a un elemento cada n elementos lo haríamos así:
#top-menu li:nth-of-type(2n) {
    margin-right: 140px;
}

Y el Resultado sería aplicar margen al segundo elemento y al cuarto:

Crear patrones con :nth-of-type en Elementos Impares
De la misma forma podemos hacer referencia a los elementos impares de la siguiente forma:
#top-menu li:nth-of-type(2n+1) {
    margin-right: 140px;
}

Y el resultado sería:

Añadir Cambios de CSS a WordPress
Hemos estado haciendo cambios de CSS en el inspector de elementos. Y esto está genial para probarlo pero en cuanto refresquemos la página desaparecerán los cambios ya que estos cambios no están guardados dentro de la web, sino en nuestro propio navegador.
Para añadir los cambios a WordPress hay un montón de formas, desde modificar el fichero CSS de nuestra plantilla a usar el propio interfaz de WordPress.
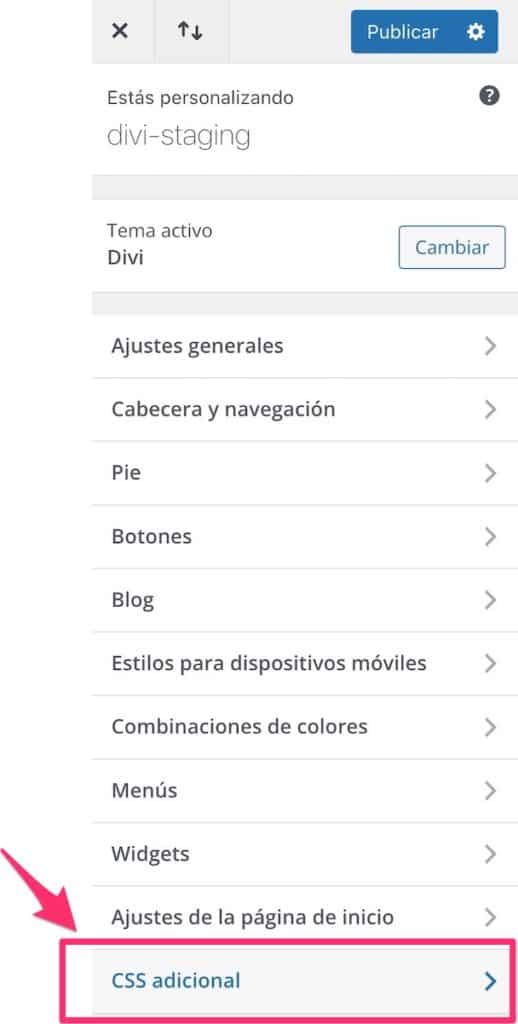
Nosotros vamos a usar el propio interfaz de WordPress, para ello vamos al menú Personalizar –> Añadir CSS adicional:

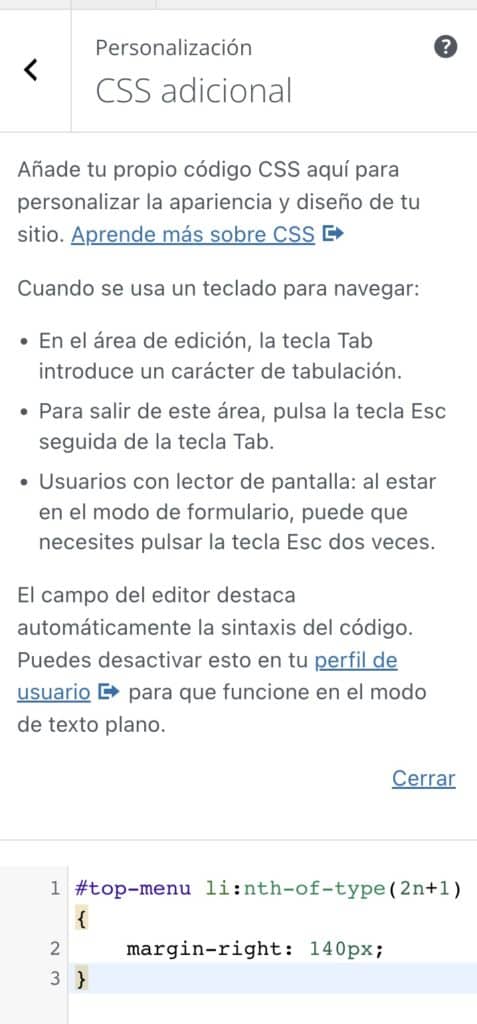
Hacemos click y llegamos a la pantalla donde tenemos que añadir el CSS:

Bonus Track: Añadir una Pseudo-Clase a un Elemento Hijo
Como hemos visto, estas Pseudo-Clases nos permiten modificar de forma sencilla elementos hermanos, es decir, elementos que están al mismo nivel.
Pero imaginemos que queremos cambiar el color de los elementos impares de nuestro menú.
El color no está definido en el elemento de lista (li) sino en el elemento enlace (a) que está dentro del elemento de la lista:
Si miramos el inspector de elementos:

Si nos fijamos, vemos que no podríamos crear el patrón de la siguiente forma:
#top-menu li a:nth-of-type(2n+1) {
    color: red;
}
Ya que cada enlace está en un li distinto todos serían el primer elemento y se cambiarian de color todos:

Lo que tendríamos que hacer es aplicar el patrón con la seudo clase al elemento li de la siguiente forma:
#top-menu li:nth-of-type(2n+1) a {
    color: red;
}

Dándonos como resultado lo que realmente queríamos:

Como hemos podido comprobar, no es el fin del mundo si no tenemos un identificador o una clase.
Gracias a las pesudoclases podemos acceder a casi cualquier elemento de nuestro HTML.
Espero que te haya gustado 😉