Hola chicos,
En este vídeo tutorial vamos a ver cómo podemos quitar el molesto cartel que aparece en la zona de administración en las plantillas y plugins de Mythemeshop cuando estamos trabajando y no hemos metido la licencia.
Si no lo haces, no es que deje de funcionar, las plantillas funcionan correctamente sin añadir el nombre de usuario, el problema es que cada vez que nos movemos por cualquier lugar del administrador de WordPress nos aparece este cartel:
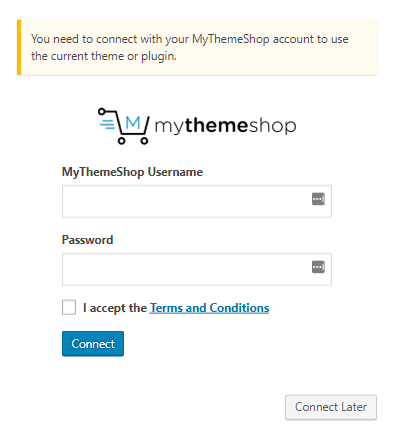
Como os digo, no interrumpe el funcionamiento de la plantilla o el plugin pero cuando recargo la página aparece el cartel, cosa que se hace muy molesto cuando estamos trabajando.
El encargado de que aparezca el molesto aviso es el plugin “Mythemeshop connect”:

Si desactivo el plugin y me voy a las opciones de la plantilla es cuando no funciona correctamente, por este motivo tenemos que tenerlo activo.
Este plugin es el encargado de las actualizaciones automáticas cuando tenemos la licencia y si no la tenemos para que te avise de que tienes que activarla.
¿Qué podemos hacer para deshacernos de ese molesto cartel?
Pues vamos a ello, ya que gracias a un pequeño truco lo podremos quitar 😉
Aquí tienes el tutorial en vídeo:
Suscríbete a mi canal:
Necesitamos hacer unos cuantos pasos para conseguirlo.
Lo primero que tenemos que hacer es instalar la plantilla hija, es decir que en vez de estar trabajando con la plantilla padre, vamos a modificar las plantillas hijas para que los cambios no los perdamos al actualizar en el futuro.
Vamos a Importar/Exportar:
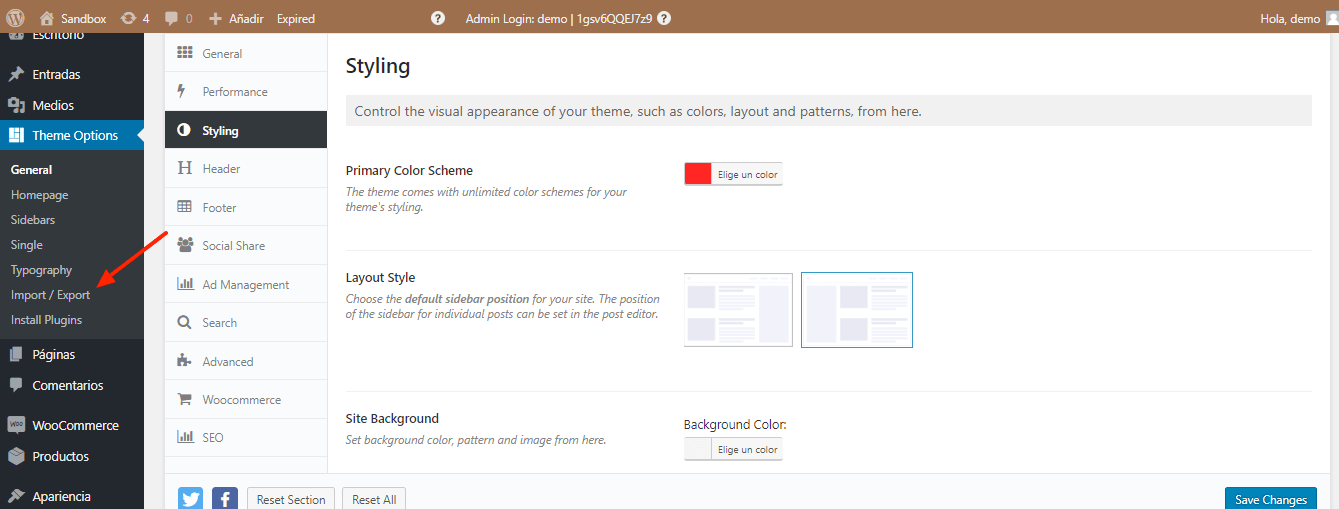
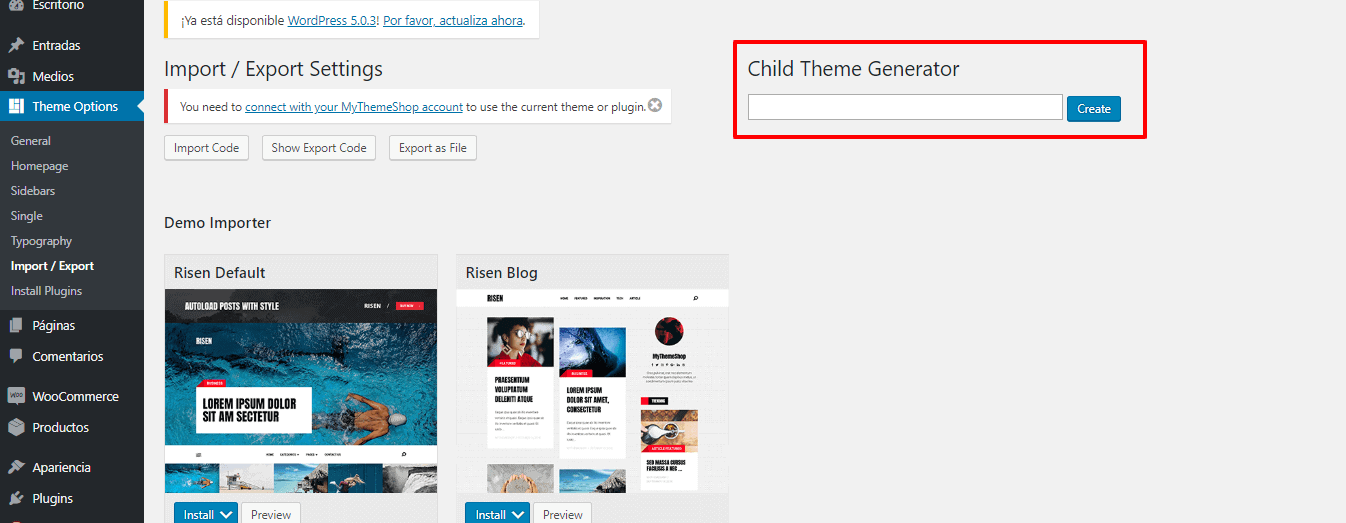
y en la parte superior derecha donde dice: “Child theme Generator” creo la plantilla hija.
Le voy a colocar child-risen, le doy a crear y acepto:
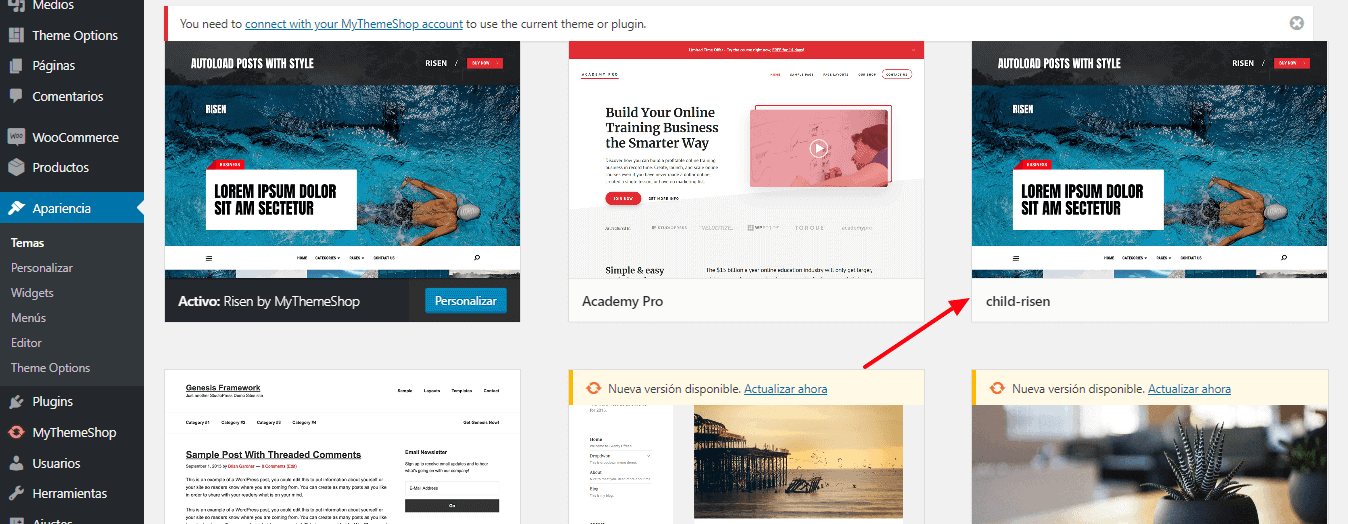
Vamos a Apariencia –> Temas, y activamos la plantilla hija que hemos creado:
Y ahora lo que tenemos que hacer es añadir en la carpeta que se ha creado llamada Child-risen, un fichero y modificar el funtions.php.
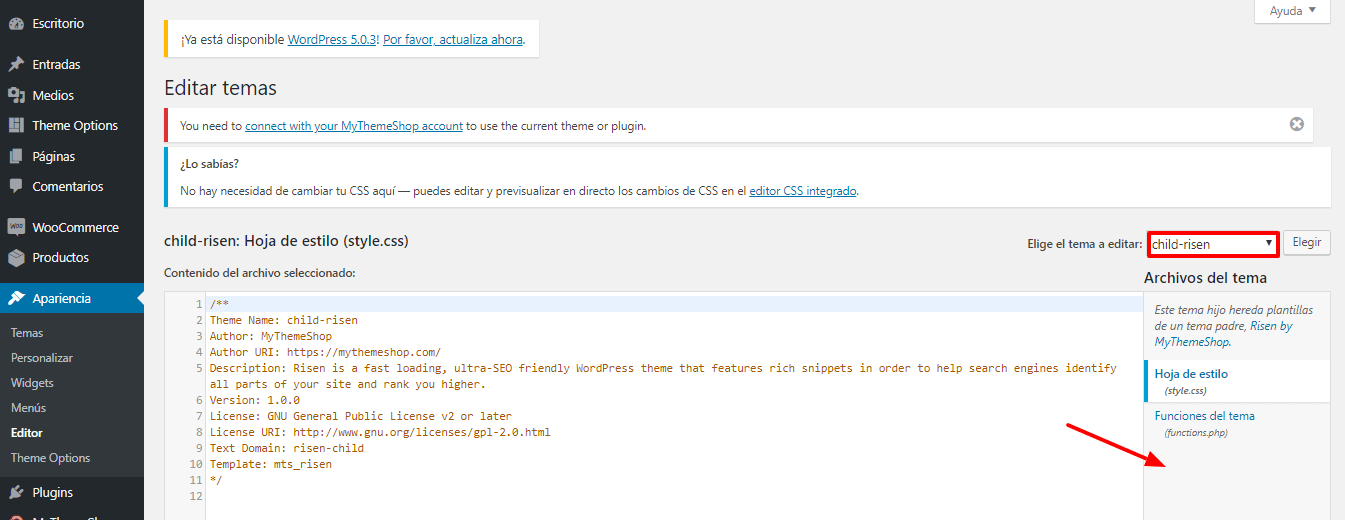
¿Qué fichero tenemos que crear?
Desde el FTP, nos vamos a la carpeta wp-content –> themes
Dento hay una carpeta que se llama Child-risen.
Aquí es donde vamos a insertar un fichero llamado admin.css que tiene el siguiente código:
div#mts-connect-modal {
    display: none !important;
}
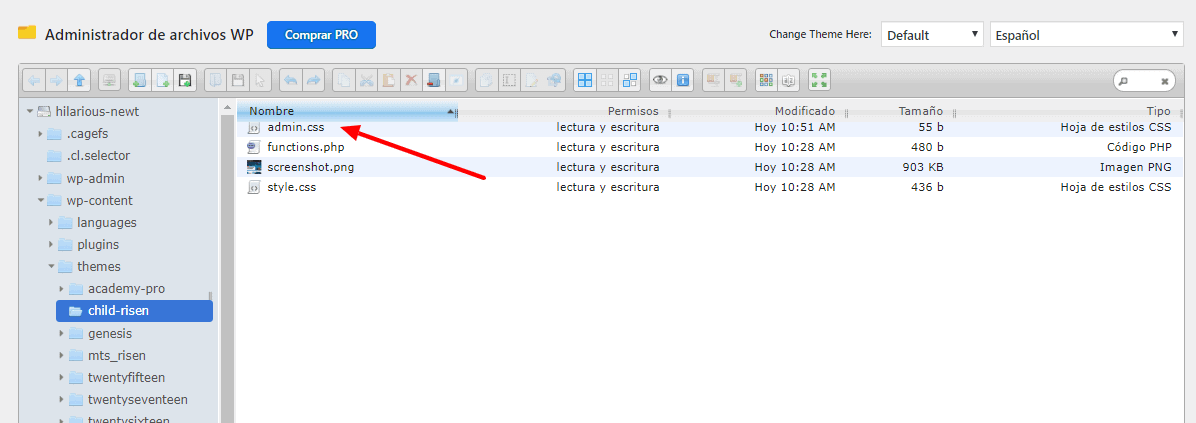
Una vez que yo lo tenemos añadido, recargamos, y podemos ver que ya aparece dentro del editor, el fichero admin.css

div#mts-connect-modal {
display: none !important;
}
Ya casi casi lo tenemos.
¿Qué tengo que hacer ahora?
Vamos al fichero Functions.php y le decimos que cargue el fichero css que hemos creado.
Para ello añadimos el siguiente código:
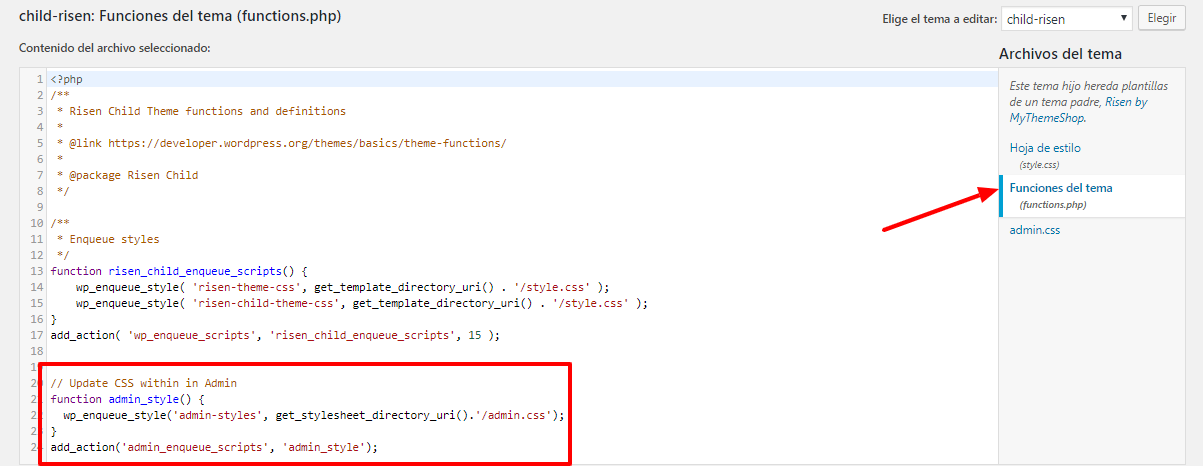
// Update CSS within in Admin
function admin_style() {
  wp_enqueue_style('admin-styles', get_stylesheet_directory_uri().'/admin.css');
}
add_action('admin_enqueue_scripts', 'admin_style');
Hacemos clic en Actualizar.
Como verás ya no aparece la molesta pantalla cada vez que nos movemos por la zona de administración de nuestra web:
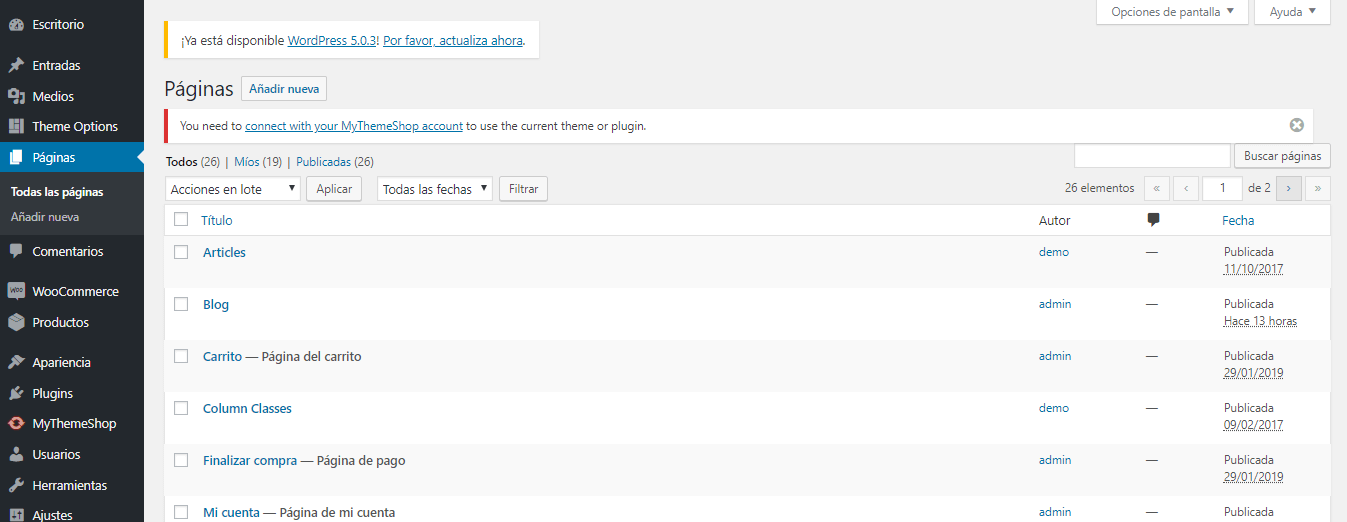
Ahora ya podemos navegar sin problemas, todo está perfecto 😉
Espero os haya gustado, nos vemos en el siguiente vídeo.