En el tutorial anterior aprendimos a crear la página principal de la tienda de WooCommerce con Elementor Pro.
En este tutorial veremos cómo podemos hacerlo con la ficha de los productos de nuestra tienda hecha con WooCommerce.
Al igual que hicimos para la página de la tienda empezaremos creando una plantilla.
Para ello vamos a Elementor —> Mis Plantillas —> Single Product —> Añadir nueva single product:
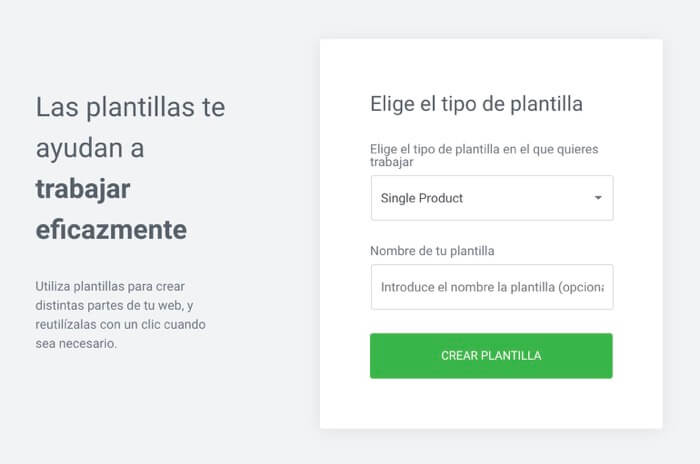
Ahora tenemos dos opciones:
- Elegir una plantilla predefinida
- Crear nuestra ficha de producto desde cero
Elegir una plantilla predefinida
Tan sencillo como elegir una plantilla entre las que nos aparecen:
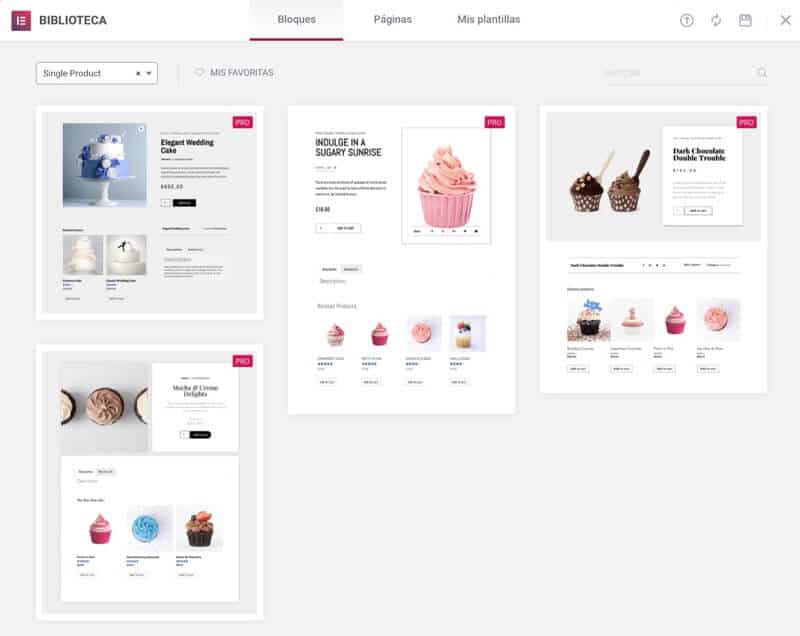
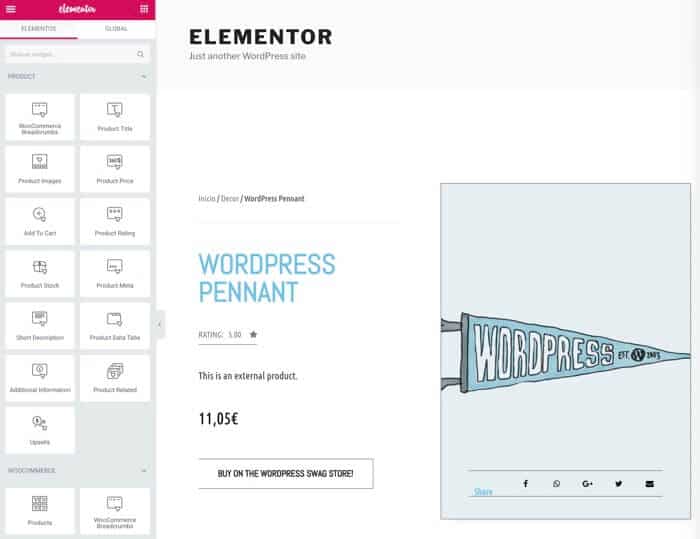
Una vez elegida entraremos en el editor visual de elementor con el diseño predefinido elegido:
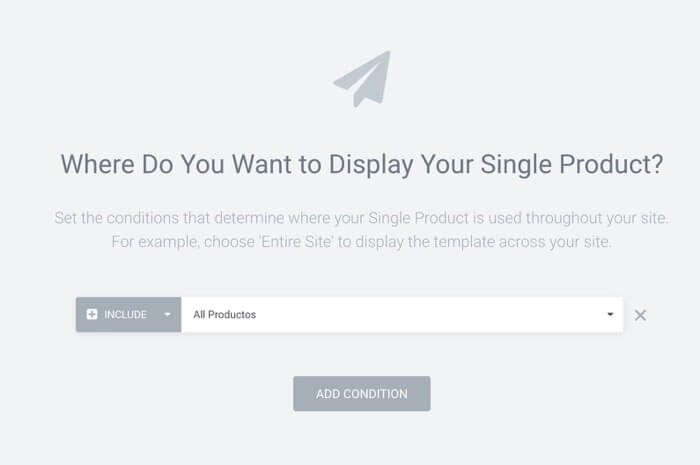
Si hacemos click en publicar nuestro diseño tenemos la posibilidad de añadir la condición para que la plantilla que estamos creando sea la utilizada en los productos:
Y listo, ahora si abrimos cualquier producto tendrá el nuevo diseño que hemos generado con la plantilla:

Crear nuestra ficha de producto desde cero
Al igual que podemos usar una plantilla predefinida para hacer nuestra ficha de producto podemos hacerla totalmente desde cero.
Para ello vamos a Elementor —> Mis plantillas —> Single Product —> Añadir nueva single product y ahora en vez de elegir una plantilla cerramos la página de las plantillas y llegaremos al constructor visual pero en esta ocasión estará vacío.
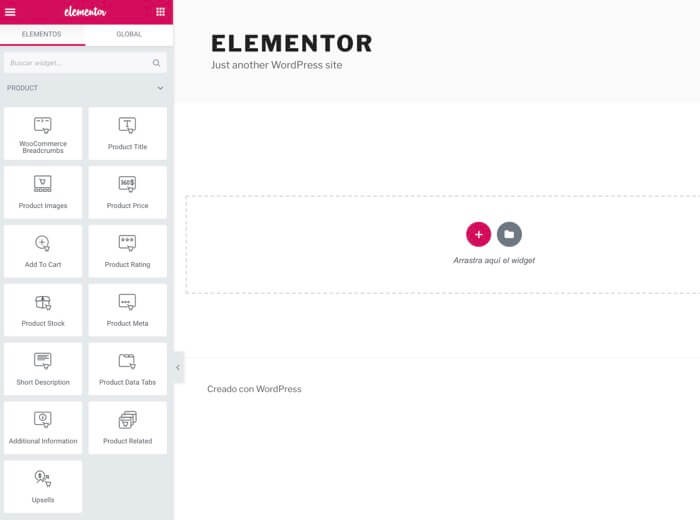
Si nos fijamos en la imagen anterior veremos a la izquierda todos los campos que podemos añadir a nuestra ficha de producto.
Antes de añadir campos lo que vamos a hacer es crear la estructura de nuestra ficha de producto, es decir, cuántas columnas queremos, en este caso voy a añadir 2 columnas para poner la imagen destacada del producto a un lado y los campos de texto al otro.
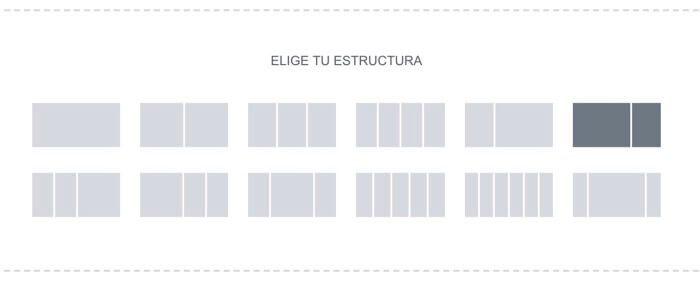
Una vez seleccionadas las columnas que queremos luego podemos cambiar su anchura simplemente arrastrando las esquinas y ajustando el tamaño al deseado.
Ahora tan sólo tenemos que empezar a arrastrar los campos deseados desde la izquierda al lugar que los queremos colocar:
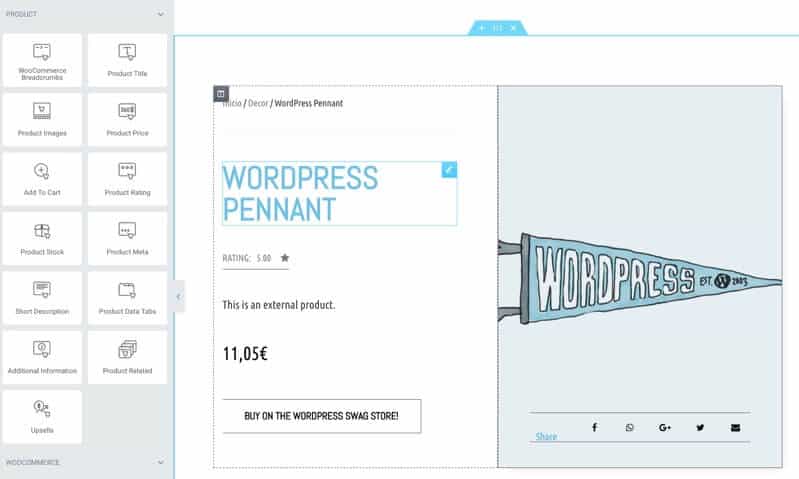
Los campos de producto que podemos añadir a nuestra ficha son:
- WooCommerce Breadcrumbs: Son las migas de pan para tener la ruta navegable del producto
- Product Title: El título del producto
- Product Image: La imagen destacada y la galería de fotos de nuestro producto
- Product Price: Precio del producto
- Add To Cart: Botón para añadir al carrito de la compra
- Product Rating: Valoración del producto de los clientes
- Product Stock: Número de productos en Stock
- Product Meta: Datos como el SKU o categoría del producto
- Short Description: Descripción corta del producto
- Product Data Tabs: Pestañas con la información del producto. Aquí está la descripción larga y las valoraciones de los clientes
- Additional Information: Información adicional
- Product Related: Productos relacionados con el producto de la ficha
- Upsells: Productos seleccionados en la opción productos vinculados
En el siguiente video puedes ver como funciona cada una de las opciones anteriores:
Suscríbete a mi canal:
Espero que el tutorial os haya gustado 🙂