Subscribe to my channel:
Hello guys,
In this video we are going to see how to upload a website to our hosting from local.
It is a question that you ask me many times and I hope that this tutorial is useful.
To do this I do not use any plugin since my intention is that you know at all times what happens you have to do.
I hope you like it 😉
This tutorial will help you if your server uses cpanel.
The first step is to make a local backup copy of our website so that it can be uploaded to our server.
A WordPress website consists of two parts, files and a database.
To backup the database I am going to use phpMyAdmin. In almost all solutions to work locally it is installed.
I work with DesktopServer and to access PHPMyAdmin I just have to go from localhost to Tools –> PHPMyadmin:

And when we click on PHPMyadmin – MySQL Administration we arrive at the screen:
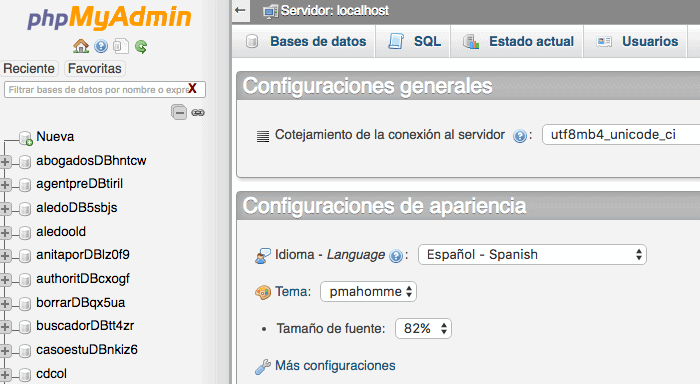
If you have several websites installed locally, you will find several databases, so to know which database is the one we need, we have to see it in the wp-config.php file, in the line where it says:
define('DB_NAME', 'databasename');
In the case of the example:
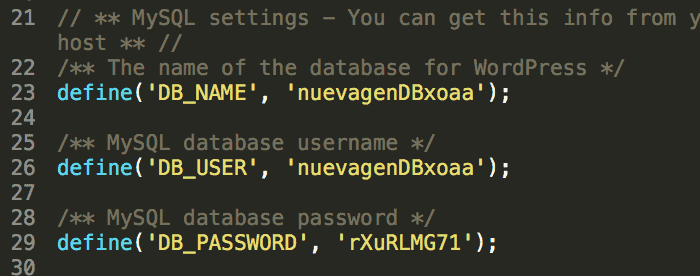
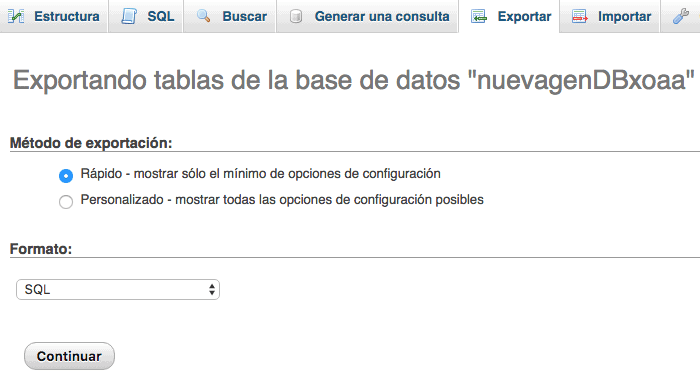
Now that we know that the database is called newgenDBxoaa I go to PHPMyAdmin and select that database and go to the "Export" column and export the database:
Once we have the database backup we are going to backup the files, but not all of them, we are only going to backup the wp-content folder.
Really, of all WordPress, the only thing that is modified is:
- .htaccess
- wp-content
- wp-config.php
The rest is common to all websites made with WordPress
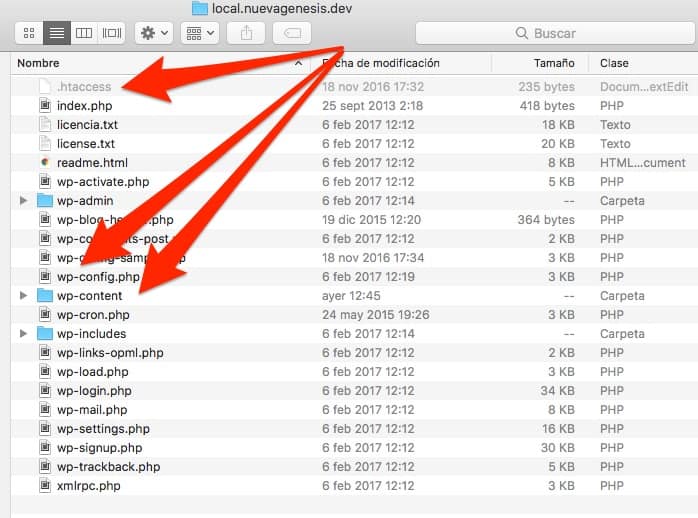
In our case we make a backup copy only of the wp-content folder and we compress it in a zip so that it is easy for us to upload to the server.
Now we enter the cpanel of our server to install WordPress thanks to the installer that is called QuickInstall:
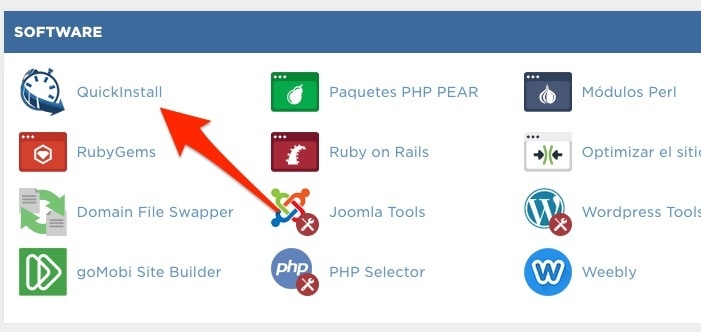
We install WordPress with this tool in a couple of clicks and once installed we will have a WordPress page as it comes standard.
Now that we have WordPress installed, we go to the file manager and navigate to the folder where WordPress is installed:
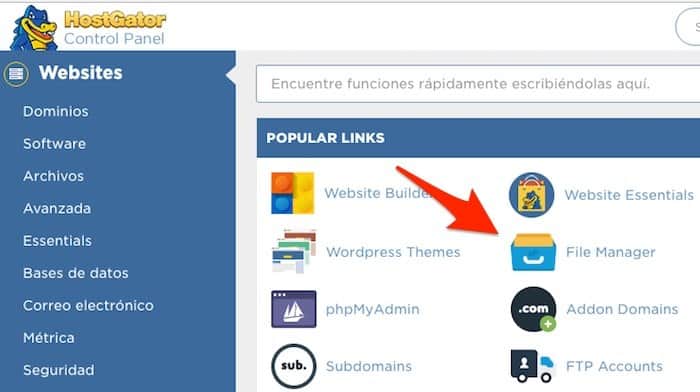
And we delete the wp-content folder that comes by default
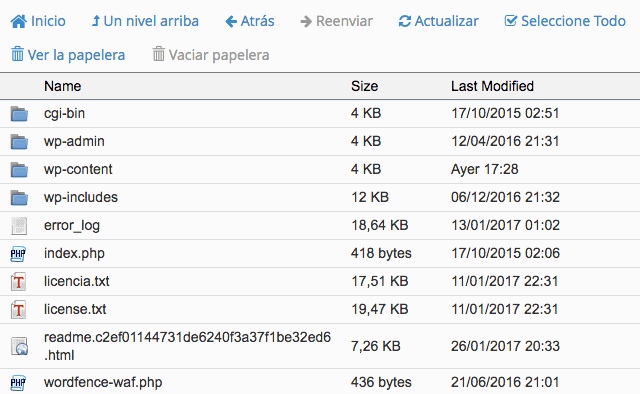
And now we will upload (from the upload file) the compressed file of our wp-content folder that we previously made backup.
Once the compressed file has been uploaded, we select it and decompress it from the "extract" button.
Now that we have the files uploaded and updated with the version we had locally, we have to do the same with the database.
We are going to proceed the same as we did locally, first we see the name of the database thanks to the wp-config.php file.
From the File Manager we select this file and click on "View". This way the file will open and we can see the name of the database.
Now from cpanel we go to PHPMyadmin and select said database.
Backup before deleting anything 😉
Once the database is open, we select all the tables and delete them:
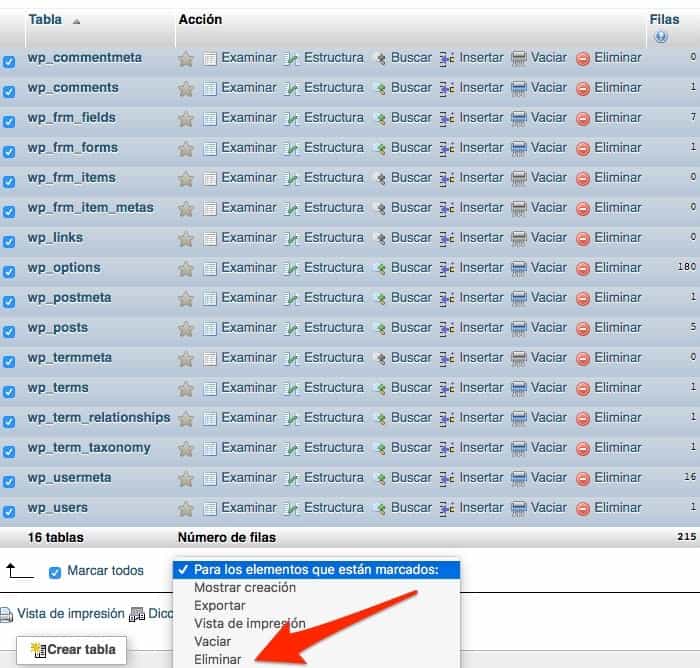
Now that we have the empty database, we go to the import button and upload the backup database that we made locally.
We are one step away from having our website uploaded.
Now we have to click on the wp-options table and change the urls of the "siteurl" and home options, changing the url of the local page to the domain we have.
If everything has gone well you have the web working on the internet.
Just one more thing, it is possible that some images still point to the local web address in the database.
To change all the old urls to the new ones at once you can use the file in the premium zone, in plugins called "Modify Database Move Web".
You upload the file to your hosting and follow the steps that I indicate in the video to be able to use it.
Be very careful with the use of this file since any error can leave your website unusable.
I hope you liked the tutorial 😉
regards
Oscar