En este tutorial te explicaré como crear filtros con atributos de WooCommerce pero antes te voy a explicar que son los atributos y su diferencia con las variaciones.
Reconozco que siempre que intento explicar la diferencia entre atributos y variaciones en WooCommerce lo paso mal 😅.
Creo que las variaciones y los atributos son dos de las opciones más complicadas de WooCommerce.
Aquí tienes la tabla de contenidos por si quieres ir directamente a crear los filtros:
Diferencia entre Atributos y Variaciones
Atributos: Los atributos son características de los productos que puedes usar para:
- Crear filtros en tu web por esas características
- Crear variaciones de productos
Pero, ¿Qué son las variaciones de productos?
Gracias a las variaciones de productos podemos hacer que los atributos se conviertan en opciones distintas que el cliente puede elegir de un producto.
Las variaciones típicas son la talla y el tamaño de una prenda.
Por ejemplo, imaginemos que vendemos una camiseta que puede ser Roja, Amarilla y Azul y a su vez puede ser Pequeña, mediana o grande.
Podemos crear un atributo que sea Talla y otro atributo que sea color.
Si solo creamos los atributos podremos crear filtros con esas características, pero si queremos que un usuario pueda elegir entre las diferentes tallas y tamaños tenemos que convertir esos atributos en variaciones de productos.
Por cierto, un plugin muy útil para hacer más atractivas las variaciones en la ficha de producto es Variation Swatches for WooCommerce. Este plugin cambia el desplegable para elegir colores por botones de los colores que quieras.
Por lo que podemos crear atributos sin necesidad de crear variaciones si lo único que queremos es que el cliente pueda filtrar en nuestra tienda pero en cambio no queremos que se generen variaciones de producto.
Un caso de uso de crear atributos sin crear variaciones sería si queremos que los usuarios puedan filtrar por marca de producto, tipo de tejido o cualquier otra característica de nuestro producto.
Diferencia entre Atributos y Categorías
Puede que te estés preguntando, ¿y para que quiero crear atributos para crear filtros si lo puedo hacer con las categorías de productos?
Y entiendo tus dudas, yo mismo a veces las tengo 🙃
Imagina que tienes una tienda de productos de higiene y quieres categorizar tus productos por tipo de uso, entonces crearás categorías del tipo: Champús, Geles, Hidratantes, Exfoliantes etc
Pero es muy probable que sea muy útil para el usuario poder filtrar por tipo de ingredientes o de principios activos. Por lo que una buena idea sería crear atributos con sus componentes. Como por ejemplo Aloe Vera y otros componentes.
¿Podrías crearlo como categoría? Sí pero sería confuso crear categorías con distintos criterios.
Crear Filtros con Atributos en WooCommerce
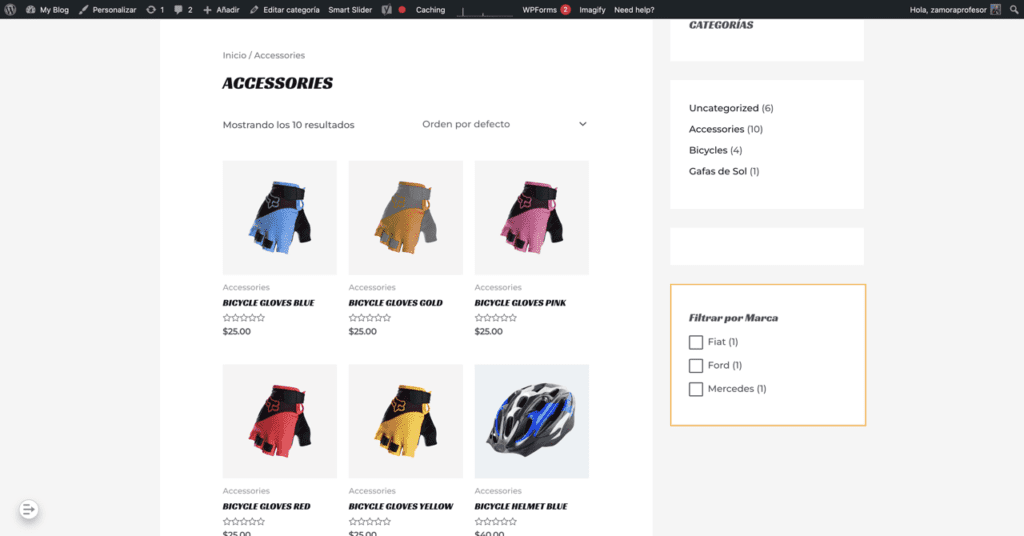
En este tutorial aprenderemos a crear un filtro en nuestra web para que los clientes puedan filtrar por las características que queremos:
Crear Atributos
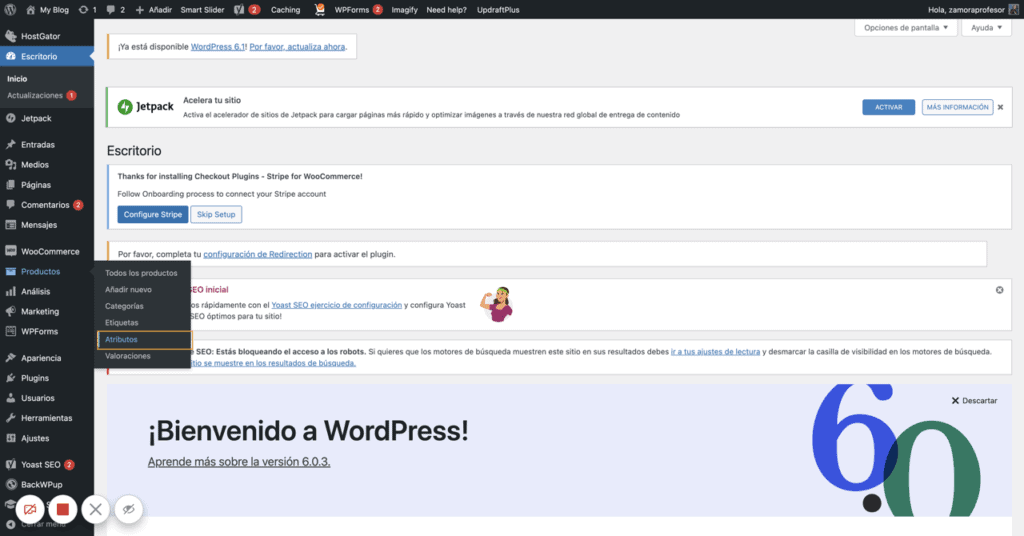
Lo primero que tenemos que hacer es ir a Productos –> Atributos y crear el atributo que necesitamos:
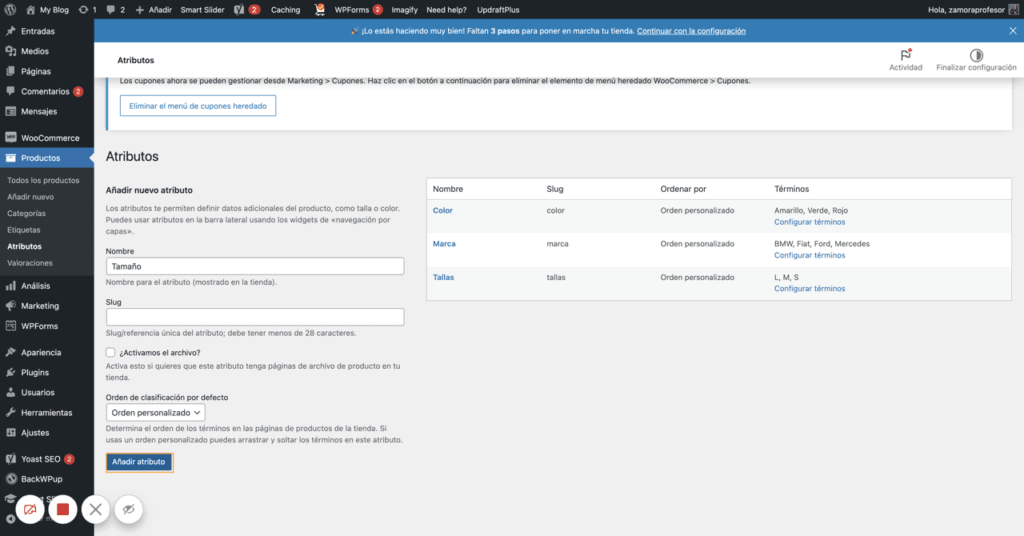
Dentro de Atributos creamos nuestro atributo o filtro general que queremos crear:
Una vez creado el atributo lo que tenemos que hacer es crear los términos dentro de ese atributo. Esto se hace desde dentro de la opción Configurar Términos:
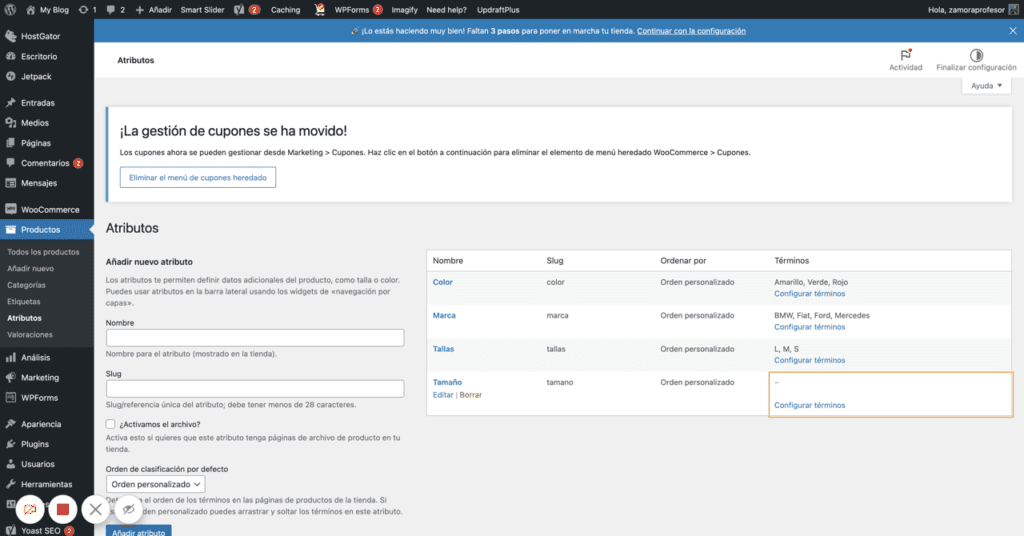
Los términos son cada una de las opciones que vamos a usar para nuestros filtros:
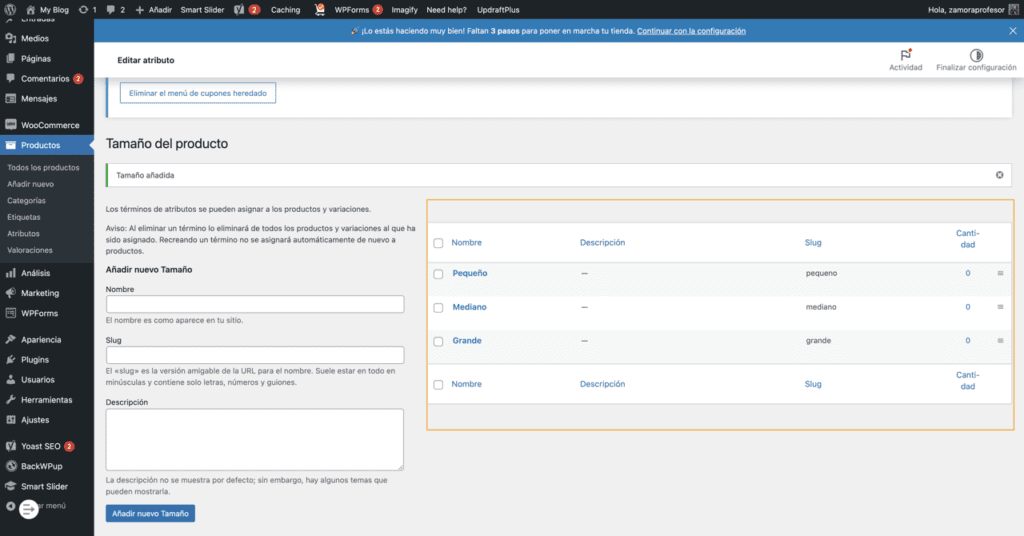
Una vez hecho tenemos que ir a nuestros productos, editarlos y añadir el atributo y los términos o filtros que necesitemos.
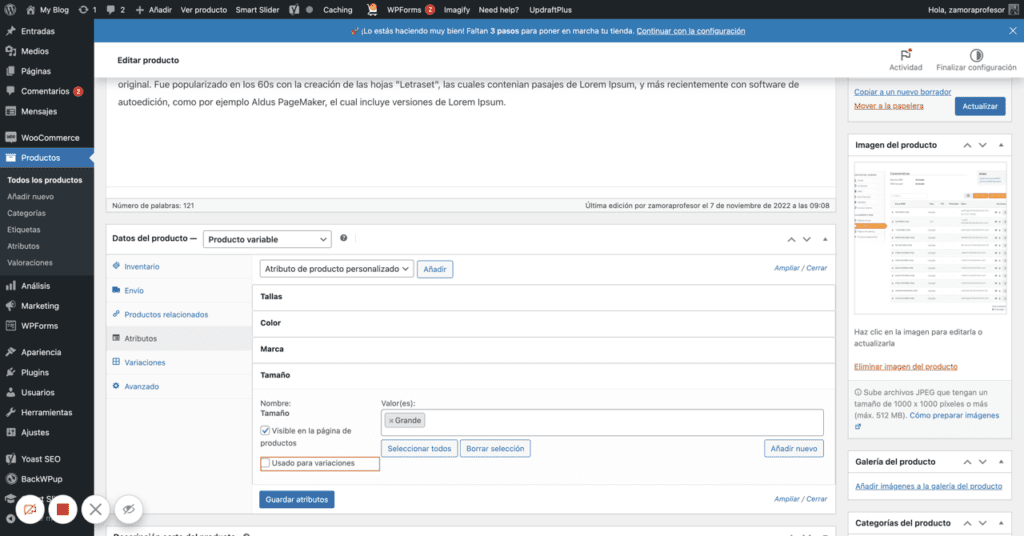
Editamos nuestro producto y bajamos hasta la zona Datos del producto y seleccionamos Atributos:
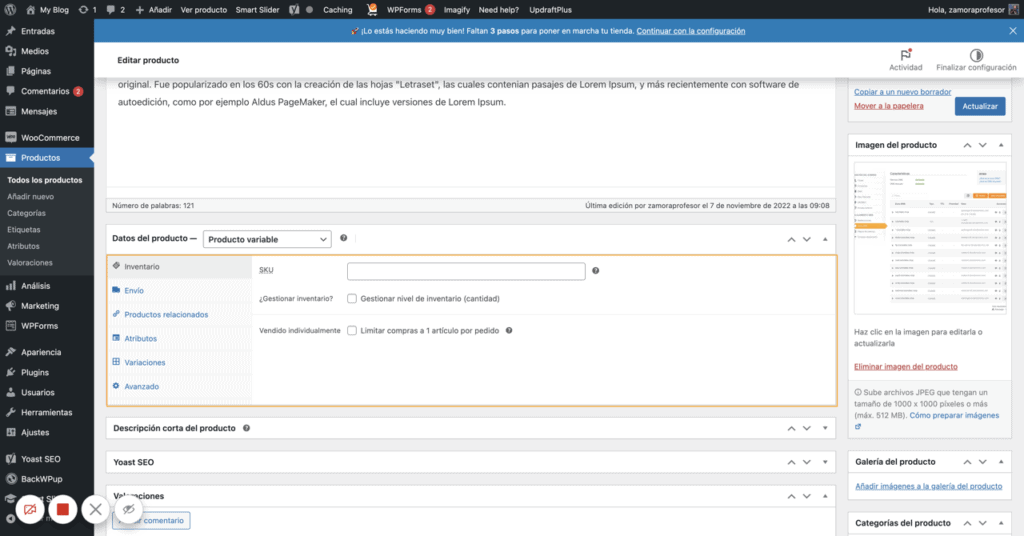
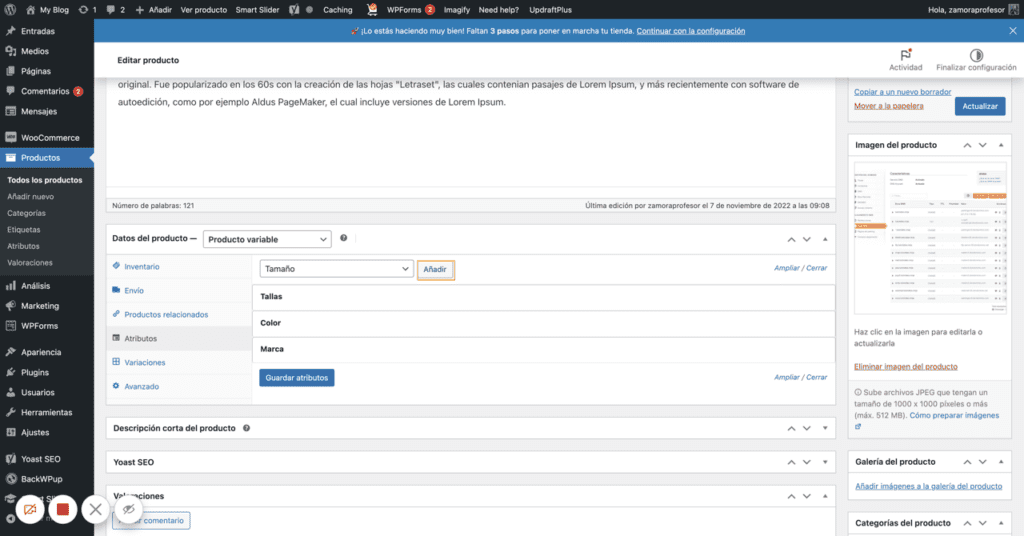
Ahora añadimos nuestro nuevo atributo:
Una vez añadido el atributo, elegimos el término que vamos a usar como filtro:
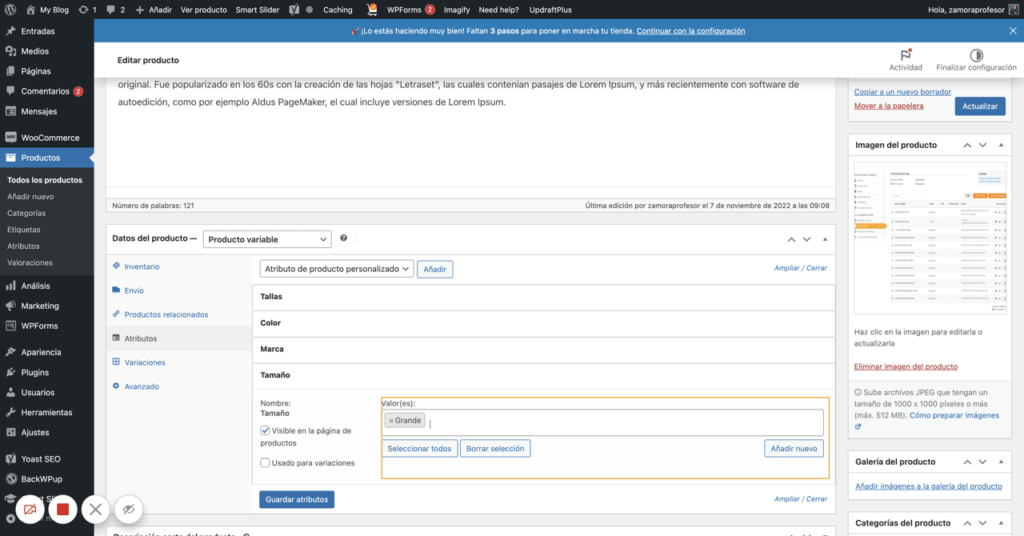
Importante: No marcaremos la opción Usado para variaciones si no queremos que se convierta en una opción por la que queremos que el cliente pueda elegir. (Esta opción solo aparece si estamos creando un producto variable)
Añadir los filtros a la tienda
Ahora que ya tenemos creados los filtros tenemos que añadirlos a nuestra tienda.
Esto lo haremos gracias a los Widgets.
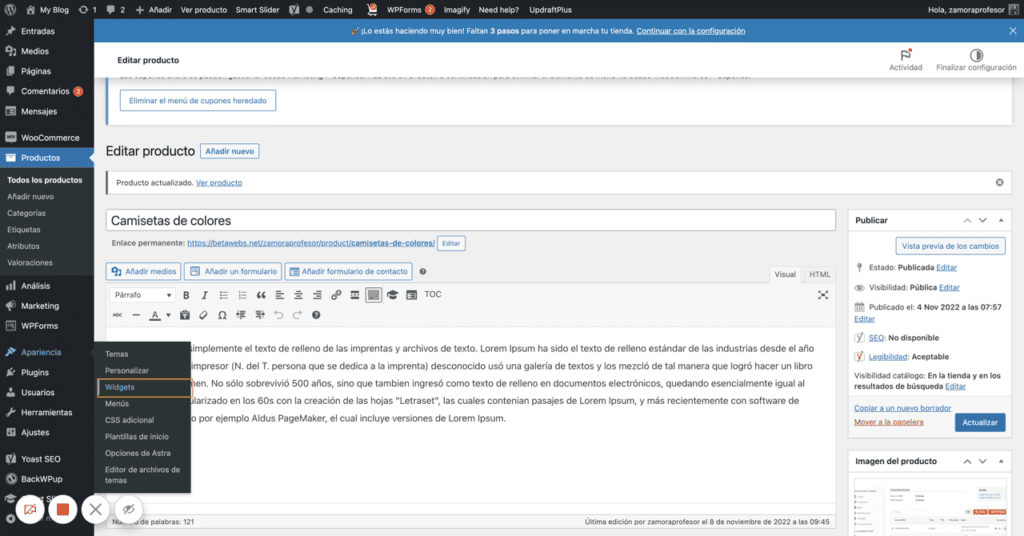
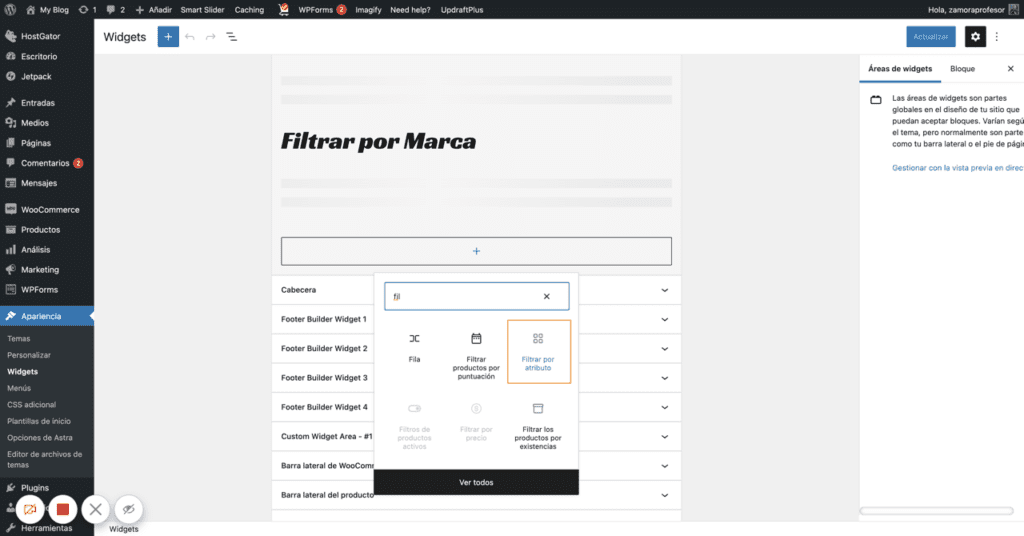
Nos vamos a los widgets y añadirmos el Widget Filtrar por atributo:
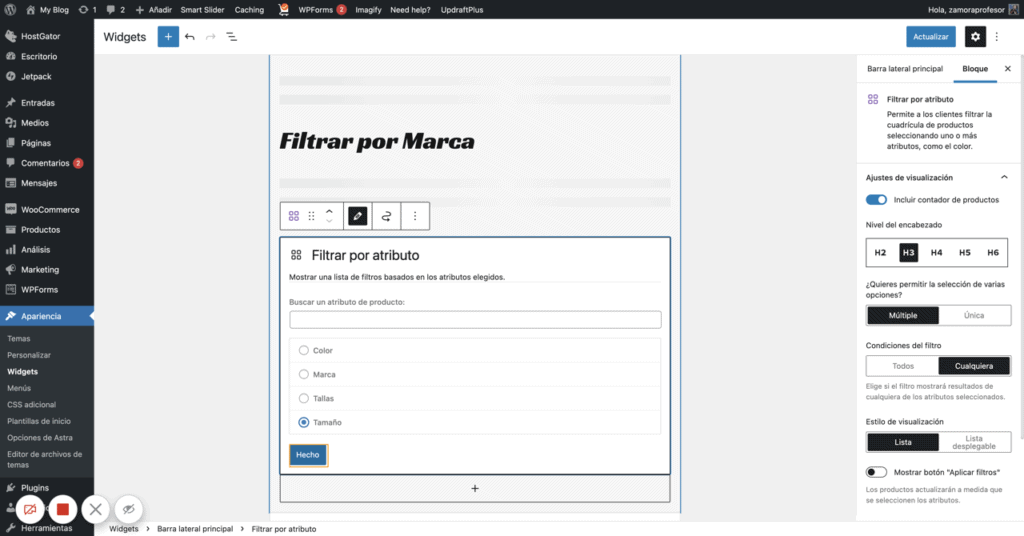
Y elegimos el término por el que queremos filtrar:
Si todo ha ido bien, ahora puedes ir a tu tienda y verás los filtros plenamente funcionales:
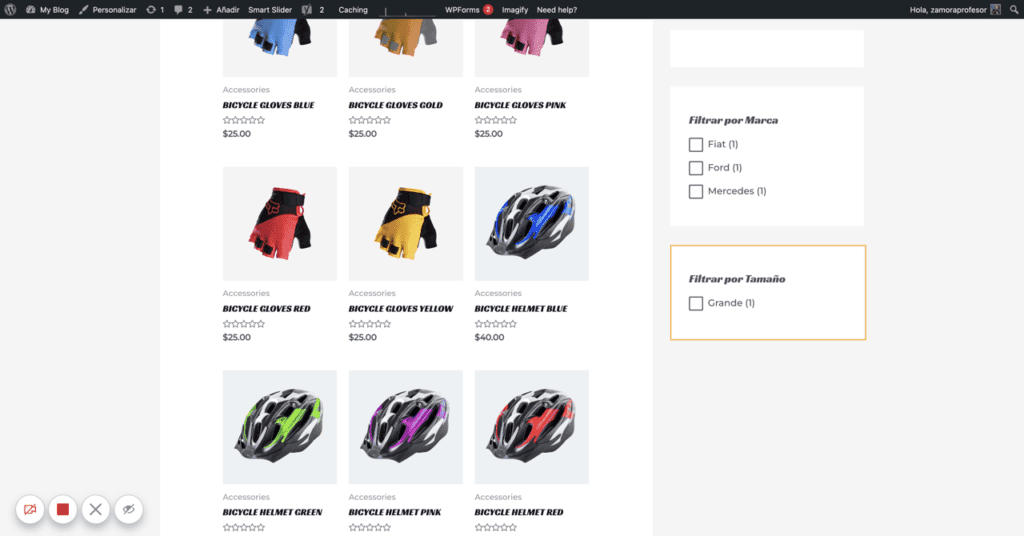
Si has llegado hasta aquí ya tienes filtros con los atributos de tus productos. Todo ello sin añadir plugins adicionales.
También podemos añadir un widget para ver que filtros tenemos activados
Mejores plugins para crear Filtros Avanzados con WooCommerce
Si necesitas funcionalidades más avanzadas existen extensiones o plugins que mejoran la funcionalidad de filtros avanzados.
Aquí tienes algunos de ellos.
Espero que este tutorial te haya sido útil