Hello guys,
In this tutorial I am going to teach you how to make a health, weight loss, fitness or lifestyle website.
Here is the video tutorial:
Subscribe to my channel:
And now in text step by step 😉
The Wellness template from Studiopress is ideal for these themes and the best of all is Genesis 😉
The template costs $99,95 but if you are a student of mine you can download it for free from the premium zone of this website 😉
If you want to see a demo of how it would look, you can do it here: studiopress.com/wellness
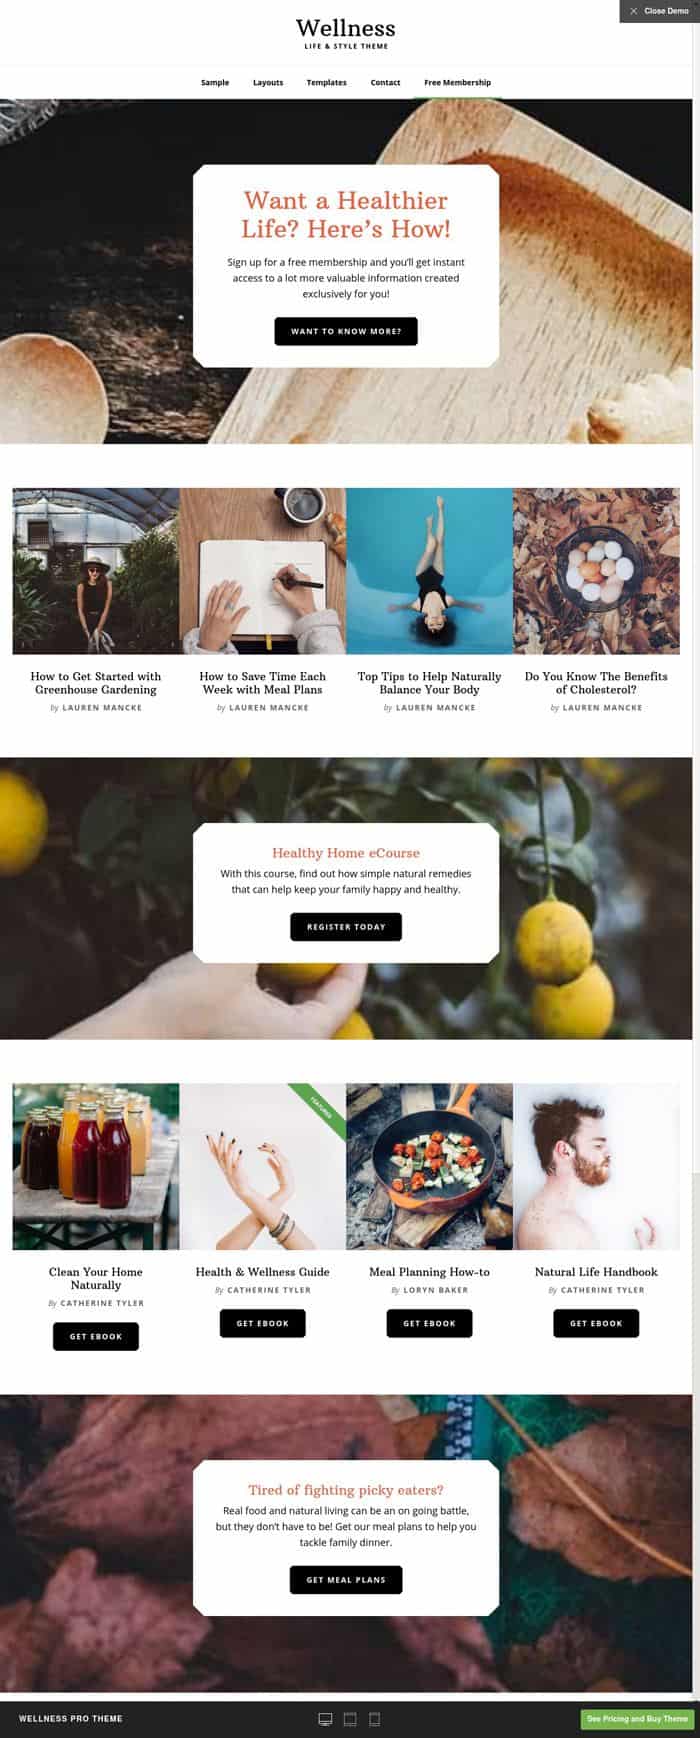
If you sell books or digital products, this template is prepared for it since it has product sheets thanks to the plugins that we are going to install later.
It's a very clean template, with white backgrounds and large photos.
The first thing we need is to have wordpress installed on our server. If you do not know how to get to this point or you need to know WordPress better, you have a course for it in the Premium Zone. If you already have wordpress let's continue 😉
Before we can install the Wellness template we need to install the parent template Genesis. Remember that we are using a Genesis child template.
Once installed, we activate it, then we will activate the Wellness daughter template.
To install it you just have to go to the WordPress menu Appearance –> Themes –> Add New –> Upload Theme and click on install Now:
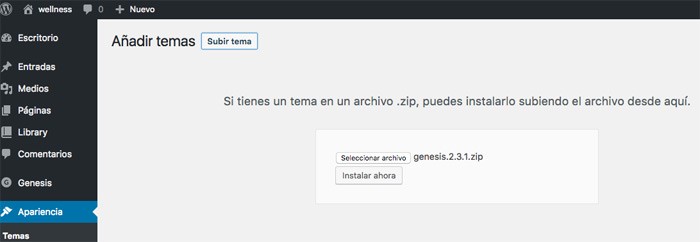
Once installed, activate it.
Don't worry about getting the error «Please Activate a Genesis Child Theme: We've noticed you are using the Genesis Framework parent theme alone. We strongly recommend you run a Genesis child theme with it (we even have a free theme you can use). For more information, see our article at https://www.studiopress.com/genesis-always-use-child-theme/»
That error is a warning that we are using the parent Genesis template without using any child templates.
We will change this later.
Now we are going to install several plugins that are needed for the proper functioning of the web, they are free and are the following:
Remember that to install the plugins we just have to go to plugins –> Add New and search for the plugin we want to install:
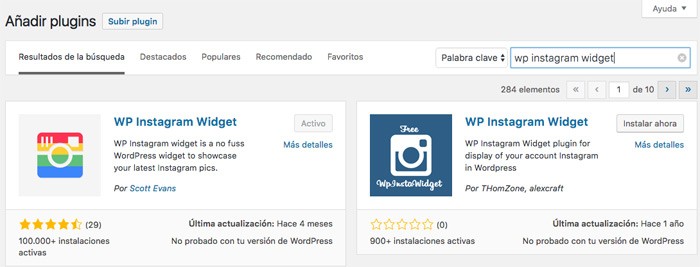
And always after installing a plugin, activate it, because if you don't activate it you can't use it 😉
Now we can install the Wellness template, that is, the daughter template of Genesis.
To do this we just have to go to Appearance –> Themes –> Add New –> upload theme and install and activate the Wellness template.
Although we already have the template installed, the result is still not that of the demo.
We still need to add test content and configure the content of the pages, menus and widgets
Import Theme Wellness demo content:
This template comes prepared with test content. In this way we can see the final result with demo content specially prepared for the template.
It is recommended to use it since this way you can see the final result that the creators of the template want and when you learn to use it you already add your own content.
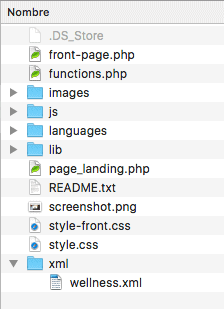
To install the demo content we have to unzip the template and look for the Wellness.xml file that is in the XML folder as you can see in the following image:
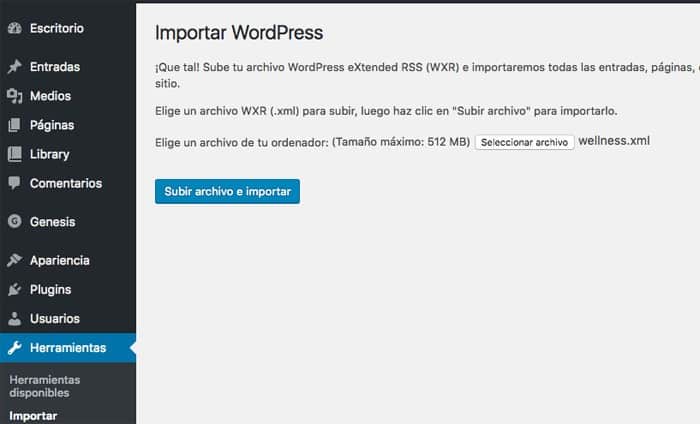
Now that we have located the xml file that we are going to import, we proceed to do it. To do this, within the WordPress administration panel, go to the Tools menu –> Import –> WordPress –> Install importer –> Run importer and upload the file that we want to import as you can see in the following image:
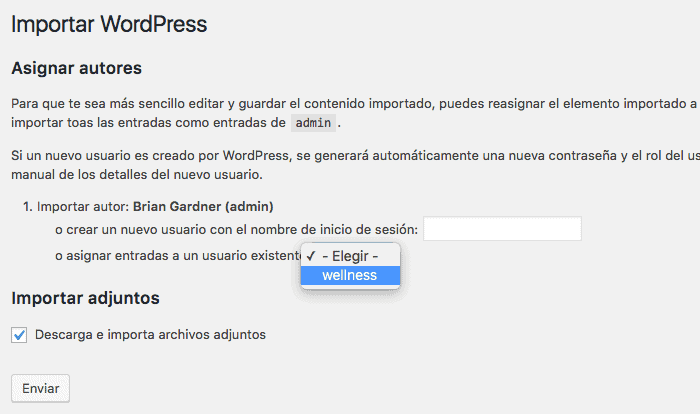
It will ask us which author we want to be the one of the imported content, we select our user and check the box "Download and import attached files" and click send:
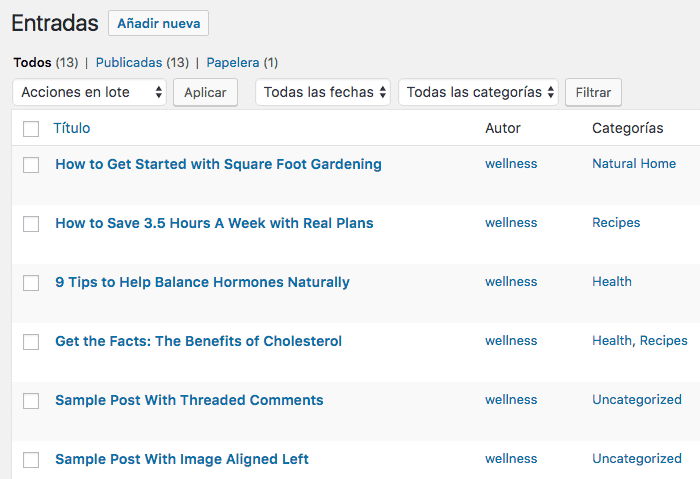
If everything went well you will see that there is a lot of content created on your website, for example, if you go to posts you can see it:
Now we need to place all the content that we have imported so that the web appears as in the demo.
To do this we are going to configure the menu first and then the Widgets.
Configure the Menu
A demo menu has also been imported so we have it very easy.
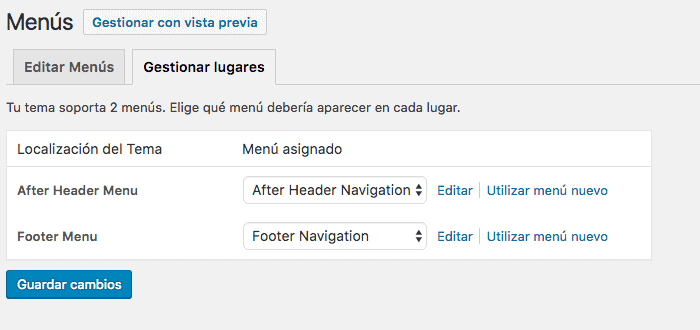
We go to Appearance –> Menus –> Manage Places and in the After header Menu option we select the After Header Navigation menu and in the Footer Menu location the “Footer Navigation” menu as you can see in this screenshot:
Once this is done we already have the menu placed on our website:

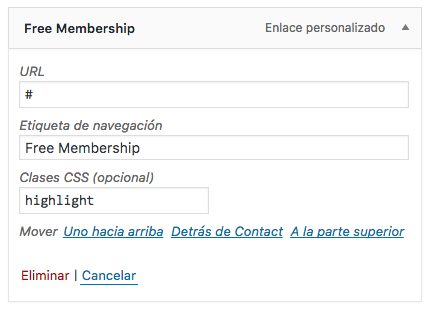
If you look at the last item there is a green line below it. To highlight a menu item in this way we have to do it from the menu configuration.
At the top it says "Screen Options" we have to display it and select CSS classes:

Thanks to selecting this option, now in each menu item we have the possibility of adding a class and thus marking any item as highlighted.
To do so we display any menu item and in css classes we put highlight and that way it will appear with the green line under the item.
Configure Widgets
Now we get down to work with the part that will format our website.
The main page is completely made up of widgets to get the final result. If we go to Appearance -> Widgets we find the following:
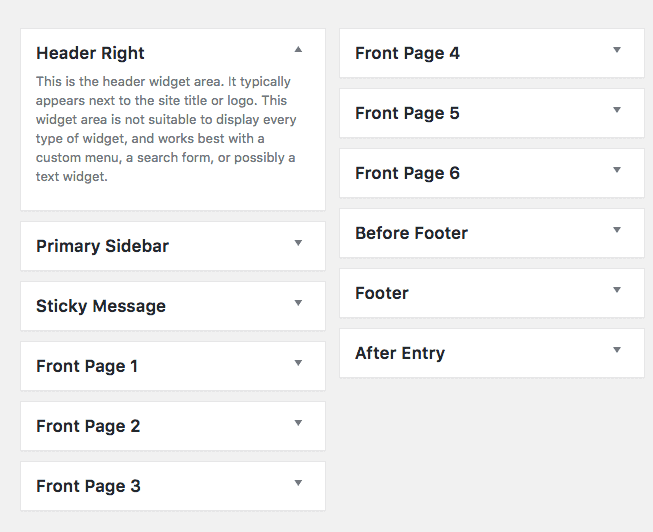
All widget zones that start with "Front Page" with zones that belong to the main page and as you can see we have 6 zones. If we do not select any widget, our main page will be the latest blog articles. If we add a widget, the latest posts will no longer appear, but rather what we add to those widgets.
Let's configure each and every one of the zones
Front Page 1
The final result of this area is as follows:
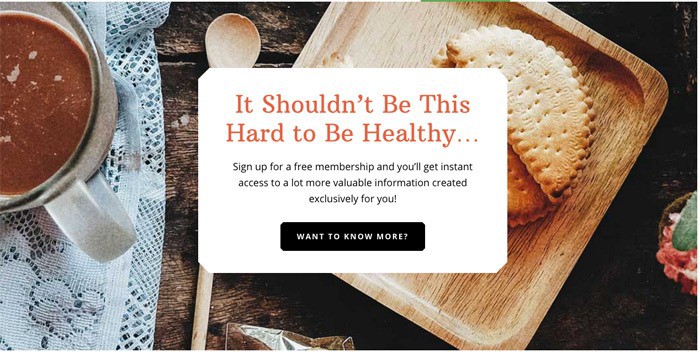
You can see that there is a background image and a text box. We will add the text from the widget but the image is not done from here.
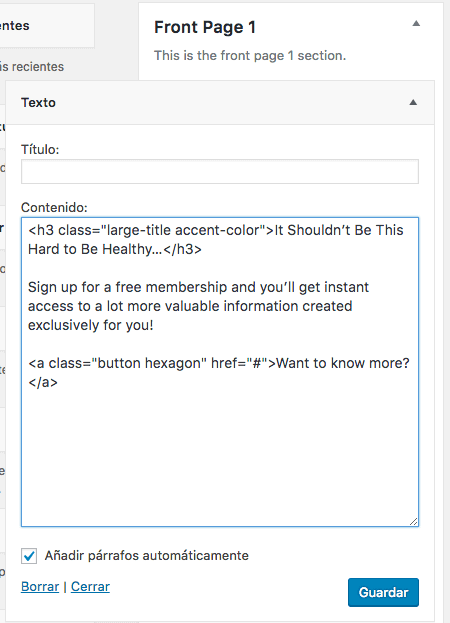
First we are going to add the text box, for this we add a text widget with the content we want, I share a test one with formatting and everything:
<h3 class="large-title accent-color">It Shouldn’t Be This Hard to Be Healthy…</h3>

Sign up for a free membership and you’ll get instant access to a lot more valuable information created exclusively for you!

<a class="button hexagon" href="#">Want to know more?</a>
We mark the option "Add paragraphs automatically"
a screenshot of this widget:
As I have mentioned, the background image is configured elsewhere. To configure it we go to Appearance –> Customize –> Front Page Backgrounds images and we find the following:

Here we have to add 3 images, one for each widget with the same numbering, that is, for the Front Page widget 1 it is the image "Featured Section 1 Image", for the Front Page widget 3 the image "Featured Section 3 Image" and for the widget Front Page 5 the image «Featued Section 5 Image»
In the example they are the images that come in the demo but if you want to add your own that are 1800 × 1000 pixels in size.
Let's go back to widgets 😉
Front Page 2
The final result of this area is as follows:
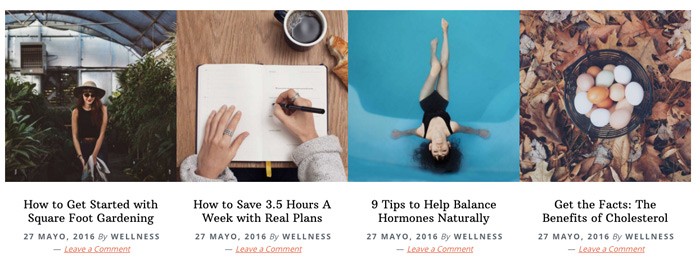
In this area we are going to add 4 identical widgets with a small modification. The widget we are going to add is “Genesis – Featured Posts” and we mark the options “Show Post Title”, “Show Post info” and “Show Featured Image” with the size “Author pro image 640×640”
Here's a screenshot of what it would look like:
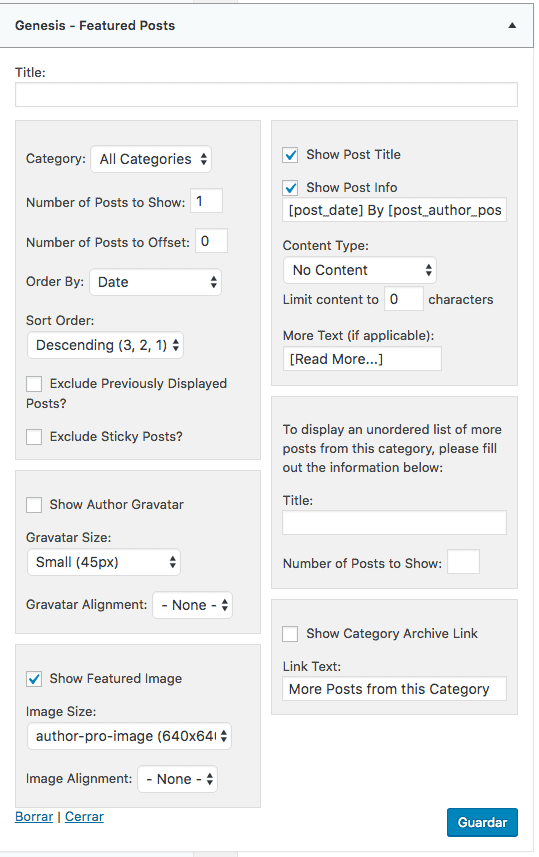
We added another 3 identical widgets (4 in total) in this area with a single modification to the “Number of Posts to Offset” field. In the first widget leave it at 0, in the next one at 1, in the next one at 2 and so on. In this way, different articles will appear in each of them.
Front Page 3
The result of this area is as follows:
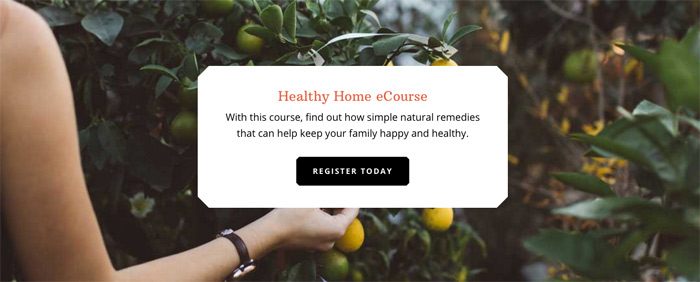
To achieve this we would do it in the same way as in the Front Page 1 area
Front Page 4
The result of this area is as follows:
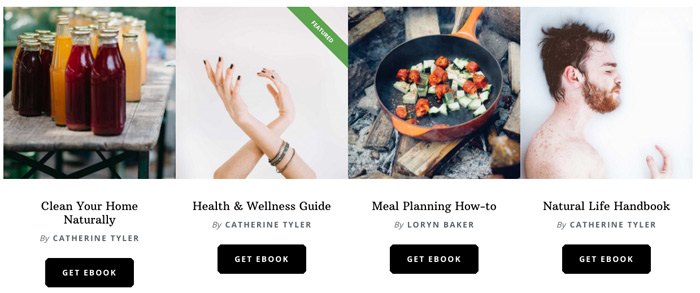
To achieve this we are going to do it very similar to what we have done in the Front Page 2 area but with the Genesis Author Pro – Featured widget
We are going to add 4 identical widgets but selecting a different book in each case.
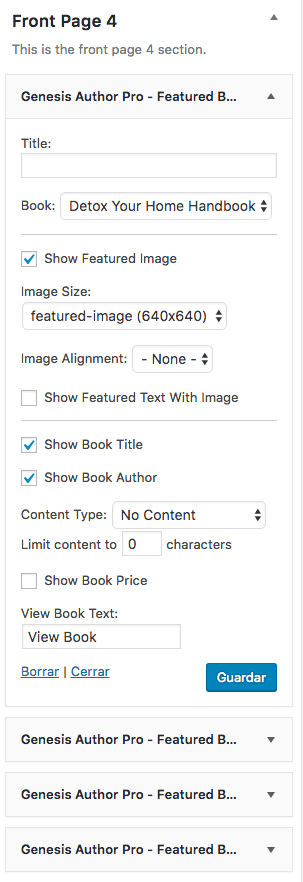
We have to mark the following options:
Book: the book we want
Show Featured Image with Featured-image size 640×640
Show Book Title
Showbook Author
Content type: No content
You can see it in this image:
Front Page 5
The result of this area is as follows:
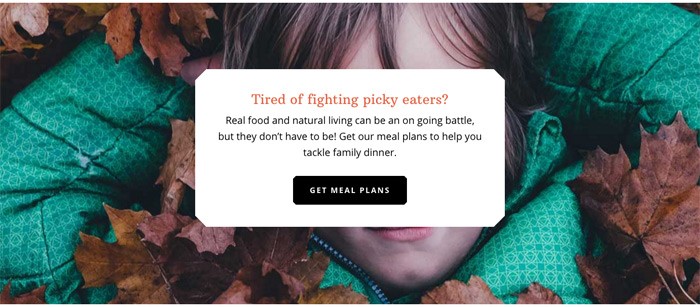
To achieve this we would do it in the same way as in the Front Page 1 area
Front Page 6
The result is as follows:

We achieve this by adding a text widget with the following content inside:
<div class="one-fourth first">
<img class="avatar alignleft" src="http://demo.studiopress.com/wellness/files/2016/06/gracie.jpg" />
</div>

<div class="three-fourths">
<blockquote>For someone who was convinced that it was easier and less expensive to buy items than put effort into making them with all natural ingredients, this website has been a complete life change! I feel so amazingly good! I sleep better, I have way more energy, my skin is bright, my smile is whiter and overall I FEEL GOOD! I am so thankful for this blog! I access it daily for recipes, information and ideas!

<cite>Gracie, New York</cite>
</blockquote>
</div>
Before Footer
The result is as follows:

In this area we will add the instagram widget.
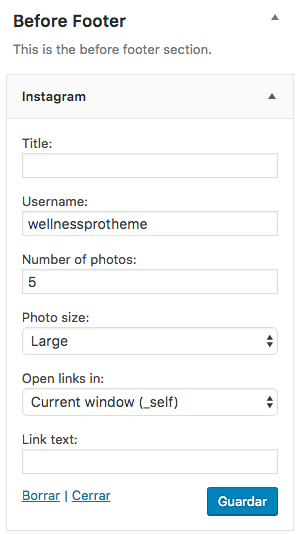
We just drag the Instagram widget here and add our username and 5 "large" size images appear
Here you can see how to do it:
Footer
The result of this area is:

To achieve this we have to add two widgets:
A Text Widget with the following content and checking the “Add paragraphs automatically” option:
The Wellness blog provides simple answers for healthier families through research, tutorials, recipes, and living life with lots of kids!

<div class="one-half first">
<ul>
<li><a href="http://demo.studiopress.com/wellness/category/health/">Health</a></li>
<li><a href="http://demo.studiopress.com/wellness/category/natural-home/">Natural Home</a></li>
<li><a href="http://demo.studiopress.com/wellness/category/motherhood/">Motherhood</a></li>
</ul>
</div>
<div class="one-half">
<ul>
<li><a href="http://demo.studiopress.com/wellness/category/recipes/">Recipes</a></li>
<li><a href="http://demo.studiopress.com/wellness/category/remedies/">Remedies</a></li>
<li><a href="http://demo.studiopress.com/wellness/category/reviews/">Reviews</a></li>
</ul>
</div>
And the Enews Extended widget.
The Enews Extended widget is used for users to leave us their email. In this tutorial we only see how to configure it visually but if you want to configure it with your autoresponder here you can see how do it with Mailchimp y here at aweber
In the "Text to Show Before Form" option we add the text that we want to appear before the form, in the case of the example:
<h3>Get Free Education</h3>
<p>When you claim your free Wellness membership, you’ll get instant access to a library of resources for moms, including our ebooks.</p>
Form action: url of our autoresponder, in the example #
Email Field: Email
Name Field: Name
And if you've come this far you already have the template as it appears in the demo. I will make more tutorials on this wonderful template 😉