In this tutorial we are going to create a website with the Genesis Hello Pro template to leave it the same as in the demo.
The template is available for free in the premium area or you can buy it here.
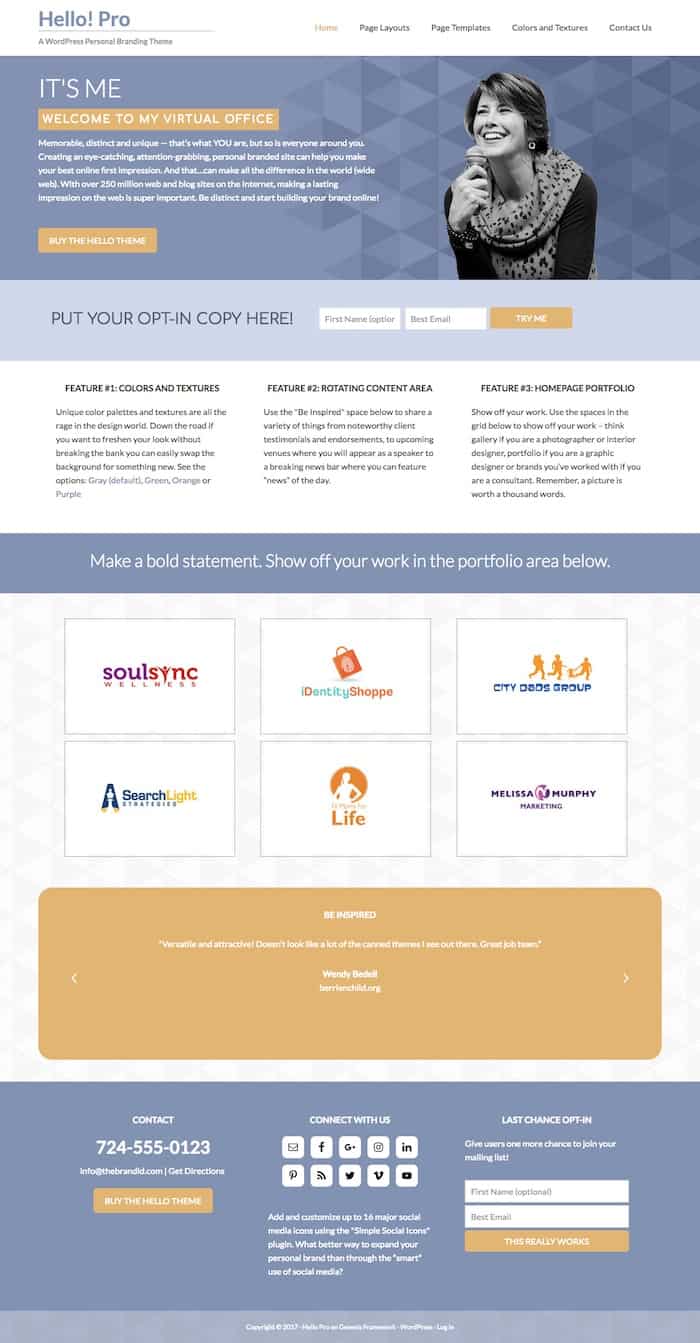
The final result that we are going to achieve is the following:
Video tutorial
Subscribe to my channel:
What do we need to have bought
- Web Hosting: I use WPEngine It is one of the best for WordPress. If you prefer a cheap one here you go Hostgator. Use the oscarteayuda coupon and it will be even cheaper 😉
- FrameworkGenesis: You have it available for free in the Premium Zone or you can buy here
- Child Theme Hello Pro: You can buy here or Download Free of the premium area
- GravityForms: You can download it for free from Premium Zone o buy here
Now that we have everything we need, let's continue 😉
Install the necessary template and plugins
The first thing we have to do is install the parent Genesis template, for this we go to Appearance –> Themes –> Add new and install and activate the template genesis.
Now we do the same with the template HelloPro.
Once the template is installed, we are going to install the necessary plugins so that our website is identical to the demo.
The plugins that we are going to install are:
- GravityForms: You can download it for free from Premium Zone o buy here
- Recent Posts Widget Extended
- Simple Social Icons
- Social Proof (Testimonial) Slider
- Genesis eNews Extended
Install demo content
Setting up a page without content is very difficult, so we are going to import the demo content that comes with the template.
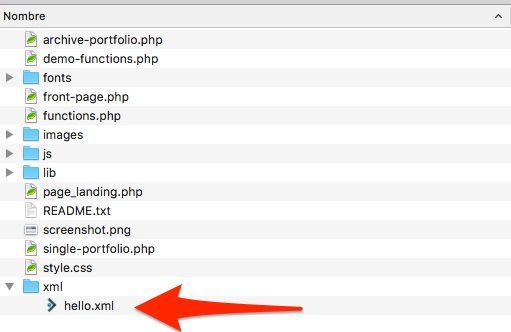
The demo content is in the hello.xml file inside the xml folder of the Hello Pro template:
To import it we go to Tools –> Import –> WordPress –> Run importer
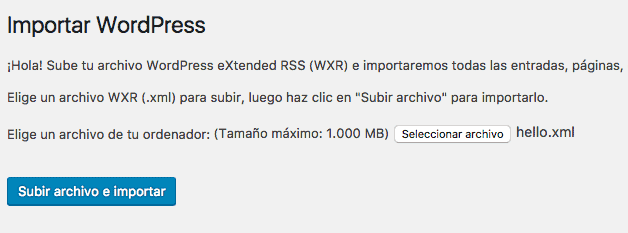
And now we have, posts, images and demo pages ready to be used.
Menu Settings
To configure the menu as it appears in the demo we need to do two things:
– Create the Menu and Appearance –> Menus with the items we want:
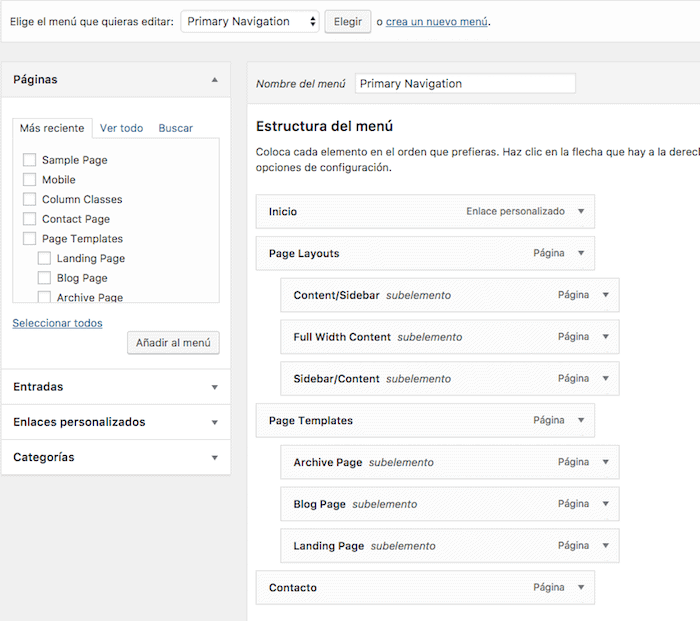
Now for it to be seen on the page you have to add the Primary Navitation custom menu to the Widgets in the Header Right Zone:
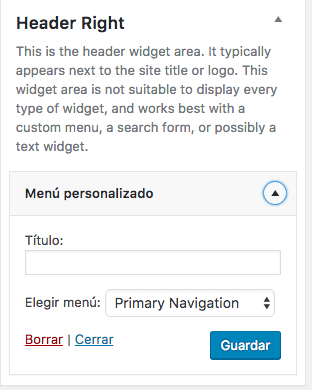
If all went well it should look like this:

Home Page Widgets Settings
Home-Welcome
The following left text is configured here:
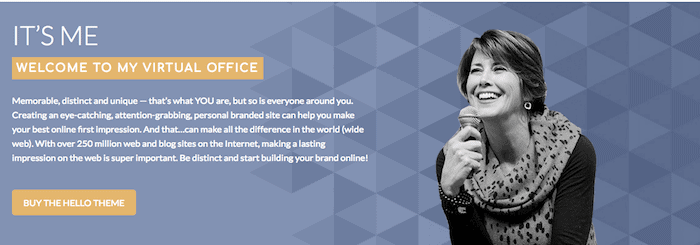
Only the text since the photo of the lady that appears is made in another widget.
We will add a text widget in this area with the following content:
<h1>It's Me</h1>
<span class="highlight">Welcome to My Virtual Office</span>

Memorable, distinct and unique — that’s what YOU are, but so is everyone around you. Creating an eye-catching, attention-grabbing, personal branded site can help you make your best online first impression. And that…can make all the difference in the world (wide web). With over 250 million web and blog sites on the Internet, making a lasting impression on the web is super important. Be distinct and start building your brand online!

<a class="button" style="color: #fff; margin-top: 20px;" href="https://thebrandidthemes.com/product/hello-personal-branding-wordpress-theme/">Buy the Hello Theme</a>
home-image
Here the photo that we see in the previous image will appear.
We will add an image widget and upload a photo of a size of 315px by 380px
Home – Call to Action
Here the form will appear so that visitors can leave us their email, it will look like the following image:

To get to this result we will add a Genesis eNews Extended widget.
To set up correctly enews extend with mailchimp here is a tutorial
Home – Features
In this Widget we configure the following part:

To do this, we only add 3 text widgets with the information we want.
Home – Headline
The result of this widget is as follows:

To do this, we add a text widget with an h1 title with the information we want, for example the following:
<h1>Make a bold statement. Show off your work in the portfolio area below.</h1>
Home – Portfolio
Here we will configure the following part:
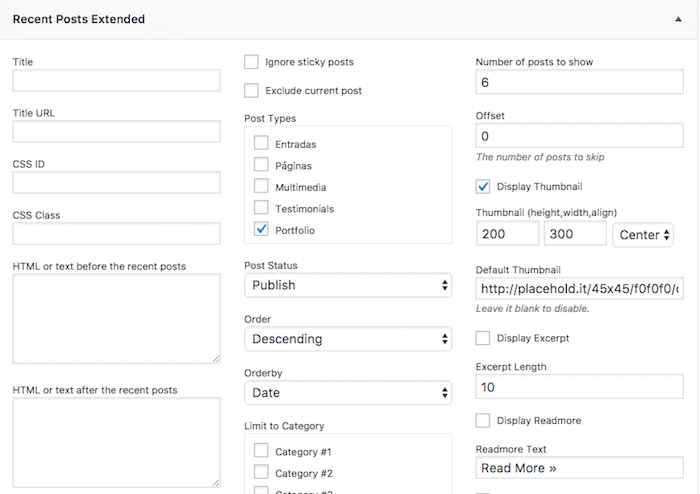
To do this we will use the Recent Posts Extended widget and we will check the following options:
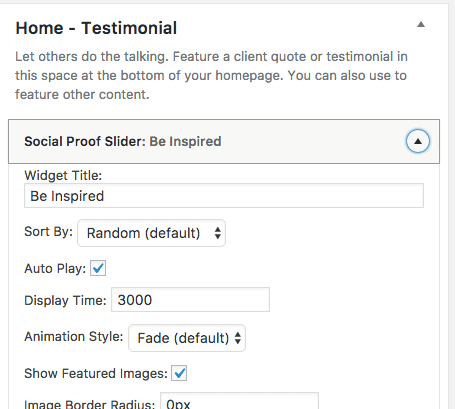
Home – Testimonial
The end result will be:

To do this we will add a slider with customer testimonials.
We will do it with the Social Proof Slider widget
Footer
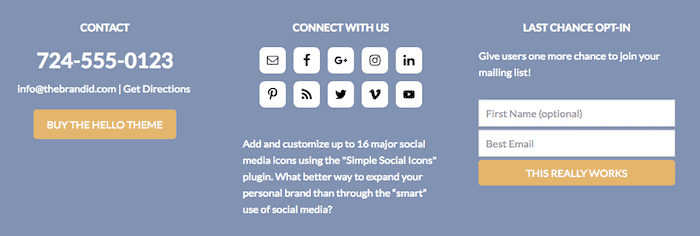
Now configure 3 widgets to configure the footer.
The end result will be:
Footer 1
We will use a text widget with the following html
<h1>724-555-0123</h1>
<a href="mailto:info@thebrandid.com" target="_blank" rel="noopener">info@thebrandid.com</a> | <a href="#">Get Directions</a>

<a class="button" style="color: #fff; margin-top: 20px;" href="https://thebrandidthemes.com/product/hello-personal-branding-wordpress-theme/" target="_blank" rel="noopener">Buy the Hello Theme</a>
Footer 2
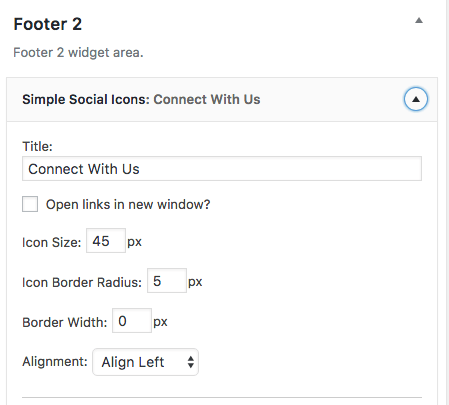
We will use the Simple social icons Widget with the social networks that we have.
We can change the size and color of the icons as you can see in this image:
Footer 3
In this area we will allow users to subscribe to our newsletter, we will do it with the Genesis eNews Extended widget.
And if you have come this far you will have the template mounted as in the demo.
I hope it has been useful to you 😉