Subscribe to my channel:
Hello guys,
In this tutorial we are going to build a website with the Beautiful Pro template. Beautiful Pro is a daughter template of Genesis so to use it we will have to first install the parent Genesis template.
If you prefer to buy it, you can do it from here.
Step 1: Have WordPress Installed
The first thing we must have is a WordPress installation done.
If you need help installing WordPress on the Premium Zone you have a basic course to manage yourself with WordPress.
Step 2: Install the Template
Install the Genesis parent template and then install the Beautiful Pro child template.
To install the templates we just have to go to Appearance –> Themes –> Add New –> Upload Theme and upload the two templates.
Remember, first the Genesis template and then Beautiful Pro. If you do it the other way around it won't let you.
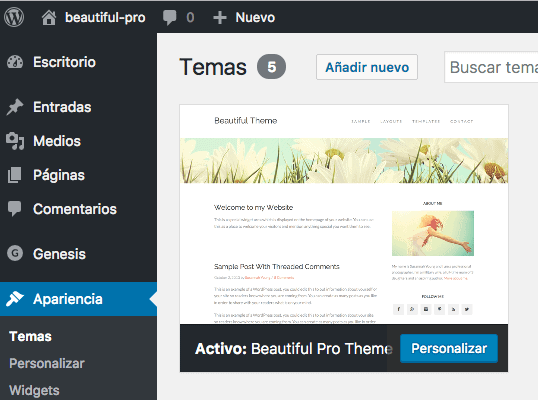
Once the Beautiful Pro template is installed, you must activate it as you can see in the following image:

Step 3: Install the necessary plugins
To achieve the same result as in the demo we need to install the following free plugins:
Step 3: Add Demo Content
Layout an empty page becomes very complicated, so it is recommended to import the demo content provided by the template to have test content to see how the page is going.
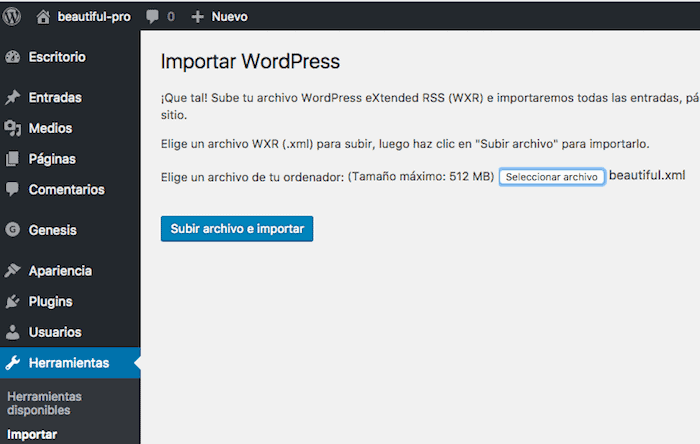
If you unzip the template you will find a folder called XML and inside the file beautiful.xml, this is the file that we must import.
To do this we go to tools -> Import -> WordPress, install the importer and run it:

Once imported we will have entries, menus and test pages on our website.
Step 4: Add Web Header Image
To add the image of the header of the web we go to Appearance –> background and here we add the image that we want. The image that comes in the demo has a size of 2000×200 pixels.
Step 5: Add Widgets
HeaderRight
In this area we are going to add a custom menu, in our case the "Primary Navigation" menu
Remember that the content of the menus is what we have imported from the demo. To add or modify the menus you have to go to Appearance –> Menus.
In this area you should not add more widgets
Primary Sidebar:
Text widget with the following content:
<p><img src="https://demo.studiopress.com/beautiful/files/2013/10/me.jpg"></p>
<p>My name is Susannah Young and I am a professional photographer. I'm a military wife, a full-time mom of 3 daughters and an aspiring author. <a href="#">More about me</a>.</p>
Widget Simple Social Icons with the social networks you have.
WelcomeMessage
Widget Text with the text you want to appear on the home page above.
Split Sidebar Right:
Text widget with the banners you want to add, in the demo comes the following content:
<p><a href="https://demo.studiopress.com/beautiful/"><img class="aligncenter" src="https://demo.studiopress.com/beautiful/files/2013/10/125x125.jpg"></a><a href="https://demo.studiopress.com/beautiful/"><img class="aligncenter" src="https://demo.studiopress.com/beautiful/files/2013/10/125x125.jpg"></a><a href="https://demo.studiopress.com/beautiful/"><img class="aligncenter" src="https://demo.studiopress.com/beautiful/files/2013/10/125x125.jpg"></a><a href="https://demo.studiopress.com/beautiful/"><img class="aligncenter" src="https://demo.studiopress.com/beautiful/files/2013/10/125x125.jpg"></a></p>
Split Sidebar Right:
In this area there are two widgets:
- Custom Menu widget, with the Sites menu
- File Widget
Bottom Sidebar:
Here we will add the Instagram widget. This widget is called Iconosquare Widget.
To configure the widget user and customize its appearance you can do it from Appearance –> Iconosquare Widget
Footer 1
In the demo there is a text widget with the following content:
<p>This is an example of a text widget which can be used to describe a particular service.</p>
<p>You can also use widgets such as recent posts, latest tweets, a tag cloud or more.</p>
<p><a href="https://demo.studiopress.com/beautiful/sample/">Read more about the Beautiful Theme</a>.</p>
Footer 2
In the demo there is a Recent Posts widget with 5 posts.
Footer 3
In this area there are two widgets:
- Tag Cloud Widget
- Search Widget
If you have come this far you will have the same page as in the demo 😉
All the best