Hi guys,
There are specialized tools for creating popups. One of the best known Popup builder is Thrive Leads. Although it works very well, each time they have a smaller route since the Page Builders are eating the ground. Why use two plugins if you can do everything with one?
In this video we are going to see how we can create Popups with Elementor Pro.
To follow the tutorial you need:
Subscribe to my channel:
Can Popups be created with basic Elementor?
In this tutorial we will see how to do it with Elementor Pro and in the next tutorial we will do it with another wonderful WordPress plugin: JetPopup by CrocoBlock.
In both cases they are premium plugin, that is, paid.
We begin
Once Elementor pro is installed, you can find the option to create Popups in Templates —> Popups
If it doesn't let you add POPUPS, it's because you don't have Elementor Pro installed
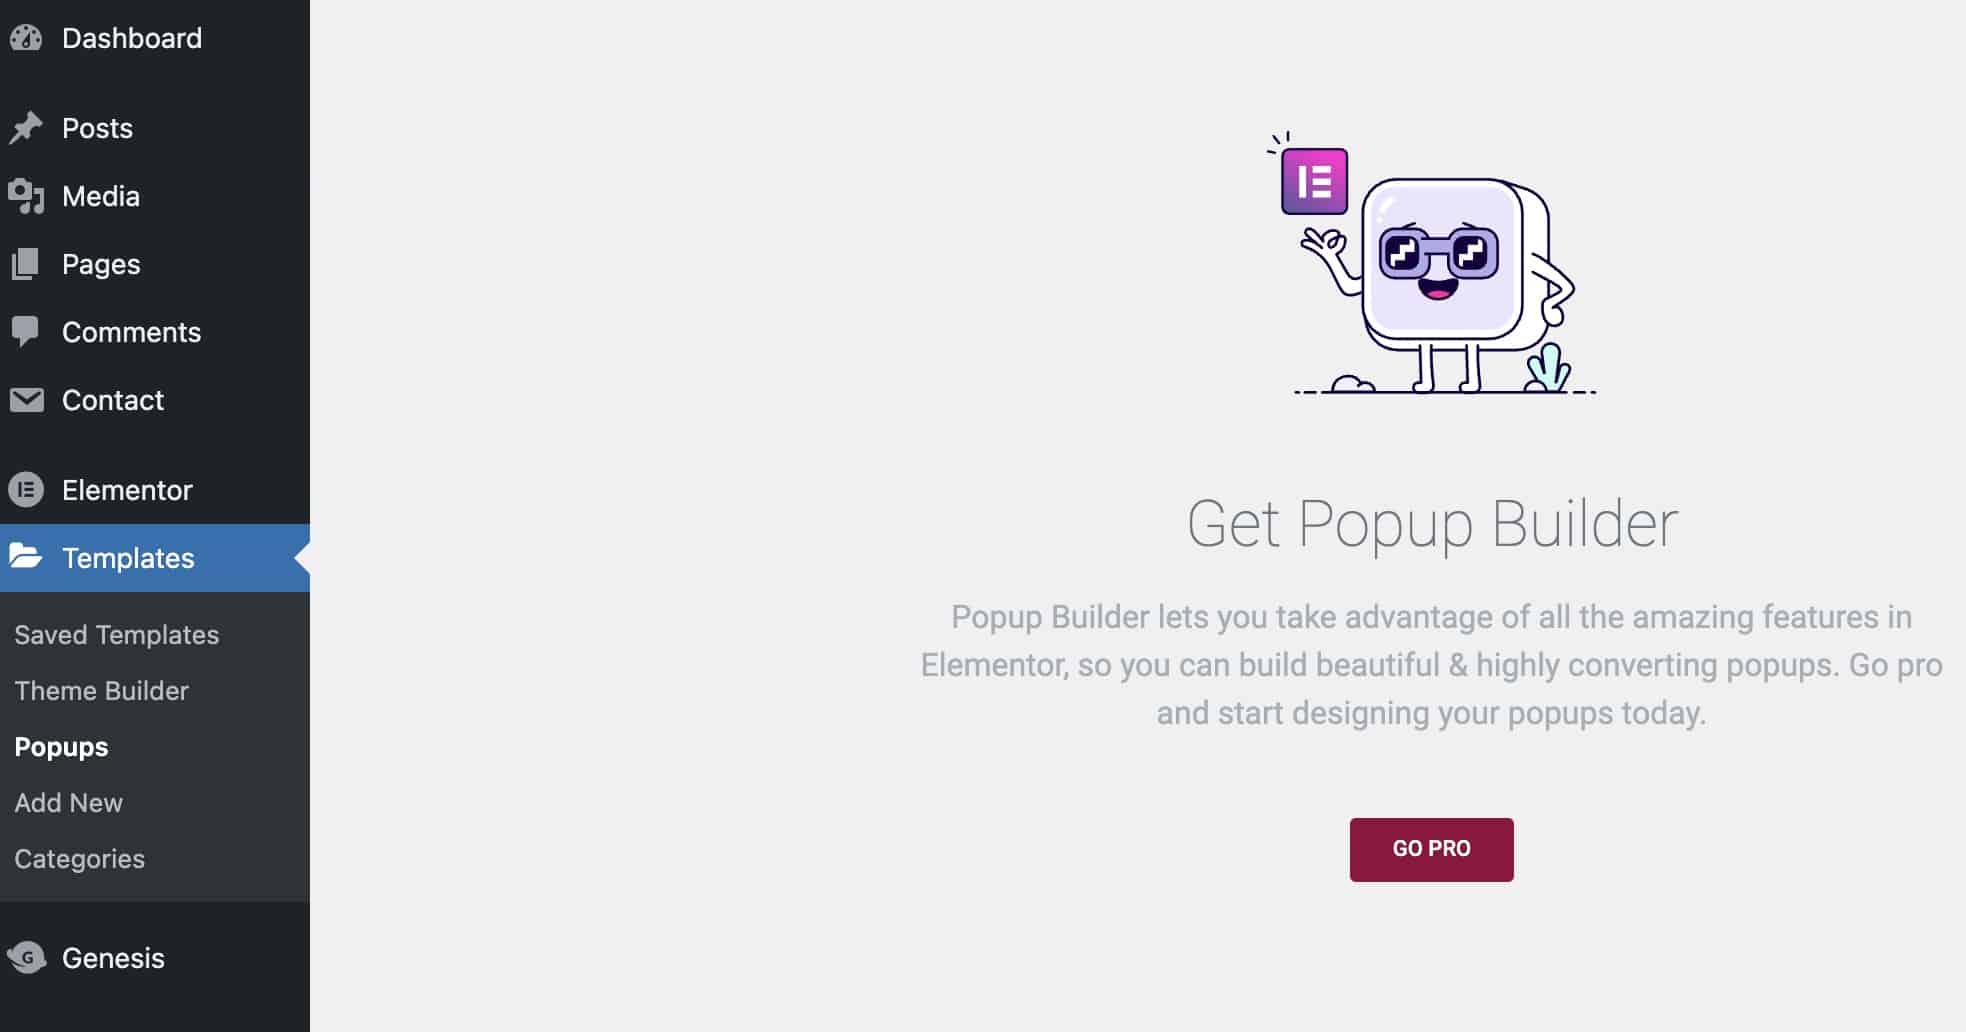
Instead, if you have Elementor Pro activated, you will see it like this:
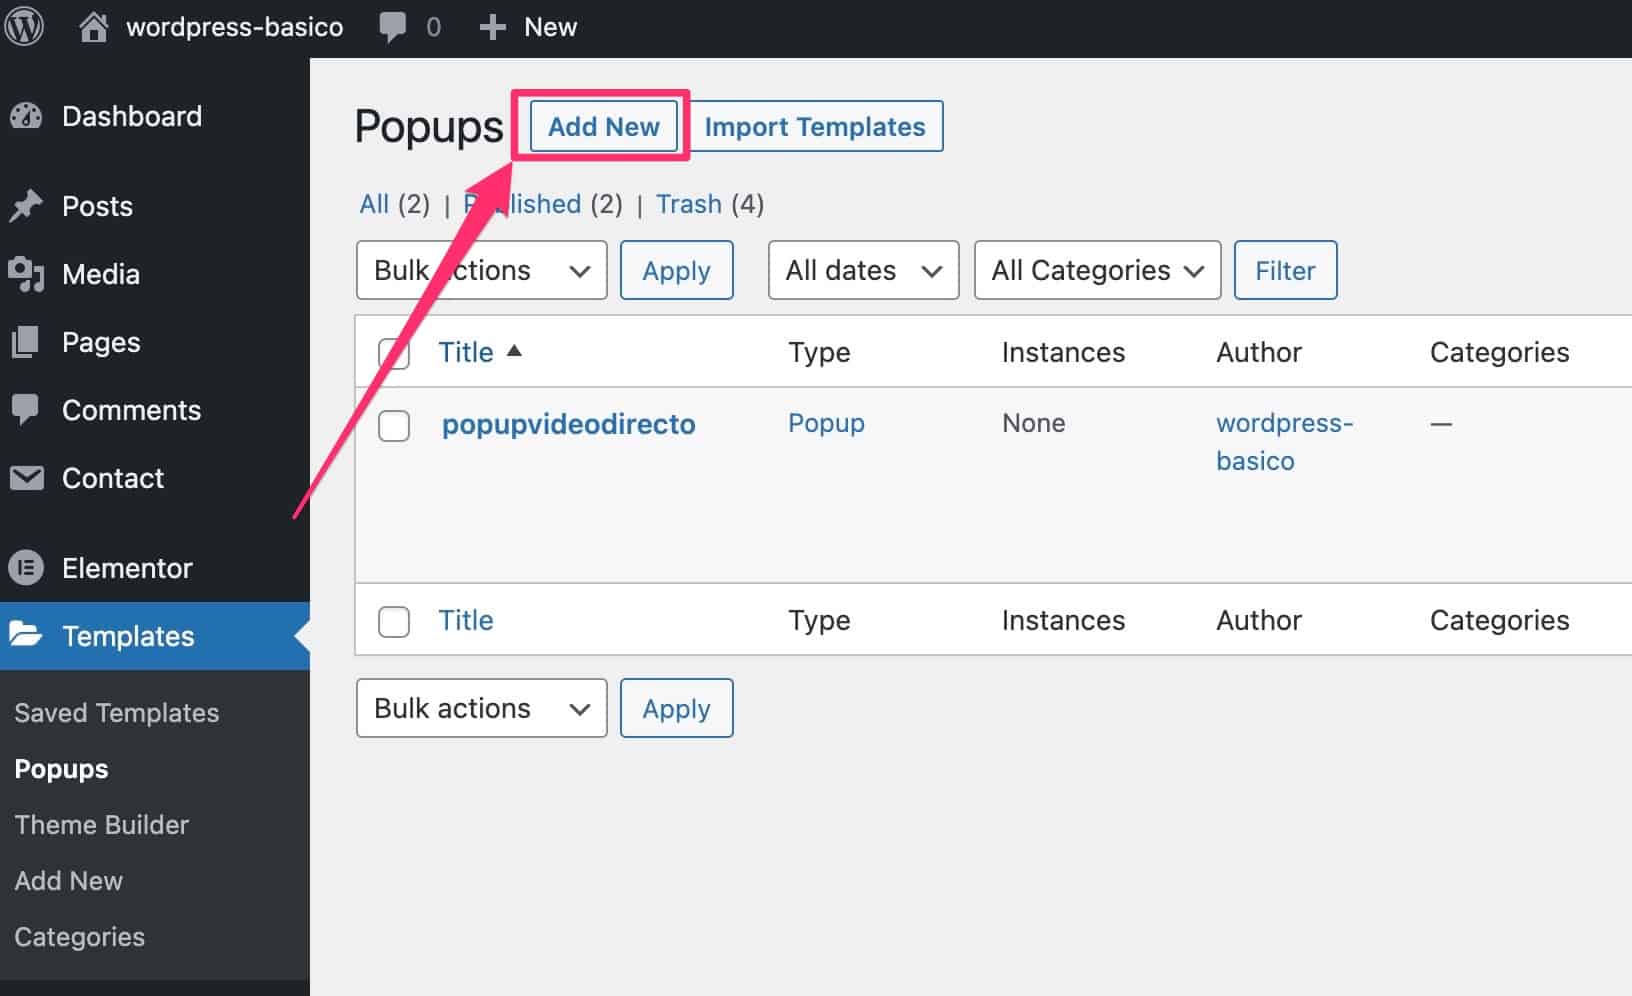
When we click on Add New It will let us give our popup a name:
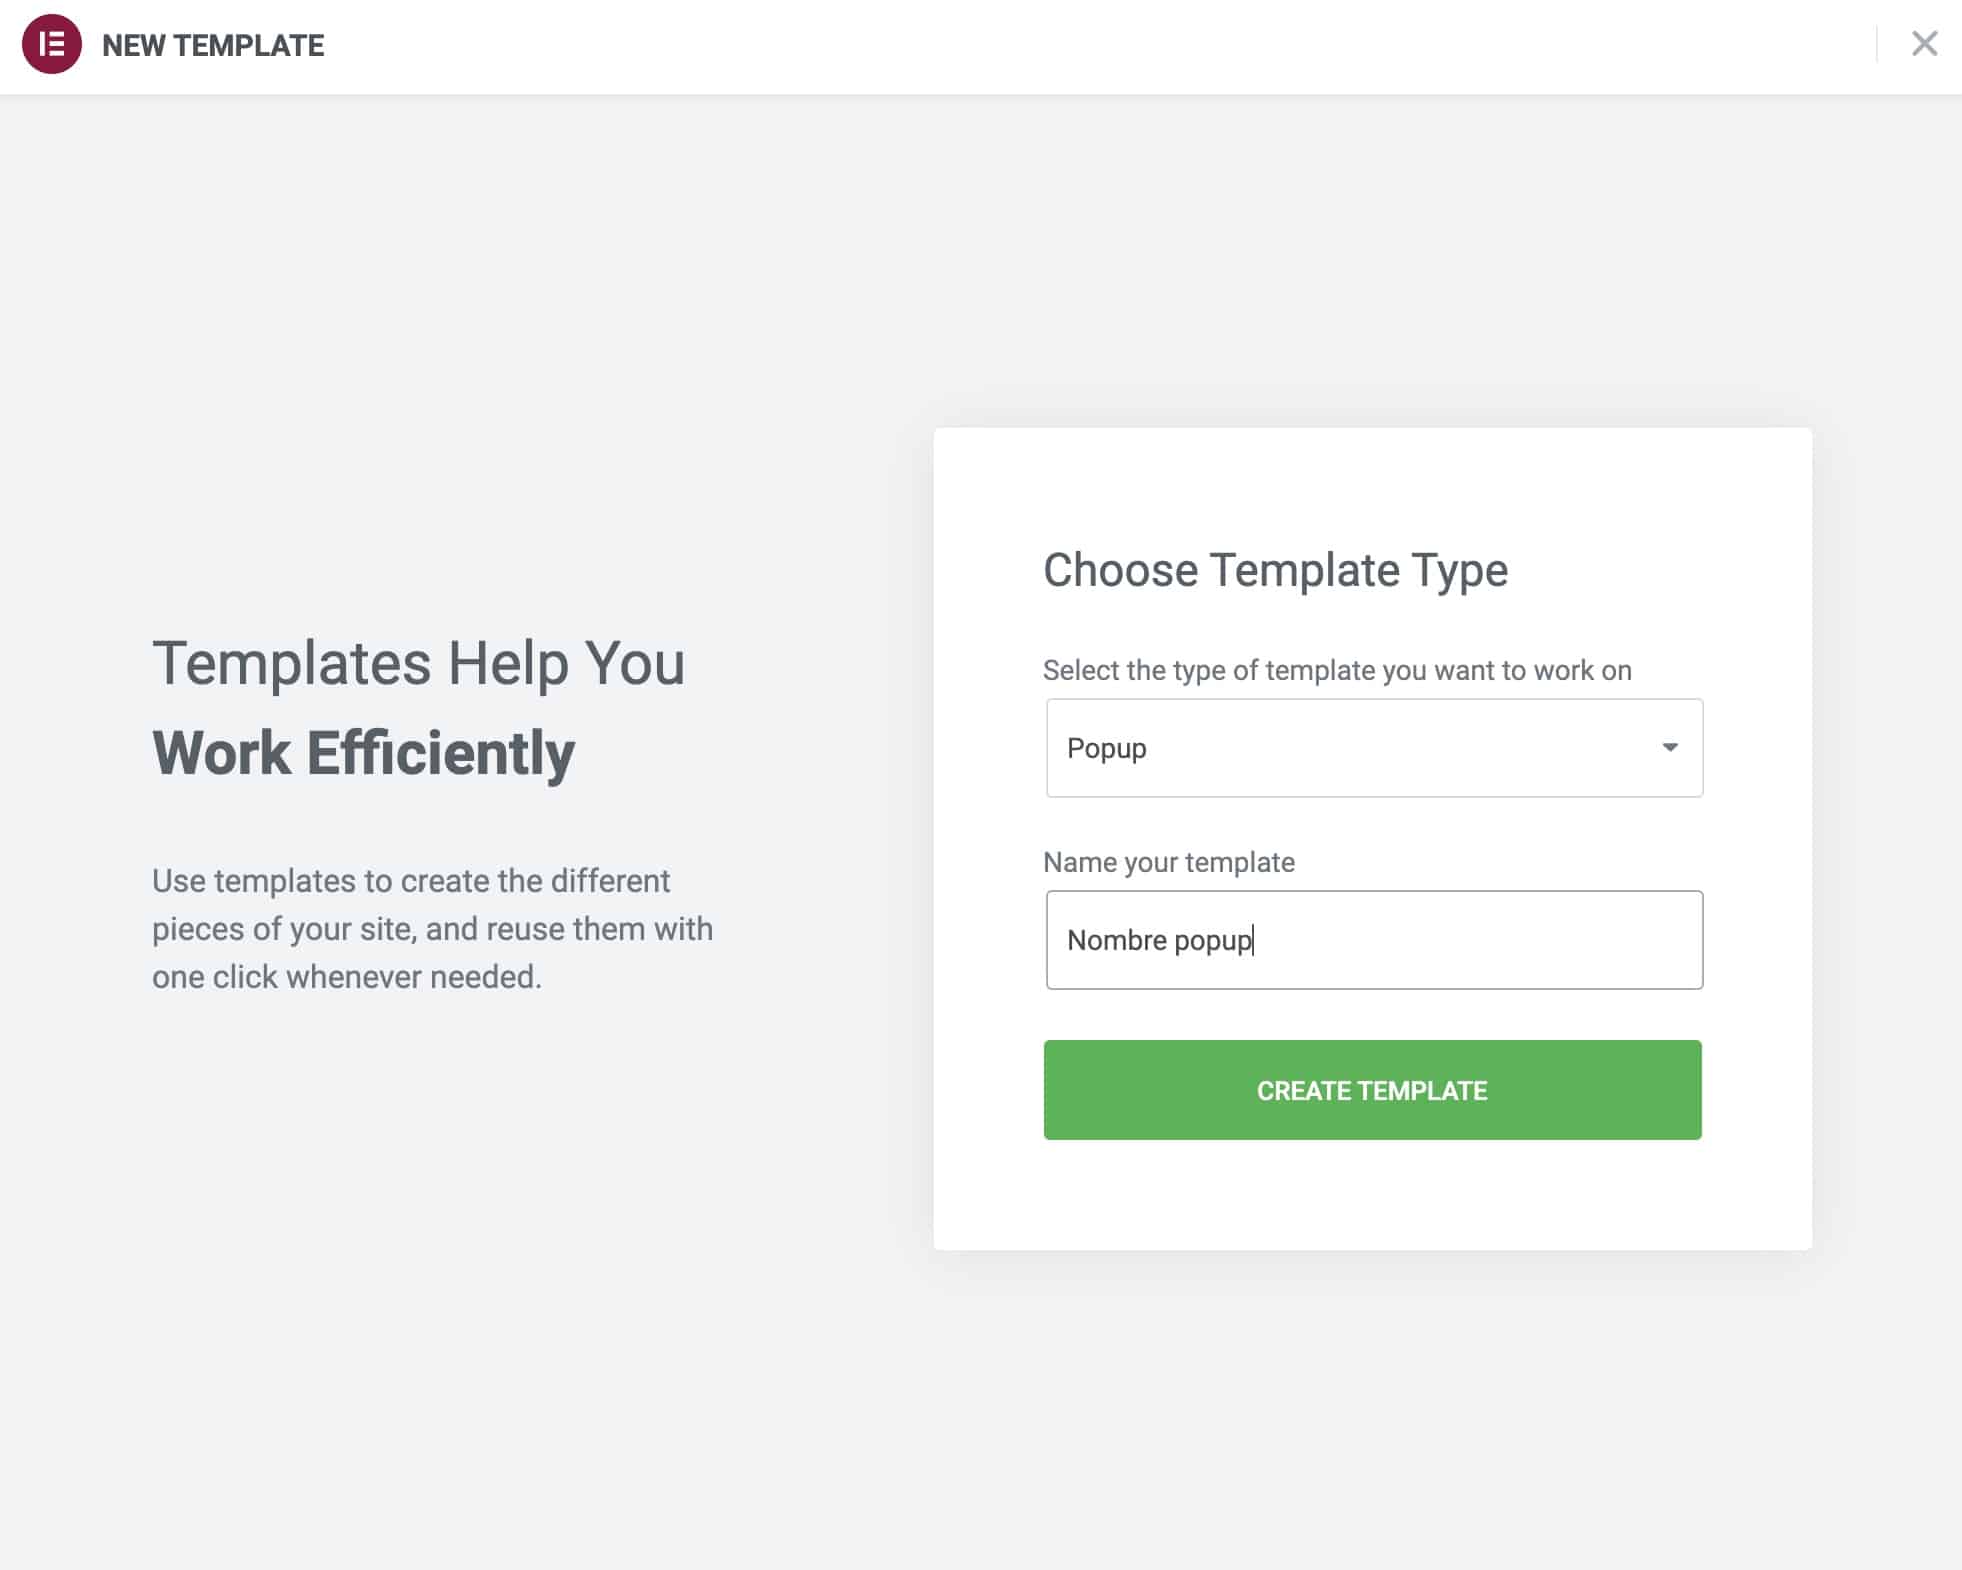
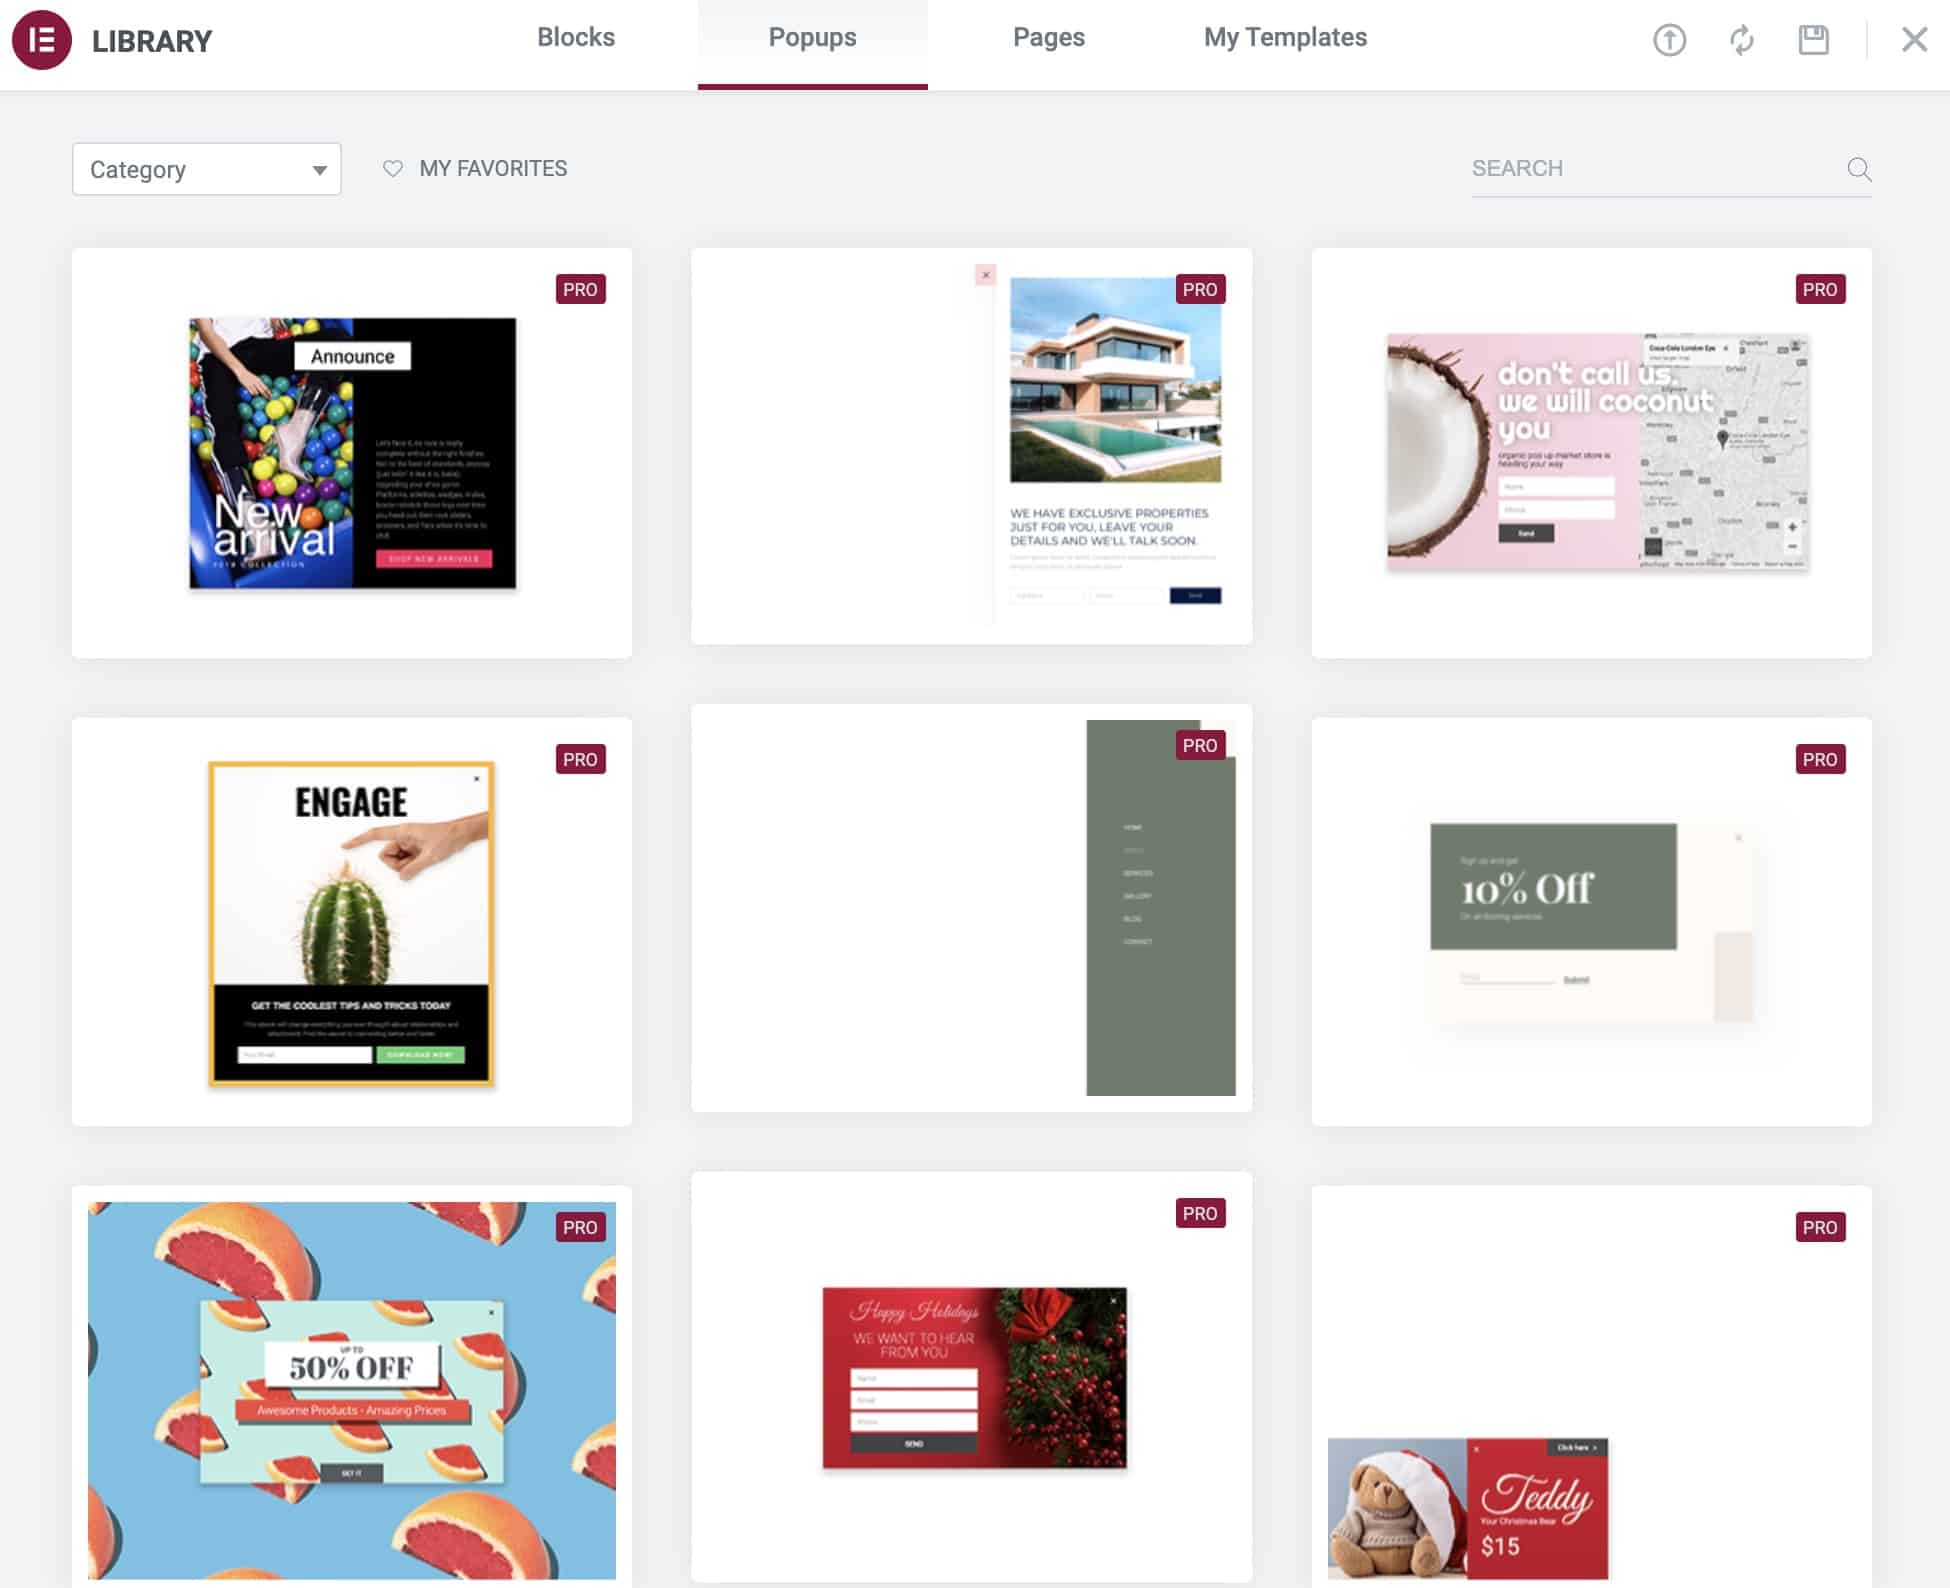
We click on create template and here we can choose an already created popup, that is, use a template from the many that Elementor Pro has:
Remember
To be able to use the templates you have to have a active license de Elementor Pro.
Once the template is inserted, we will enter the Elementor editor with the popup design practically ready:
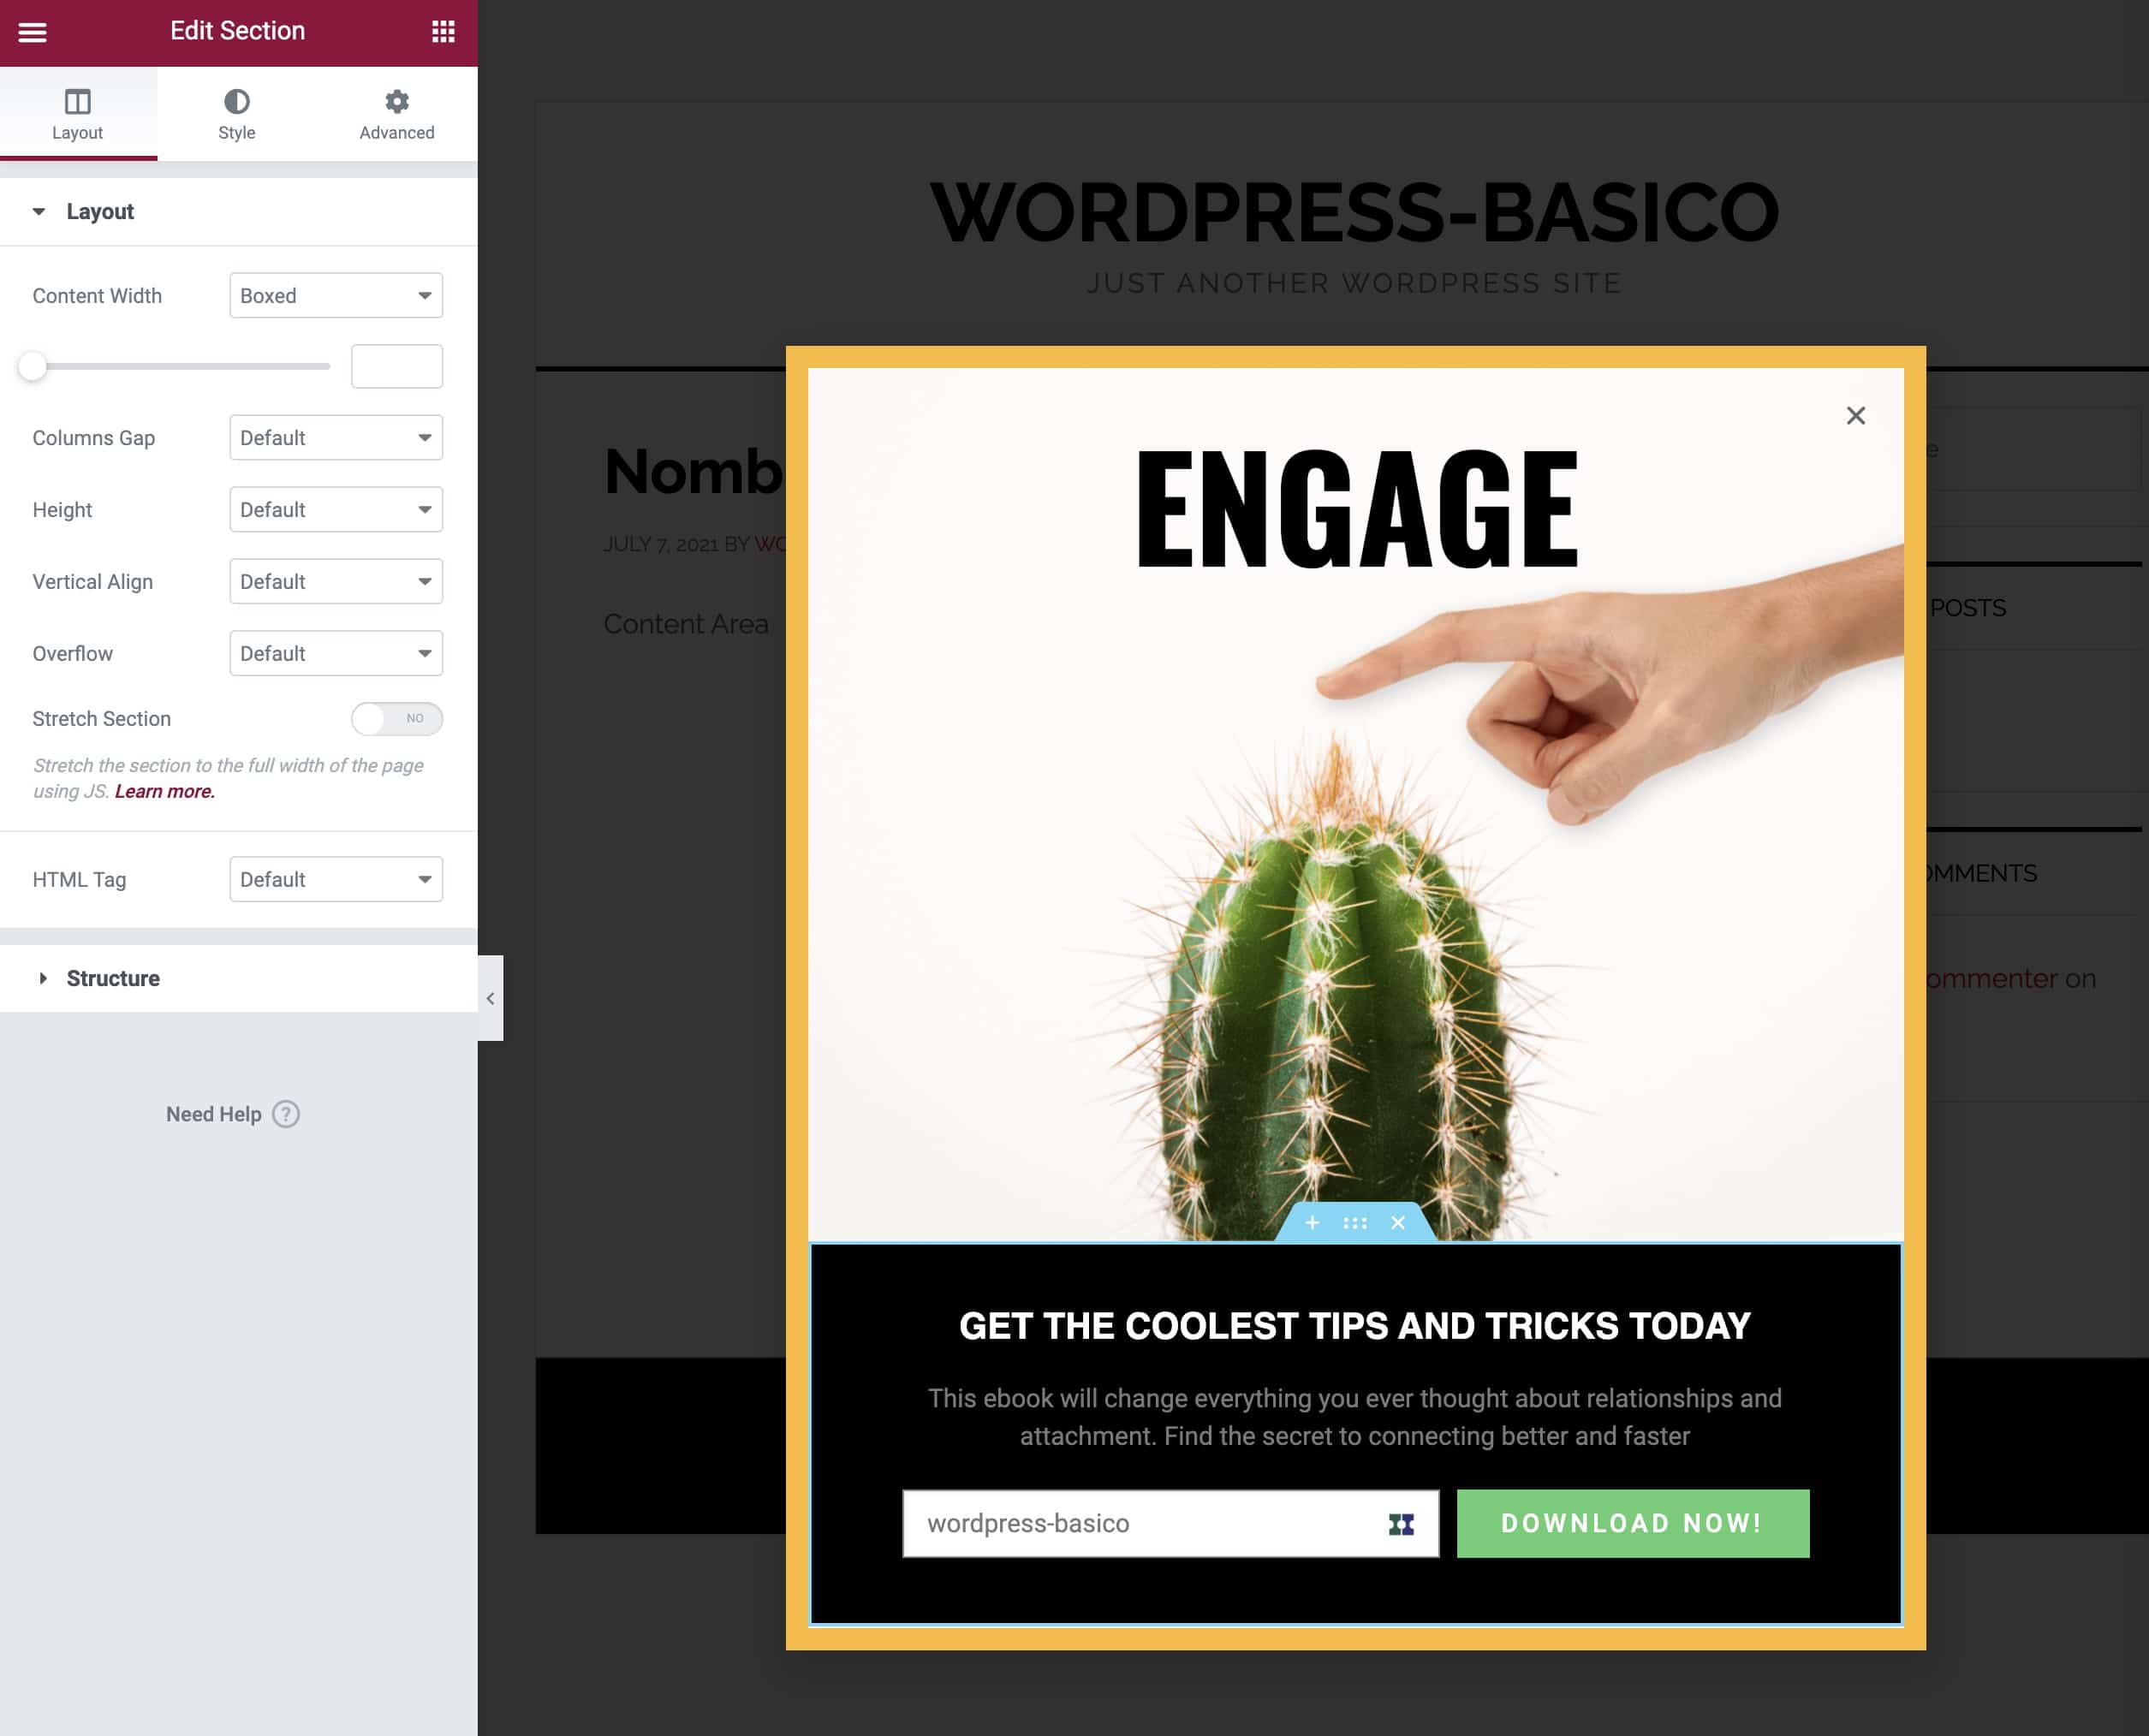
In this video I am not going to go into the detail of the popup design but we can modify each part of the popup, including the close button or the typical X.
Beware!
When you create a Popup with a form it is very important that cEach field of the form has an ID since if you leave it empty it will give you an error when using the Popup.
This has driven me very crazy until I discovered it 😉
The ID is inside the field —> Advanced —> ID
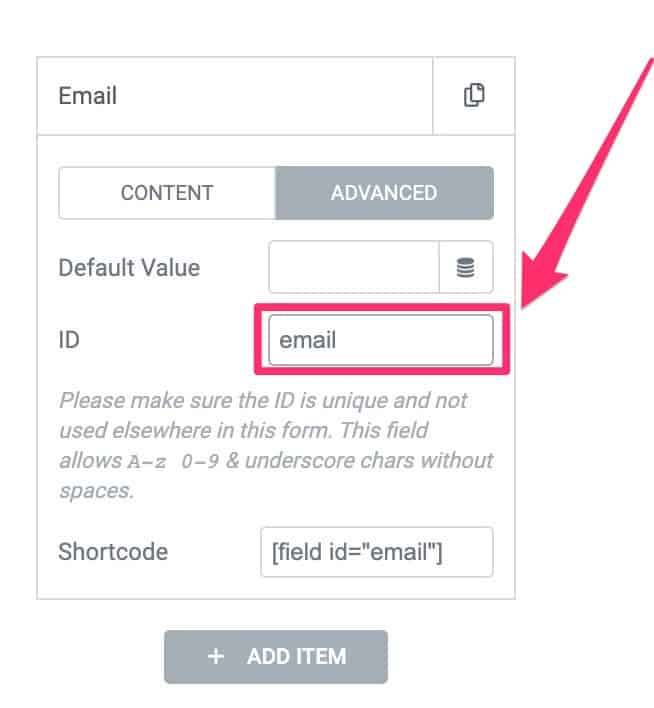
If you leave it empty, using the popup will give you the error “An error occurred.”

Once the popup is created, comes the most important part, the behavior that we need our popup to have.
For this, Elementor Pro offers us the following options:
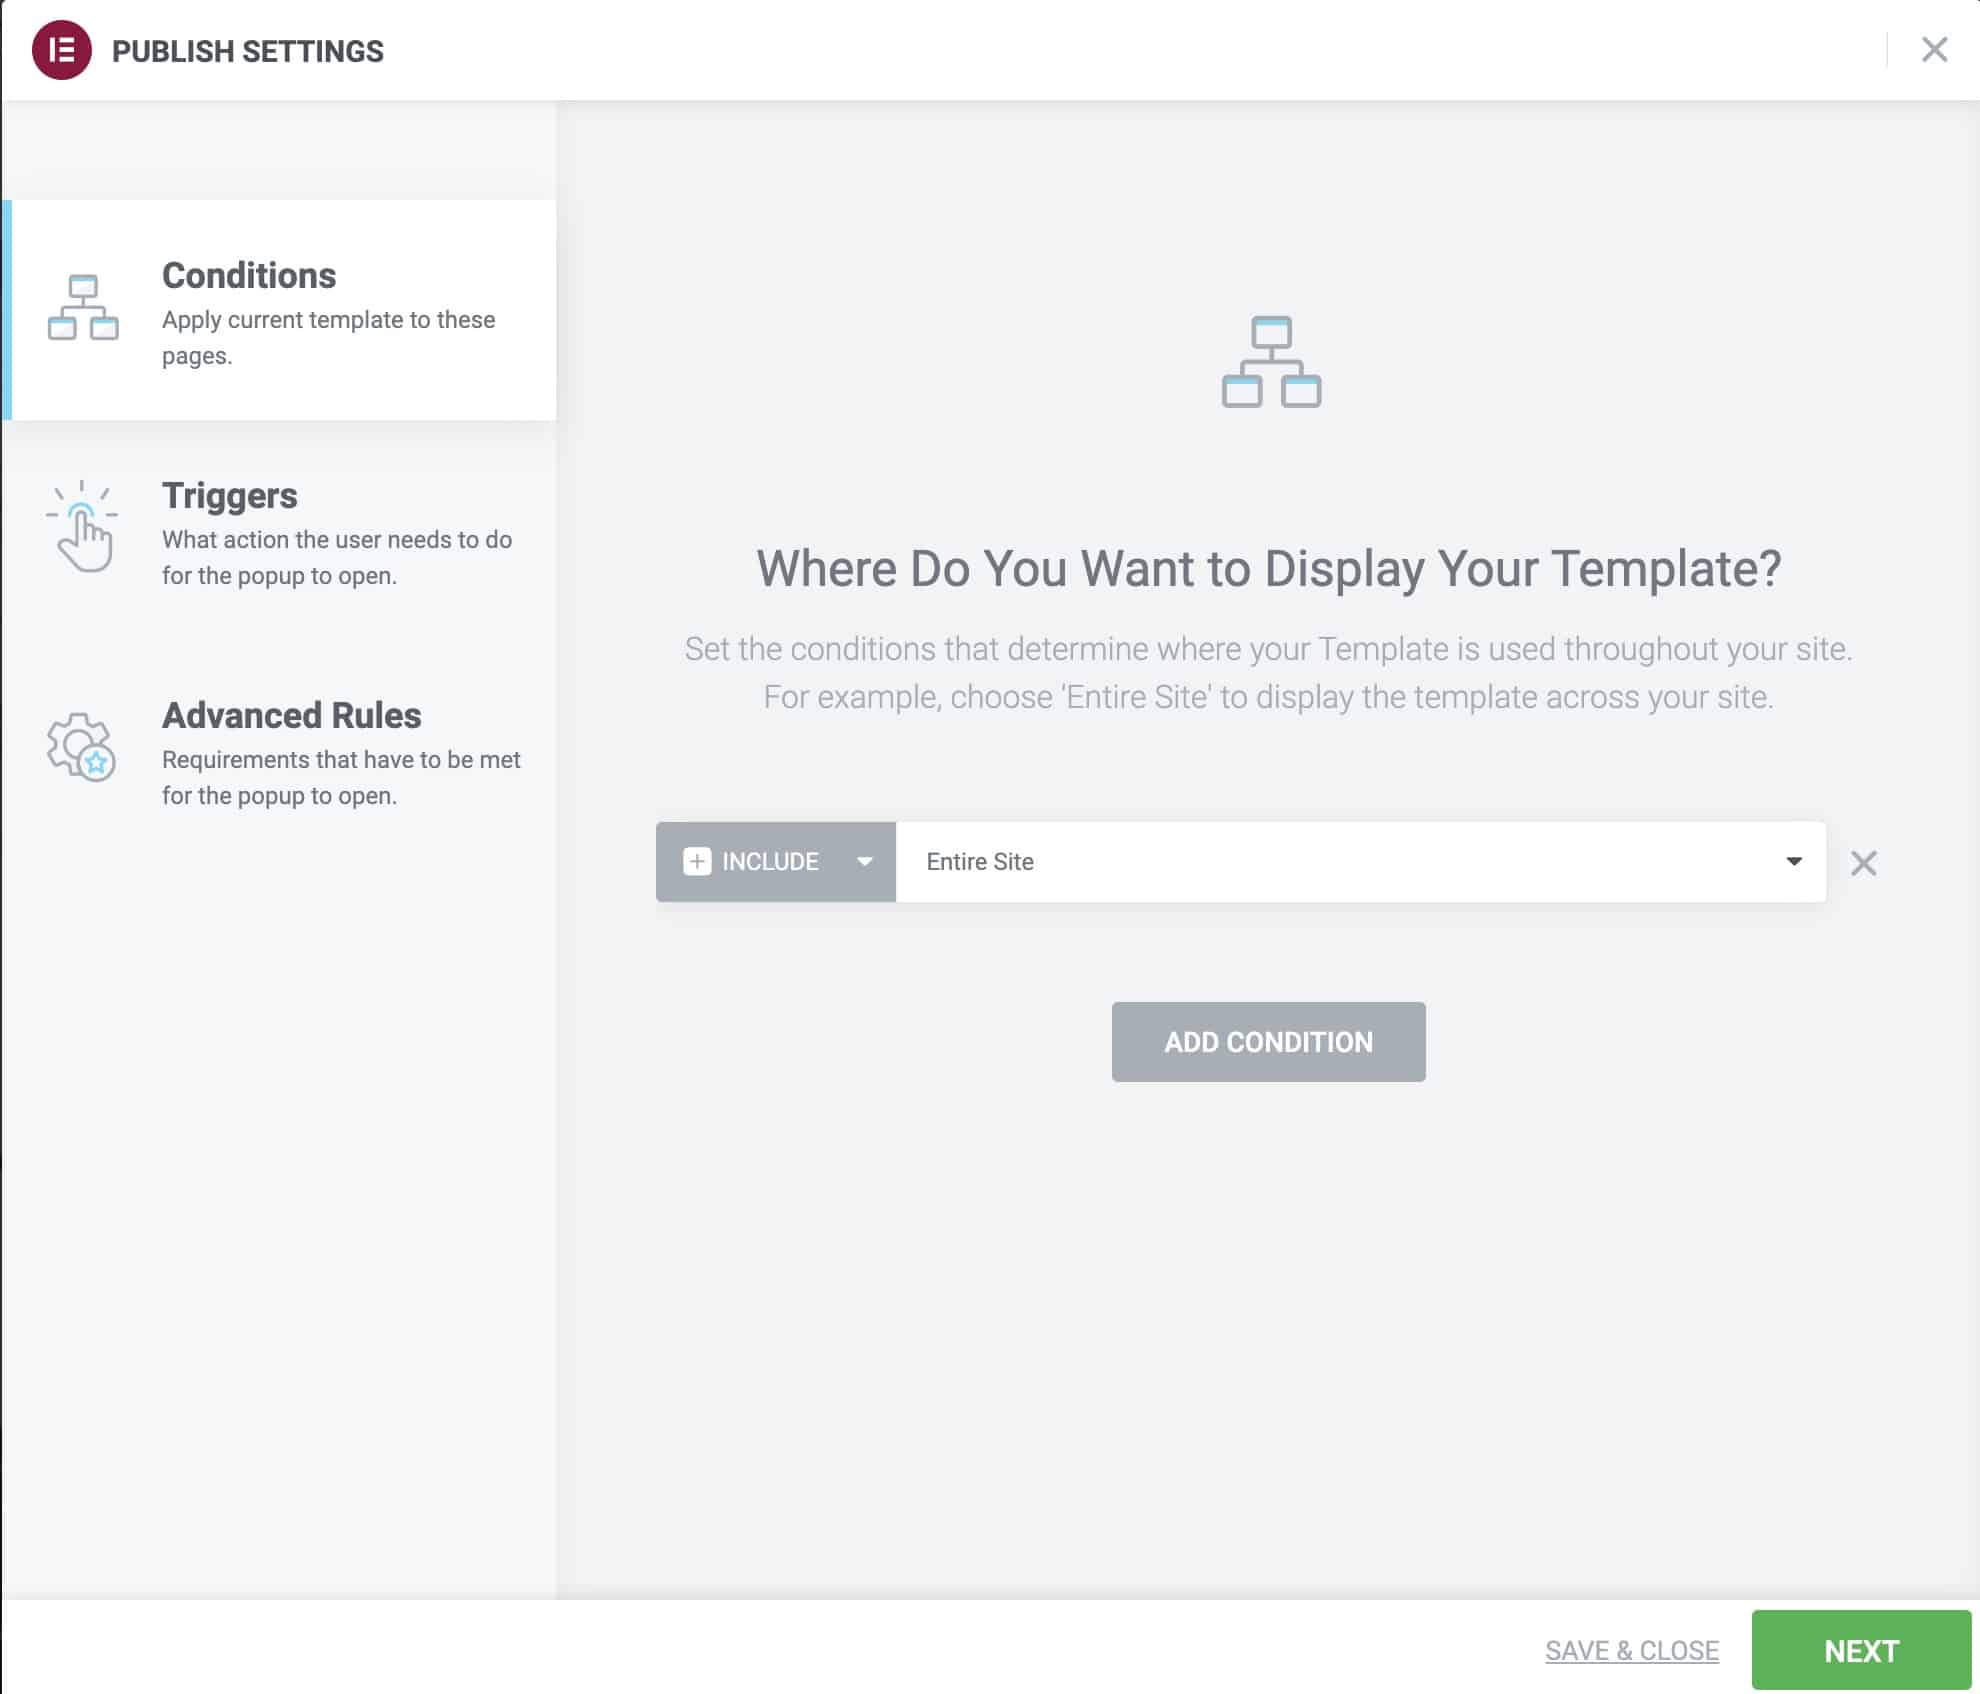
Conditions, Triggers and Advanced Rules (Conditions, Triggers and Advanced Rules)
When we click on publish our Popup, the following screen will appear:
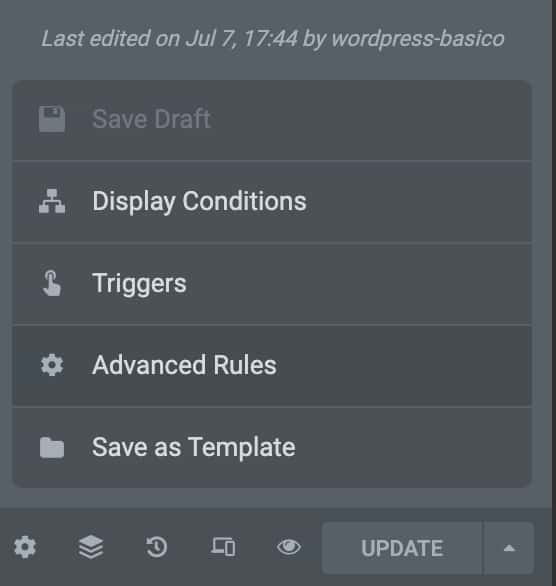
If that screen does not appear or you have closed it, you can return to it from the little arrow to the right of Update:
Conditions
Here we have to choose where on our website we want the popup to be seen.
It can be on the entire web, in a specific post, in a category, whatever we need:

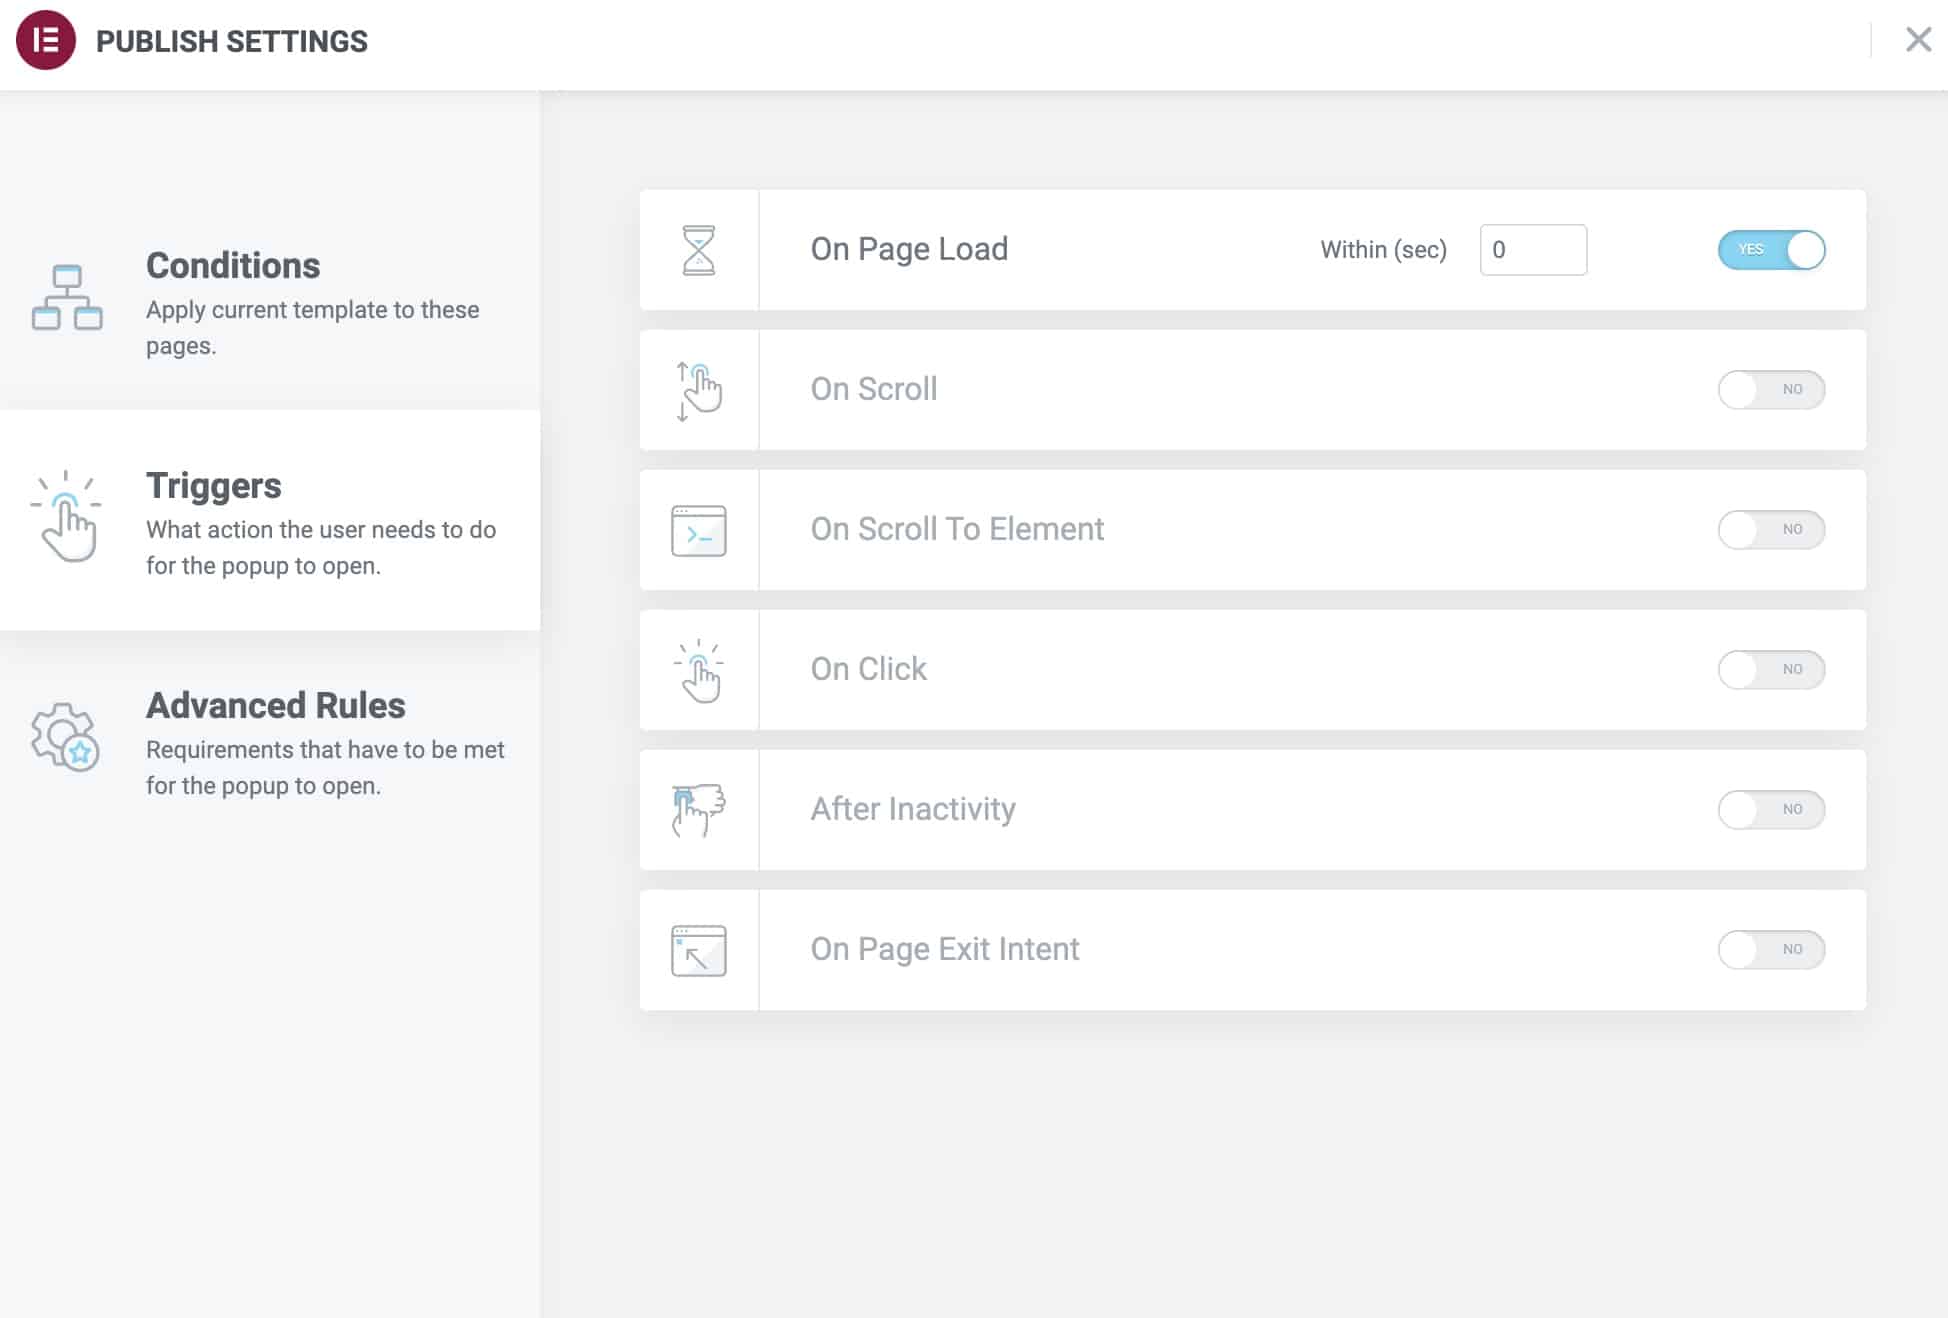
Triggers
A popup is a special element, since it does not appear on the web until an event occurs.
It can appear when a certain amount of time passes, when the user has scrolled, after a period of inactivity or when the user wants to leave the web.
In this option we choose which is the event that triggers the popup:
Advanced Rules
Not only will we be able to choose a trigger, but we will also be able to choose at what specific times we want the Popup to appear.
We can make the popup show after the user has seen a specific number of pages, sessions, or after they have visited us X number of times.
We can also make the popup show only for visits that come from a search engine or only for a specific browser.
Even hide the popup if the user is logged in:
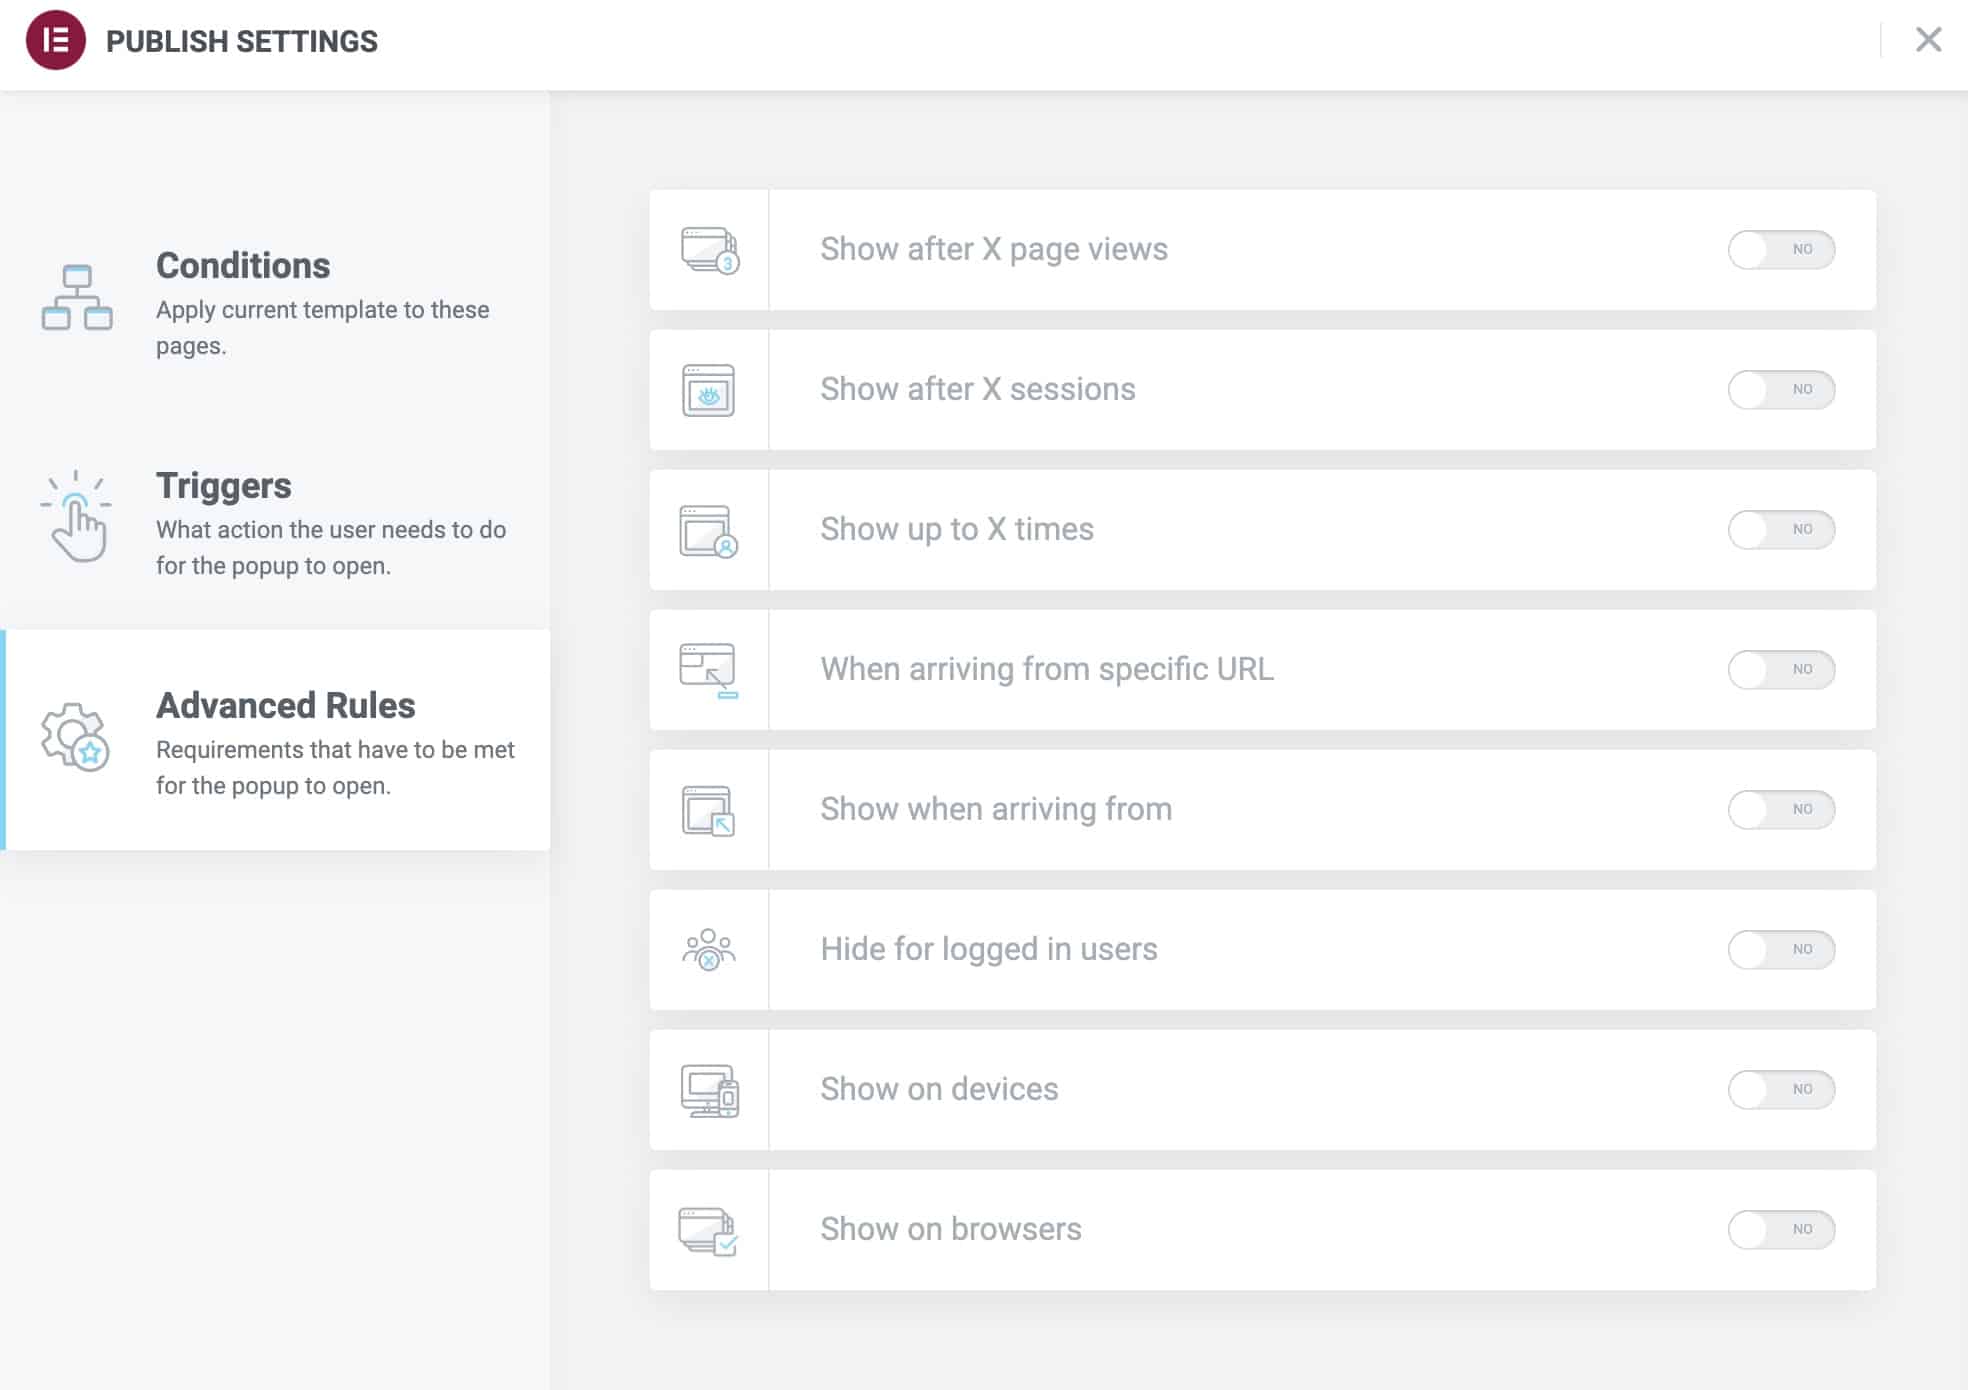
The advanced rules are very important since we cannot ignore that a Popup is an annoying element for many users and thanks to the advanced rules we can greatly limit who we are interrupting.
Integration with Email Marketing services
By default, when you collect emails with a popup they will be saved as Collect Submissions.
This option is in Elementor —> Submissions:
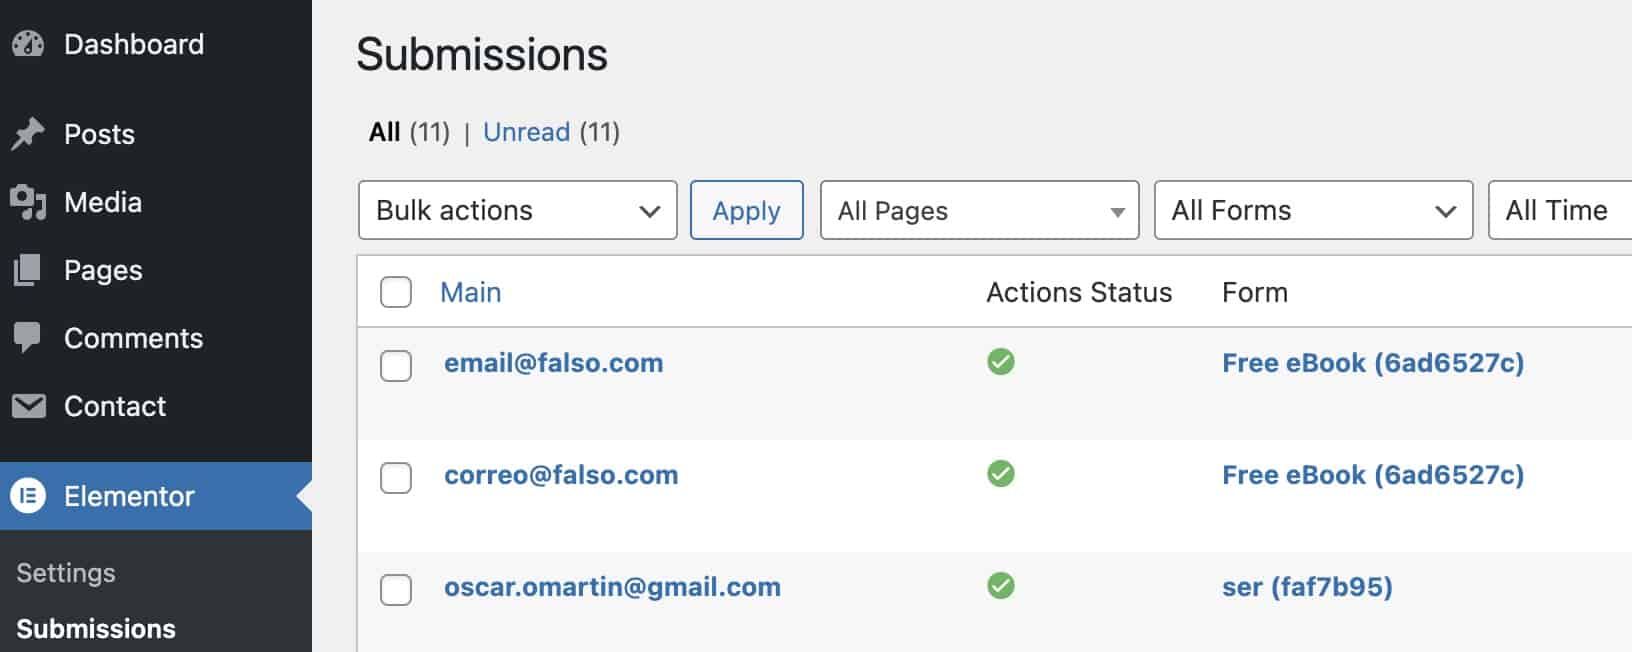
Although useful, it is not the best place to get the most out of collected emails.
The most normal thing is that you use a professional Email Marketing service.
Elementor has direct integration with a lot of email marketing services:
- Mailchimp
- Drip
- ActiveCamping
- GetResponse
- ConvertKit
- MailerLite
To use them is as simple as adding the API Key of the corresponding service.
You have the option in Elementor —> Settings —> Integrations
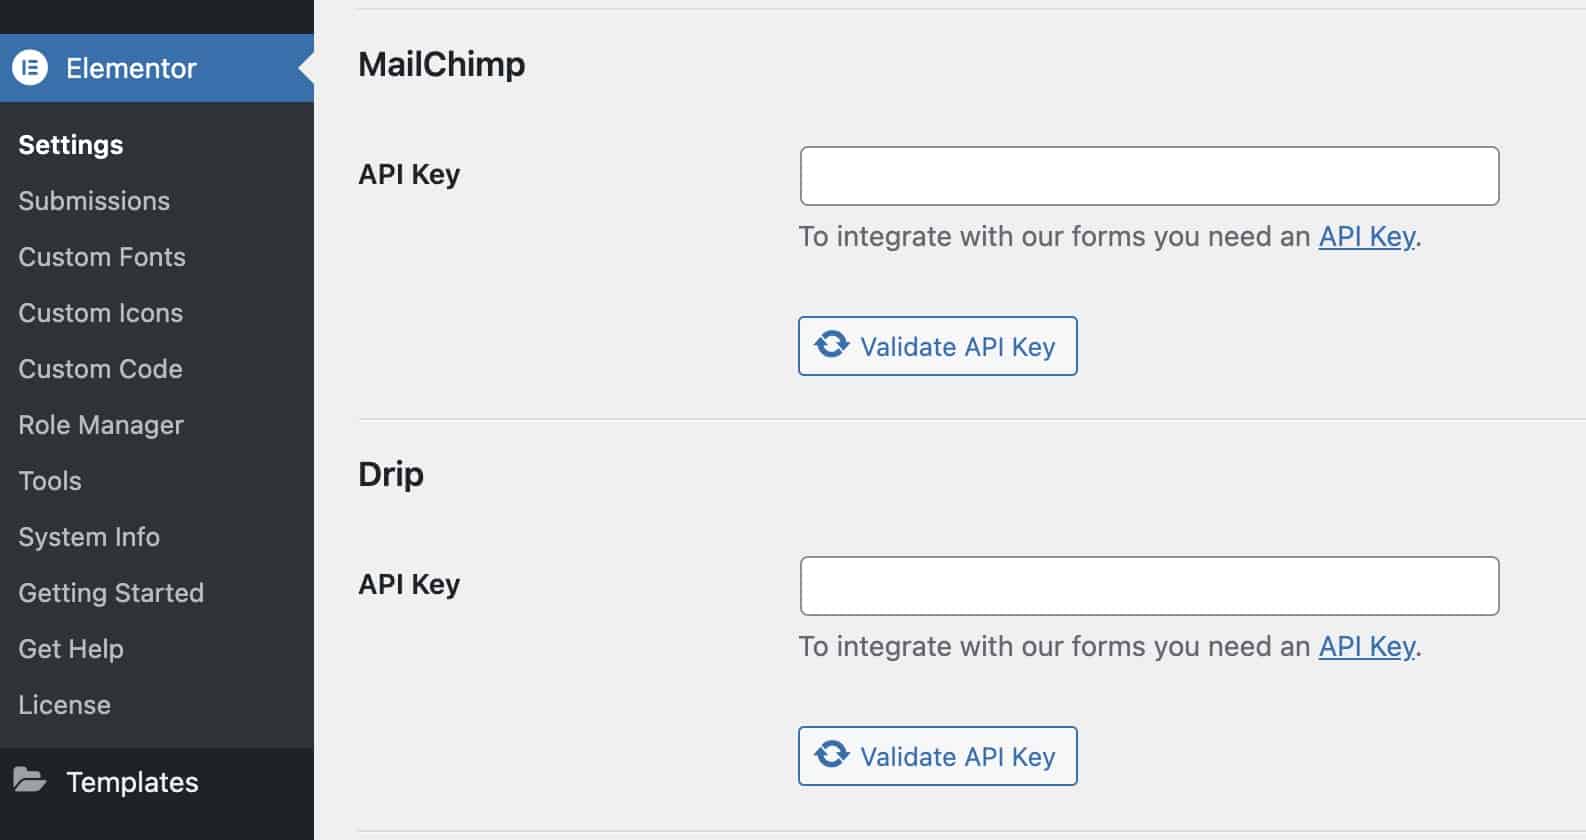
Once you have connected your tool you can make the data collected on the web be sent automatically to the service selected from the option After Submit Actions
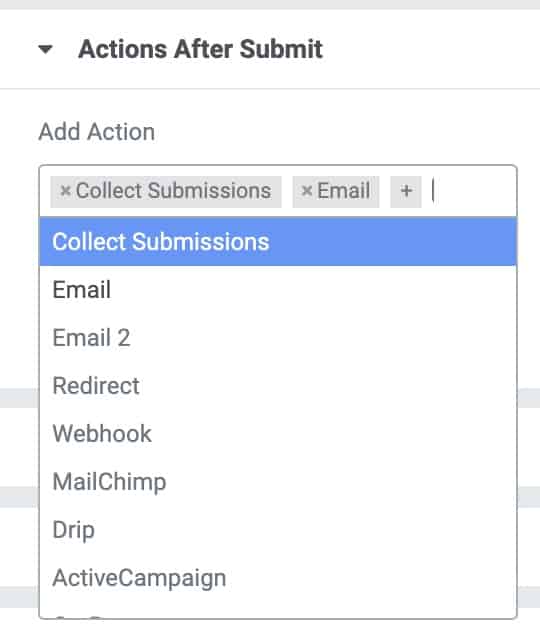
Each time you select one, new options will appear below:
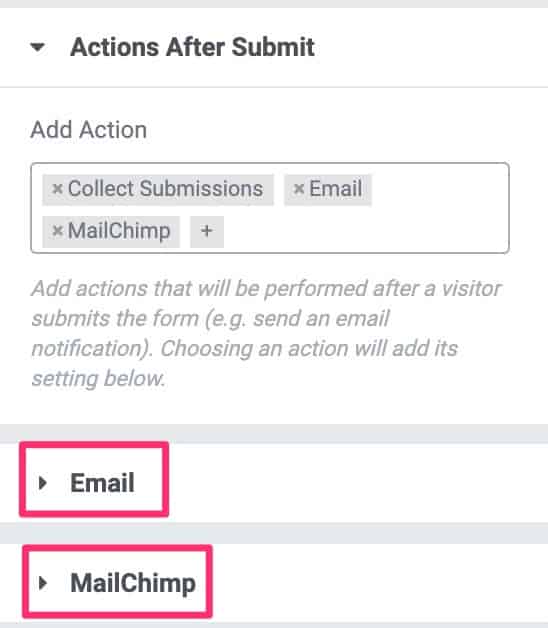
And if we unfold we can see choose the specific options of each service.
What do we do if the Email Marketing service I use is not on Elementor?
That's what Webhooks are for 😉
Webhooks in Elementor Pro
This option may seem very complicated but it is simpler than it seems.
If we select the Webhook option in After Submit Actions The Webhook URL option will appear
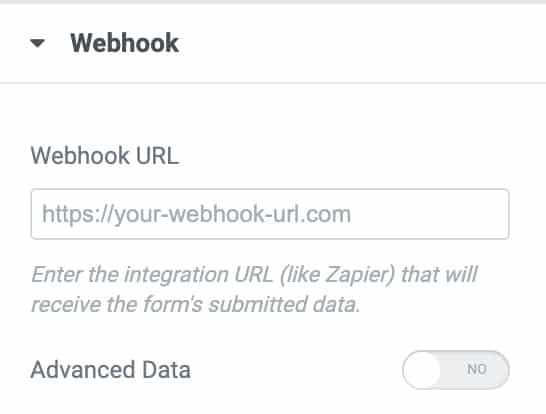
We have to find the URL of the Webhook in the specific Email Marketing service that we are using.
In my case I use Encharge as an Email Marketing service.
En charge It's very easy, I create a new flow, I add a form:
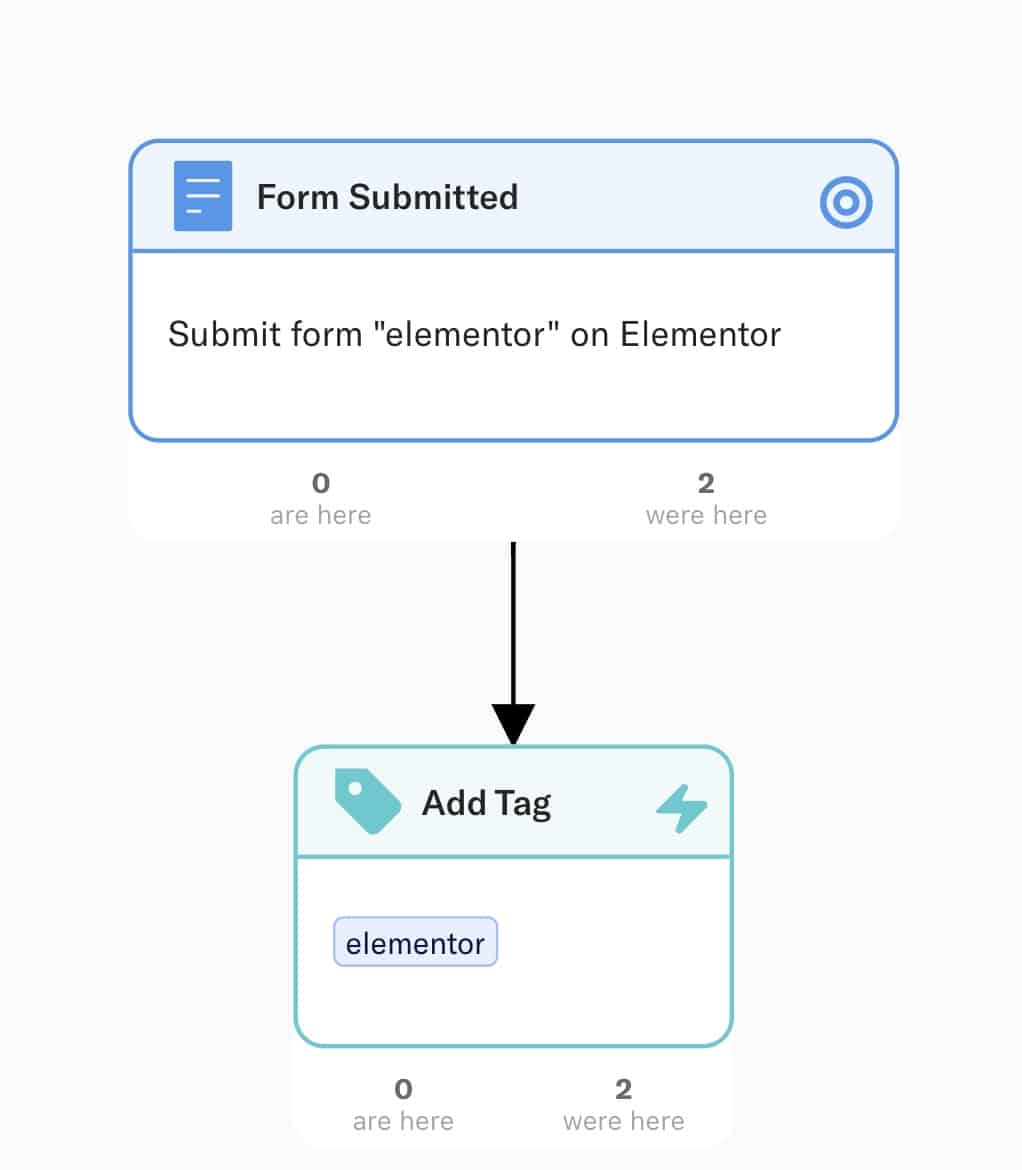
Clicking on the first element, the form, displays the options and gives us the Webhook url:
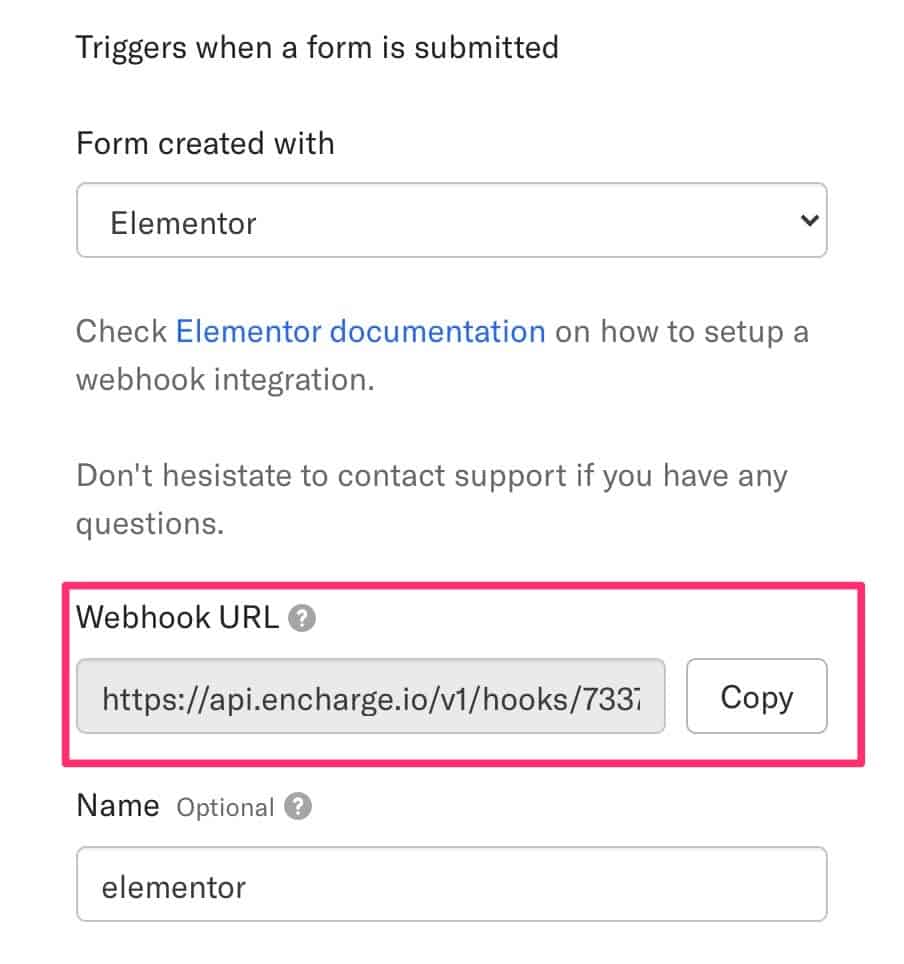
This is the url to add in Elementor to send enrollees to Encharge.
Important
Each Email marketing tool will have the Webhook url in a different place, you should review the help.
I hope it has been helpful to you.
All the best