In this tutorial we are going to see 3 different methods to have different headers or images in the header of each page.
For example, we can have an image in the header of the home page and not in the rest of the web or a different one for each page.
We will also see how to do it with 3 different methods, so you can choose the one that suits you best.
Video tutorial
Subscribe to my channel:
1 – Add different headers with Blox Lite
blox lite It is free and it is used to easily add information in very specific places of your Genesis template.
This plugin can be used much more than adding a featured image in a header, if you like it I will do more tutorials on this plugin.
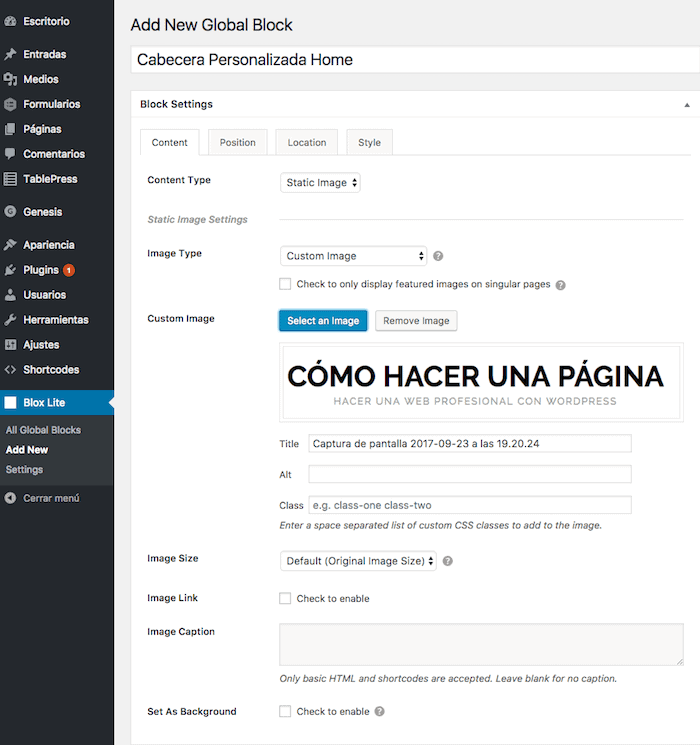
Once installed and activated, the new menu will appear on the side «Blox Lite» –> Add New

We give it the name we want, in my case "Custom Home Header"
En type of content I check the “Static Image” option
In type of image I say «Custom image» and add the image I want in the header.
We have more options to customize the image, we choose the ones that interest us the most.
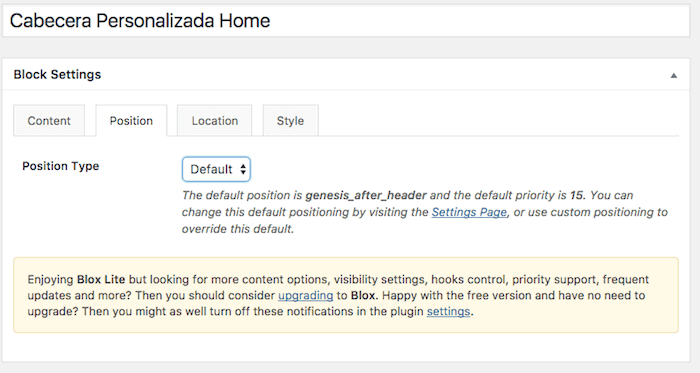
Now we have to tell it where we want this image to appear, for this we go to the Position tab in it I can choose the exact place where I want the image to appear. By default it appears in the position genesis_after_header but I can put it wherever I want.

If we do nothing else, the image will appear in the header of all the pages of our website.
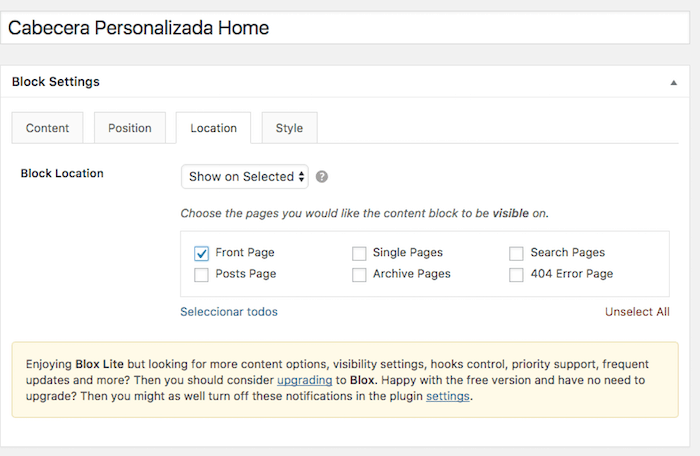
To choose where we want the image to appear, we go to the location tab and we select on which page we want the image added in this block to appear. For example the main page:

2 – Add different headers by modifying the functions.php file
function imagen_especifica_header(){
    if(is_home())
    echo '<div class="home-header"><img src="http://ejemplo.com/imagen.png" alt="home header image" /></div>';
    elseif(is_page() )
        echo '<div class="page-header"><img src="ttp://ejemplo.com/imagen2.png" alt="page header image" /></div>';
}
add_action('genesis_header', 'imagen_especifica_header');
In the above code we have to change the address of the image to yours.
What we are saying is that if it is the home page, the desired image appears and if it is not the home page, another image appears.
3 – Add different headers by modifying the styles of our template
This time we are going to modify the style.css file and we are going to add the following code:
.home .site-header {
 height: 262px;
 background: url("images/big.png") no-repeat scroll 0 0 transparent;
 }

 .site-header {
 max-width: 980px;
 margin: 0 auto;
 width: 100%;
 height: 149px;
 background: url("images/small.png") no-repeat scroll 0 0 transparent;
 }
The folder where the images are added is the images folder inside our template.
With the previous code we are telling the web that we want a background image on the main page and another on the rest of the pages.
The width, height and margins are just an example, you have to modify them according to the style of your website.
I hope that any of the 3 methods you like and serve your purposes 😉
Dear Oscar, and I'm falling short with dear, dearest Oscar, you save my life every time I need to solve something. I was all day looking for this and I always fall on your website.
My eternal thanks to you.
Thank you thank you thank you!!!!
Your student
noah christ
What a joy to always see a comment from you!
I am infinitely grateful for your words.
You do not know how happy I am to know that my work is useful to you!!!
A strong hug 😉