There are not many Genesis templates for eCommerce, so every time a new one comes out I am very happy. StudioPress has just released the Theme Outfitter Pro and here you have a tutorial to learn how to leave your website as it appears in the demo of this template.
This template, together with the Genesis Framework, is priced at $129,95.
In the following image you can see the final result that we are going to obtain:
Before starting with this tutorial you have to have WordPress installed. In the premium area you have a WordPress Course
Here is the video tutorial:
Subscribe to my channel:
Installation Template
As you probably already know, being a daughter template of Genesis, before installing the Outfitter template you have to have the Genesis framework installed. and once installed and you can install and activate the Outfitter theme.
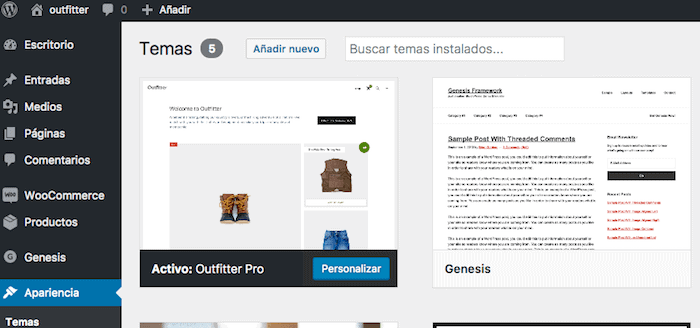
Once the template is activated we have to install the following plugins:
Necessary Plugins
- WooCommerce: If we are going to create a store in WordPress there is no better option
- Genesis Connect for WooCommerce: The plugin adds the styles to the store components. A must in Genesis templates
Import demo content
Configuring the template without content is very complicated since we will not have anything to place on the page.
This template comes prepared with demo content. The demo content can be found inside the compressed file of the template. Specifically in the XML folder you will find a file with the name outfitter-pro.xml
To import the content you have to go to the WordPress Dashboard –> Import –> WordPress and run the importer:
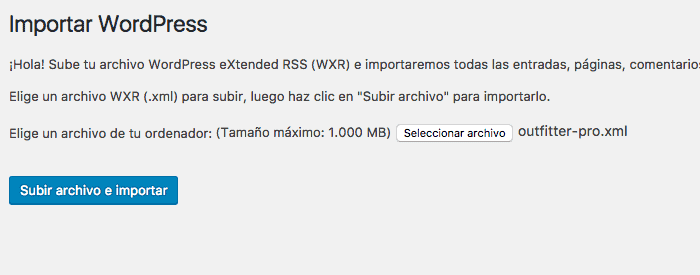
It may take a few minutes. When finished you have posts, products and demo pages to configure the template.
Menu Settings
In the menu we have to configure the following elements:

- Header Menu: They are the items to the right of the shopping cart
- Shopping cart
- Search
- Off-screen Menu
Header Menu
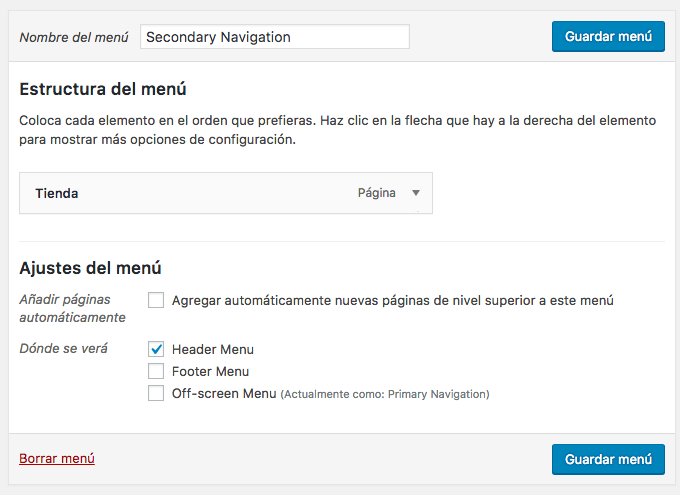
In the case of the demo it is the "Store" menu
You can add as many elements as you want, just go to Appearance –> Menus and add a menu.
In the menu you have created you have to check "header menu"
Shopping cart
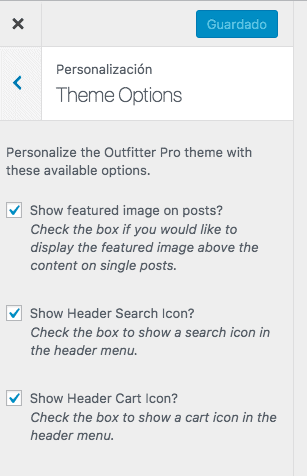
You can hide or show it from the web header. To do this you have to go to Appearance –> Customize –> Theme options and check or uncheck the “Show header cart icon” option.
Search
In the previous options we have to activate or deactivate "Show Header Search Icon"
Off-screen Menu
It is the menu that appears in the three dots. Clicking on them brings up the menu like this:
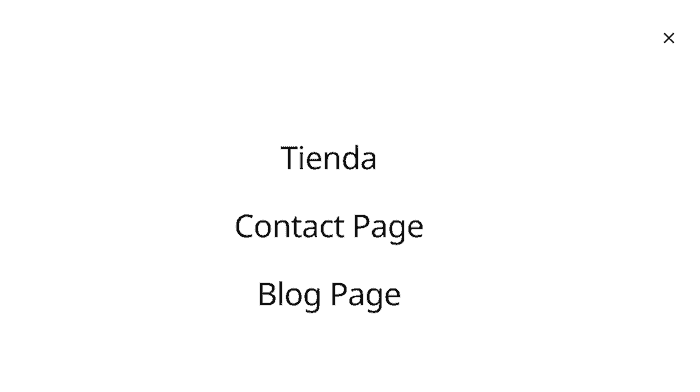
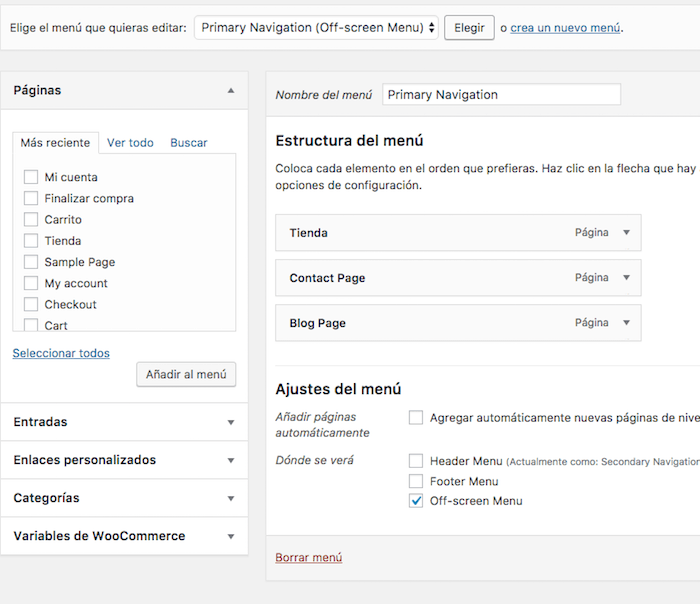
To configure the menu we go to Appearance –> Menus –> create a new menu and mark the “Off-screen Menu” option
Main Page – Home
The main page is configured through the widgets. Specifically the areas:
- Front Page 1
- Front Page 2
- Front Page 3
Front Page 1
On front page 1 we see the following content:

To configure it we create an html type widget and add the following content if we want the result of the demo:
Degree: Welcome to Outfitters
Content:
<div class="two-thirds first">
<p>Whether it’s fishing, rafting our country’s rivers, or the hiking adventure of a lifetime - we match with you with the clothes and equipment to make your trip comfortable and memorable.</p>
</div>
<div class="one-third">
<div class="welcome-button">
<a class="button" href="#front-page-2">Shop The Collection</a>
</div>
</div>
Front Page 2
Here come the main page products. If we do not add anything to this area they appear by default.
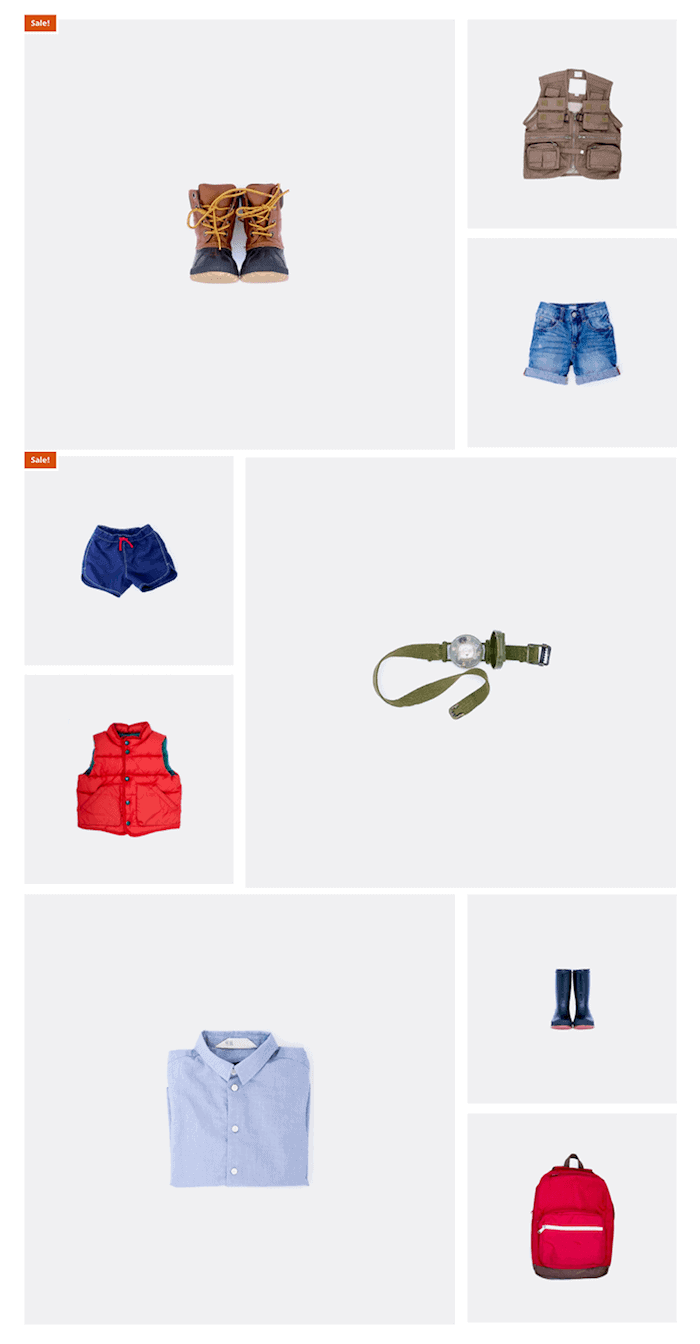
If we want to change the number of featured products we can use the following shortcode:
[featured_products per_page=”9″]
Front Page 3
The blog articles go in this area.
To get the following result:
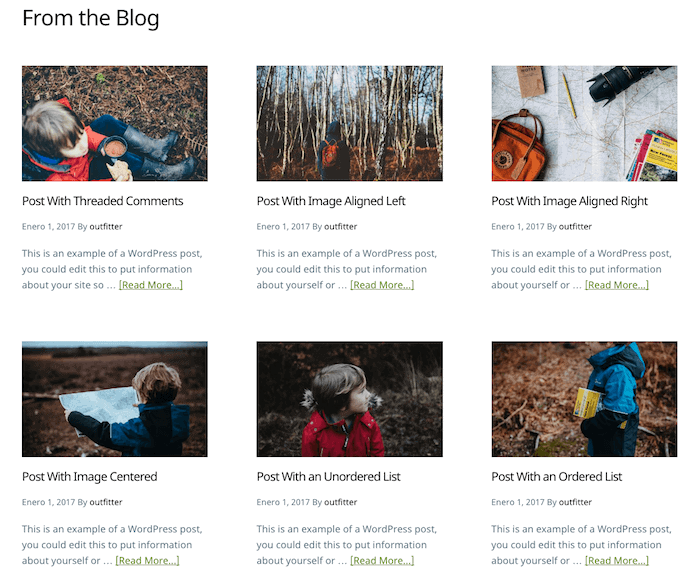
We have to add to Front Page 3 the widget Genesis Featured Posts with the following configuration:
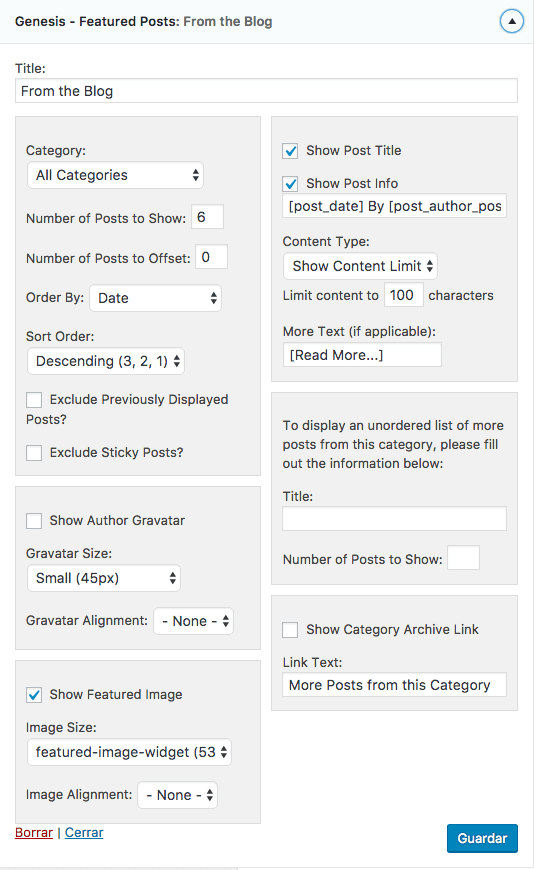
blog page
For the blog page to have the featured image full width we have to go to the WordPress dashboard –> Genesis –> Theme Settings –> Content Archives and check “Featured image” and select “Featured-image” and centered.
If you have completed the tutorial up to here, congratulations, you will have your template as in the demo 😉
Hope it has fit
regards
Oscar

1 comment on “Genesis Outfitter Pro Template Tutorial for WooCommerce”